1Quick Start Guides
Welcome to the Quick Start Guide.
Follow the steps in this guide to quickly set up your device and get started.


User Manual
RGB20X-NAI-GY Educational Tracking Camera
981-0011-21-0
RGBlink
www.rgblink.com
November 2026
Welcome to the Quick Start Guide.
Follow the steps in this guide to quickly set up your device and get started.
This chapter explains how to configure your PTZ camera using Camera CMS software and set up VISCA communication.
🔔 Current cameraCMS Version:1.0.9.33
RGB20X-NAI-GY does not have a web interface.
Use the dedicated CameraCMS software for configuration.
Download CameraCMS using either of the following methods.
📢 Important: This software is exclusively for the RGB20X-NAI-GY Educational Tracking Camera (order codes: 981-0011-21-0).
It supports RGB20X-NAI-GY only.
📢 Applicable Model: RGB20X-NAI-GY Educational Tracking Camera (order codes: 981-0011-21-0).
After downloading the software, double-click the application icon to launch CameraCMS.
In the main interface, open Device Management page.
Click Start Search and wait for the software to detect the camera.
The detected device will appear in the search results.
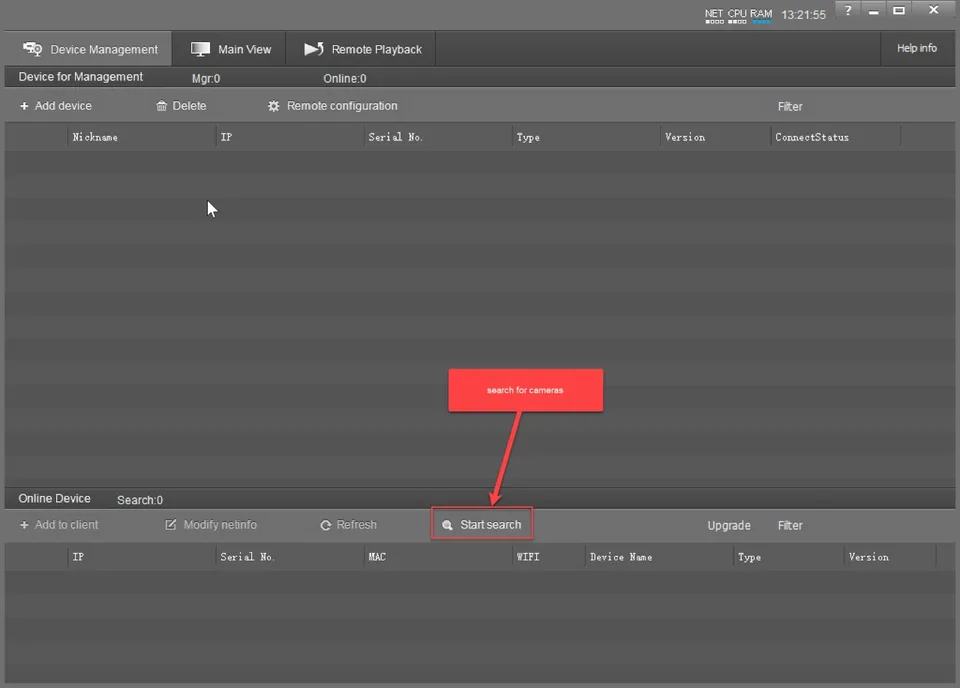
Select the detected camera and click Modify netinfo to reconfigure its IP settings if necessary.
Save the changes and reboot the camera if the IP settings are modified.
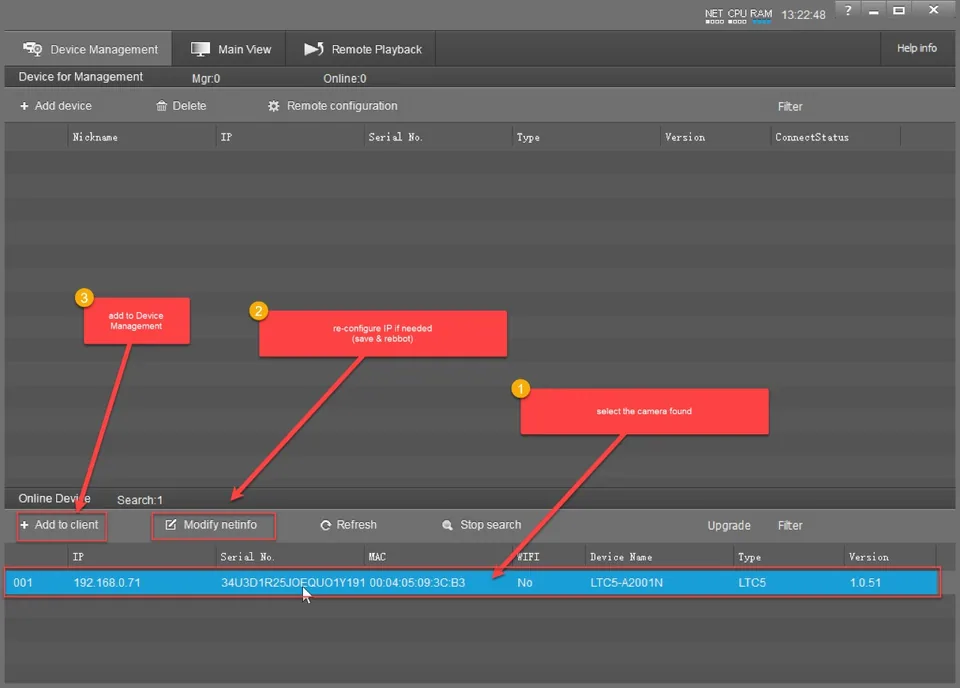
Click Add to client to add the camera to Device Management.
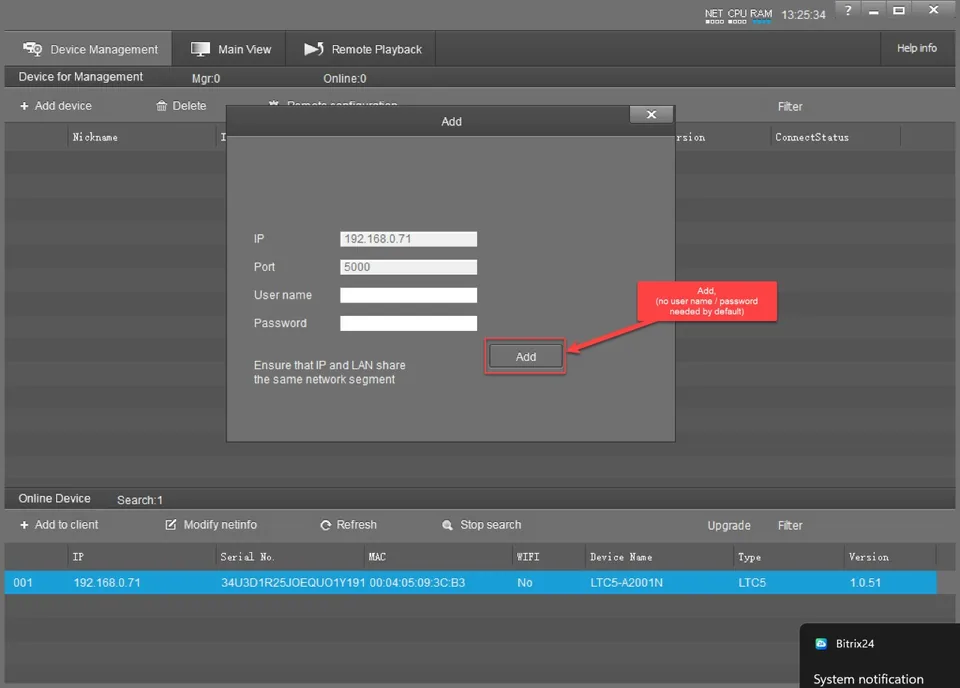
In the Add pop-up window, ensure that the camera's IP address and the LAN configuration are on the same network segment.
Click Add to confirm. The camera will then appear in the Device Management list.
📢 Notes: No username or password is required by default.
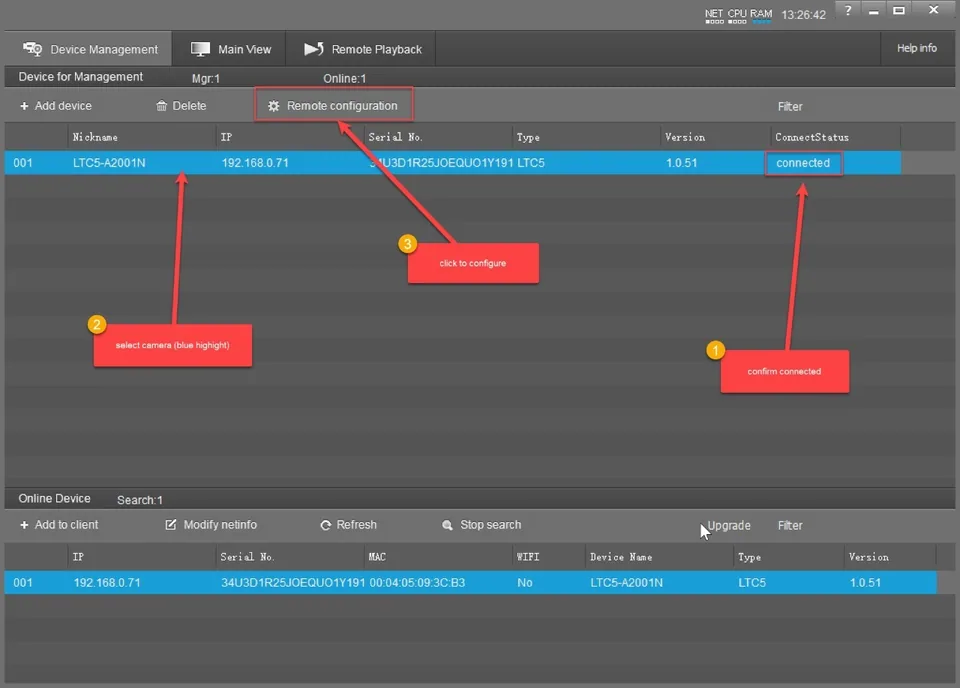
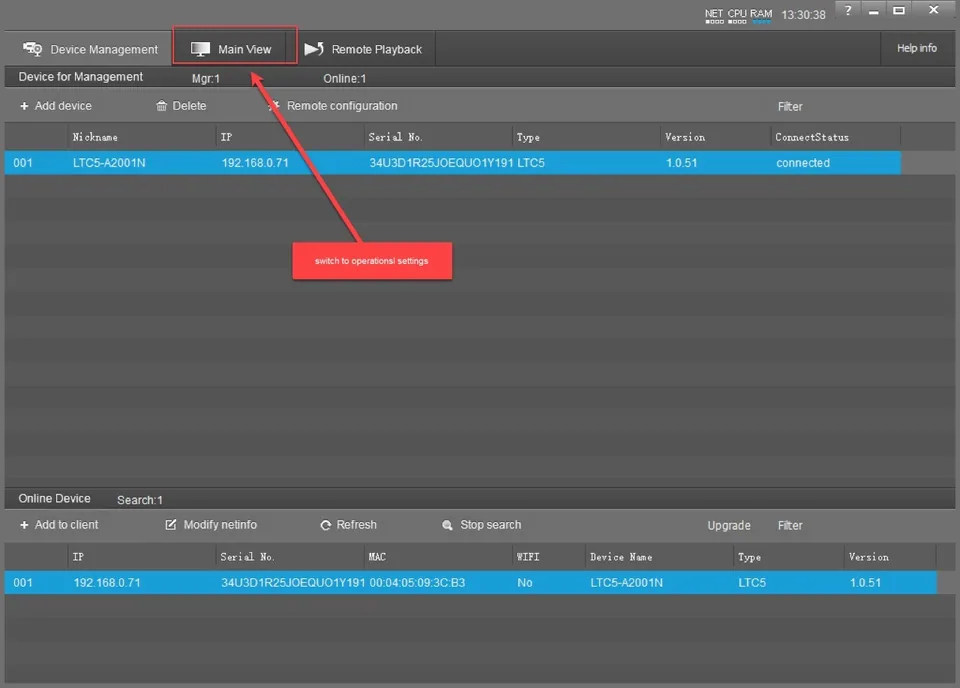
In the Device Management list, select the camera and confirm that it is highlighted in blue and its status is Connected.
Click Remote configuration to proceed to the next step.
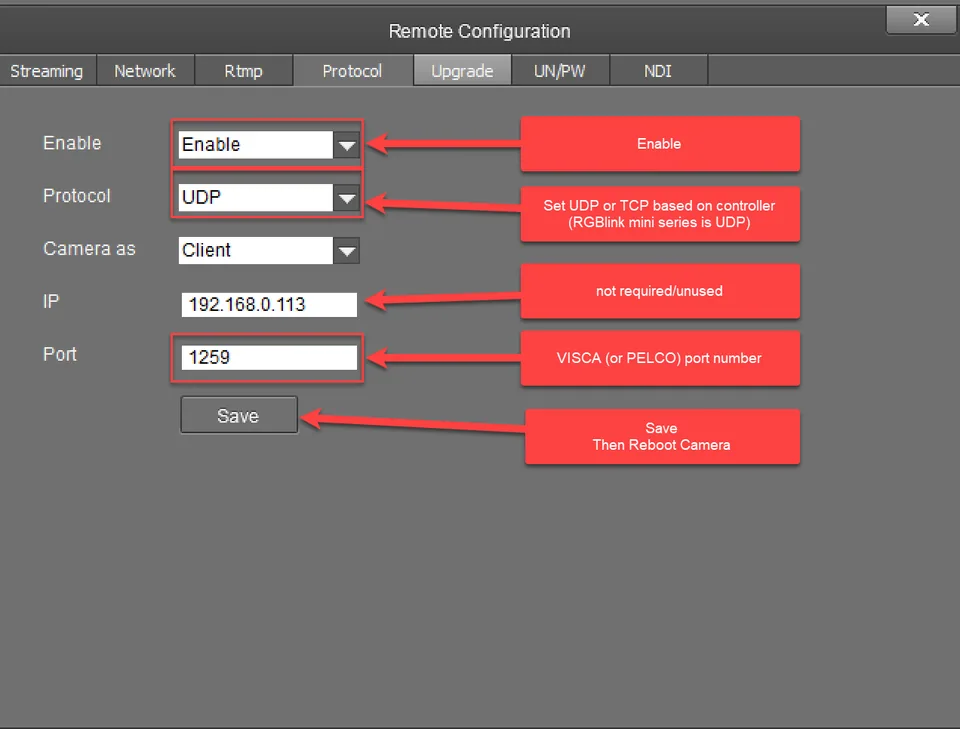
In the Remote configuration window, open the Protocol tab and configure the following settings:
Enable: Select Enable to activate the protocol.
Protocol: Select UDP or TCP according to the camera controller's requirements.
📢 Notes: Use UDP with RGBlink mini-series devices.
Camera as: Leave the setting at Client by default.
Ip: No configuration is required for this field.
Port: Enter the port number configured for VISCA or PELCO, as applicable.
The default VISCA port is 1259.
📢  Notes: Do not use the following ports, as they are reserved by the camera's internal services:
5000, 5002, 554, 80, 88, 8080, and 9005.
Click Main View to access the camera preview and operational controls.
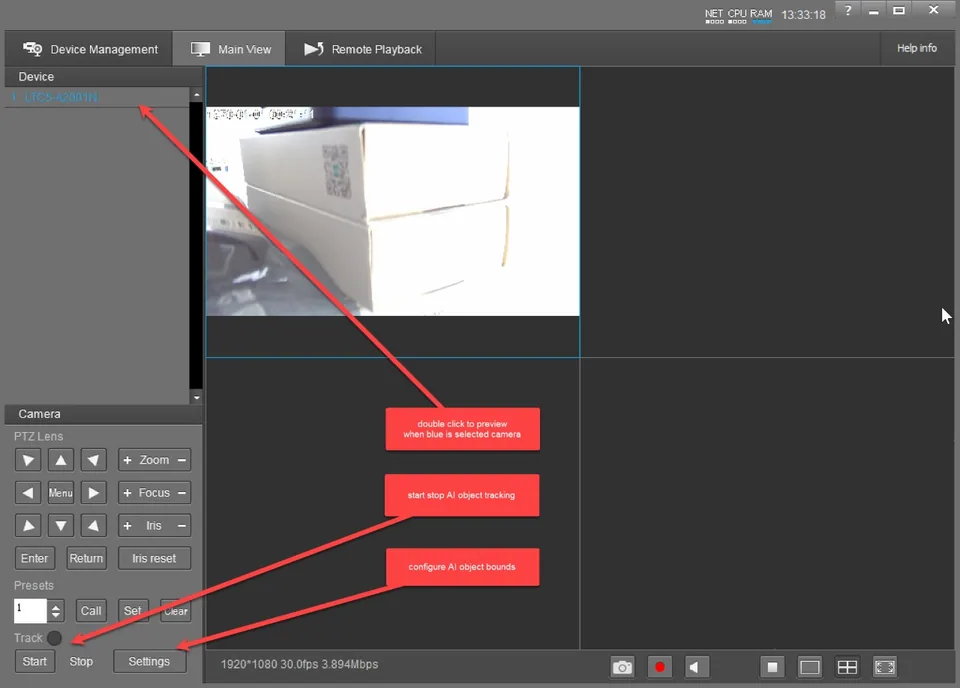
This camera does not support ping requests to its IP address. This is expected behavior and does not necessarily indicate a network or device failure.
The camera has no web interface. Use the dedicated CameraCMS software for device configuration and management.
CameraCMS communicates with the camera via port 5000 by default.
1259. Do not use ports 5000, 5002, 554, 80, 88, 8080, or 9005, as they are reserved by the camera's internal services.Xiamen RGBlink Science & Technology Co., Ltd. designs and manufactures professional video processing, switching, streaming and LED display control products for live events, broadcast, education and fixed installations.
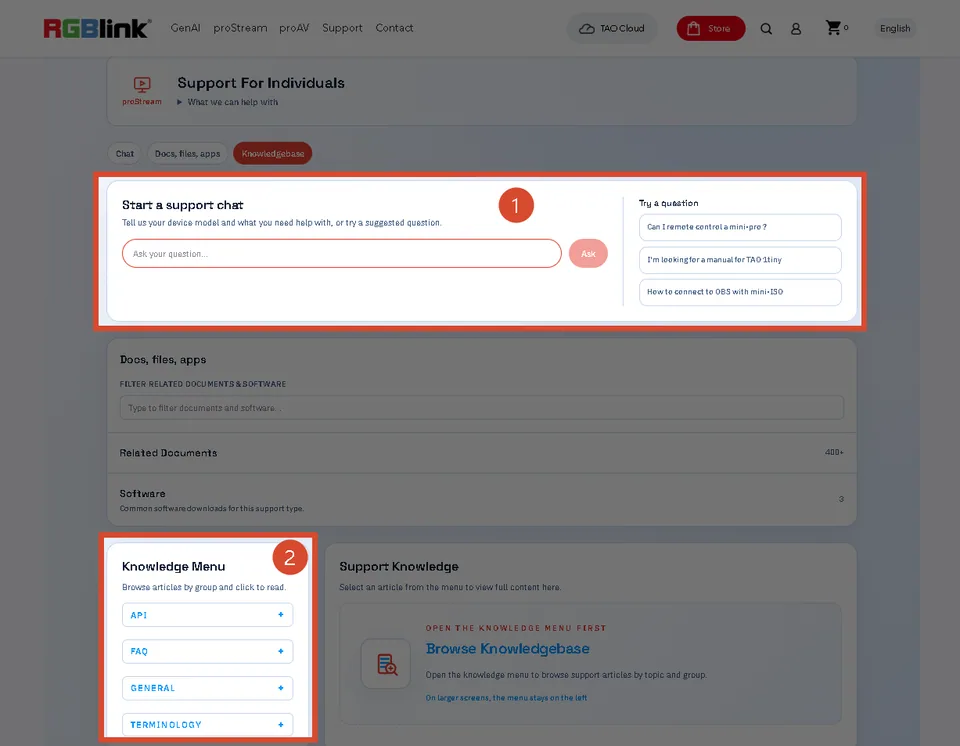
Choose one of the following support options:
www.rgblink.com
© Copyright Xiamen RGBlink Science & Technology Co Ltd