Export PDF

RGBlink
TAO pro 2

User Manual

TAO pro 2

TAO-1pro-2

410-5513-11-0

RGBlink

www.rgblink.com

November 2026

1TAO 1pro 2-User Manual

Thank you for choosing RGBlink TAO 1pro 2.

This manual provides information on the device features, installation and operation.

Before using the device for the first time, please read this manual carefully to ensure safe and proper use of the product.

1.1This Specification

Document image
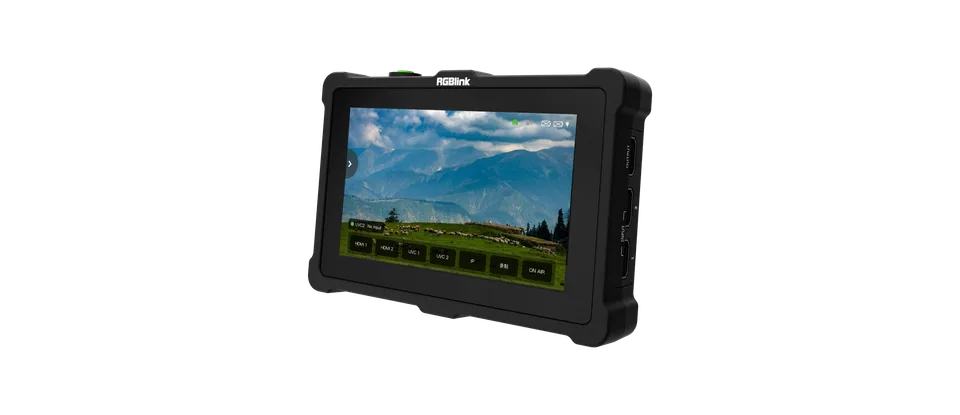
TAO 1pro 2
Key Features + 5.5 inch HD touch screen for operation + Network HD streaming + Seamless switcher + Asynchronous rotation of main screen and HDMI output + 2UVC inputs, 2HDMI 1.3 input and 1* HDMI 2.0 output + HDCP supported + Bluetooth 5.0 + NDI encoder + NDI decoder + Sound column + Recording via USB 2.0 port,mobile hard disk stores up to 2T + Multistream up to 4 Live Streaming platform Simultaneously + Compatible with SONY NF970 and Panasonic AG-VBR59MC standard battery socket (no battery install for standard version)
Application
Dimension

Connectors

ItemDescription
InputHDMI 1.32×HDMI-A
USB 3.02×USB TypeA
OutputHDMI 2.01×HDMI-A
RecordUSB 2.01×USB TypeA
AudioIn1×3.5mm Audio Jack
Out1×3.5mm Audio Jack
Communication/StreamLAN1×RJ45
Power1×USB-C

Performance

ItemDescription
Input ResolutionsHDMI
SMPTE720p@50/60, 1080p@23/24/60
VESA1024×768@60, 1280×720@60, 1280×800@60, 1280×1024@60, 1360×768@60,
1600×1200@60, 1680×1050@60, 1920×1080@60
Output ResolutionsHDMI
SMPTE1080p@60, 2160p@60
VESA1920×1080@60, 3840×2160@60
Supported StandardHDMI1.3(Input), 2.0(Output)
USB3.0

Screen Feature

ItemDescription
Screen Dimension5.5'' TFT
Resolution1920×1080 pixels
Dot Pitch0.063(H)×0.021(W)(mm)
Aspect Ratio16:9
Brightness450cd/m²
Contrast1000:1
BacklightLED
View Angle80°/80°(L/R)80°/80°(U/D)

Power

ItemDescription
Input Voltage9V/2A
Max Power18W

Environment

ItemDescription
Temperature0℃~55℃
Humidity5%~85%

Physical

ItemDescription
WeightNet0.35kg (without battery); 882g (with battery)
Package0.77kg (1pcs); 19.6kg (20pcs)
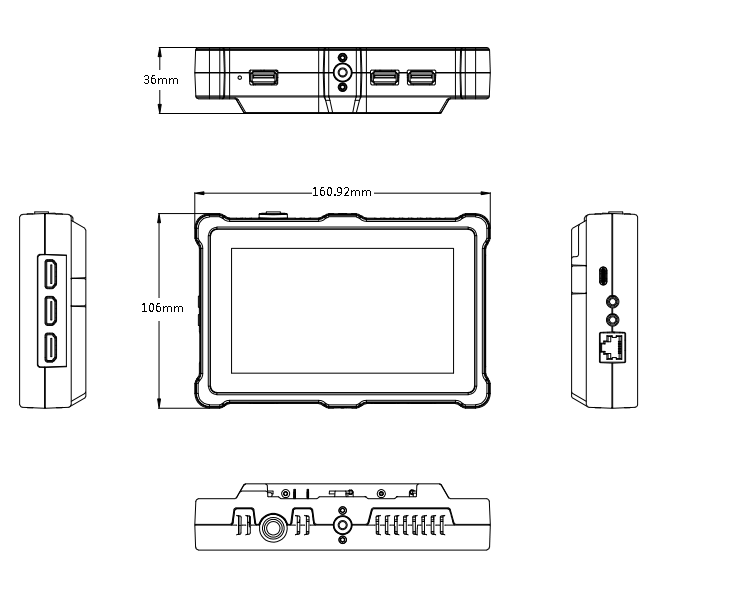
DimensionNet161mm×106mm×36mm
Package255mm×145mm×85mm (1pcs); 565mm×490mm×345mm (20pcs)

Order Codes

Order CodesItem
410-5513-11-0TAO 1pro 2

1About Your Product

Meet TAO 1pro 2

TAO 1pro 2 is a portable device that integrates video switching, encoding/decoding, and live streaming. It features a 5.5-inch HD touchscreen and provides two USB 3.0 inputs and two HDMI 1.3 inputs for seamless switching between four video sources.

TAO 1pro 2 features a Gigabit Ethernet port for network streaming and NDI encoding/decoding. It supports the UVC protocol and can connect to compatible USB 2.0 or USB 3.0 cameras and other video devices.

TAO 1pro 2 supports Web App control. Connect the computer and device to the same network, then enter the device IP address in a web browser to access the Web App. The Web App provides control over device status, signal switching, NDI encoding/decoding, network streams, and advanced settings.

TAO 1pro 2 supports up to two optional rechargeable batteries, making it suitable for portable live streaming and video production.

Key Features

  • 5.5-inch HD touchscreen for device menu operation
  • Four video inputs: two UVC and two HDMI 1.3
  • One HDMI 2.0 output
  • H.264 network encoding for live streaming
  • NDI encoding and decoding for network-based audio and video transmission
  • Simultaneous streaming to up to 2 platforms
  • USB recording with support for external hard drives up to 2 TB
  • HDCP support
  • Web App control for managing device status, signal switching, NDI encoding/decoding, network streams, and advanced settings
  • USB Type-C power input with PD support
  • Supports up to two optional batteries, compatible with Sony NP-F970 and Panasonic AG-VBR59MC batteries

1.1In the Box

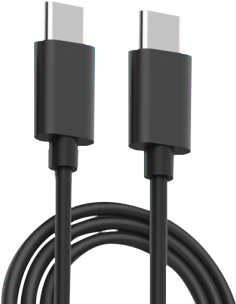
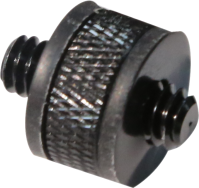
Power AdapterType-C Power CordDoublethread 1/4 Screw
📢  Notes

The color of the accessories is subject to actual conditions.

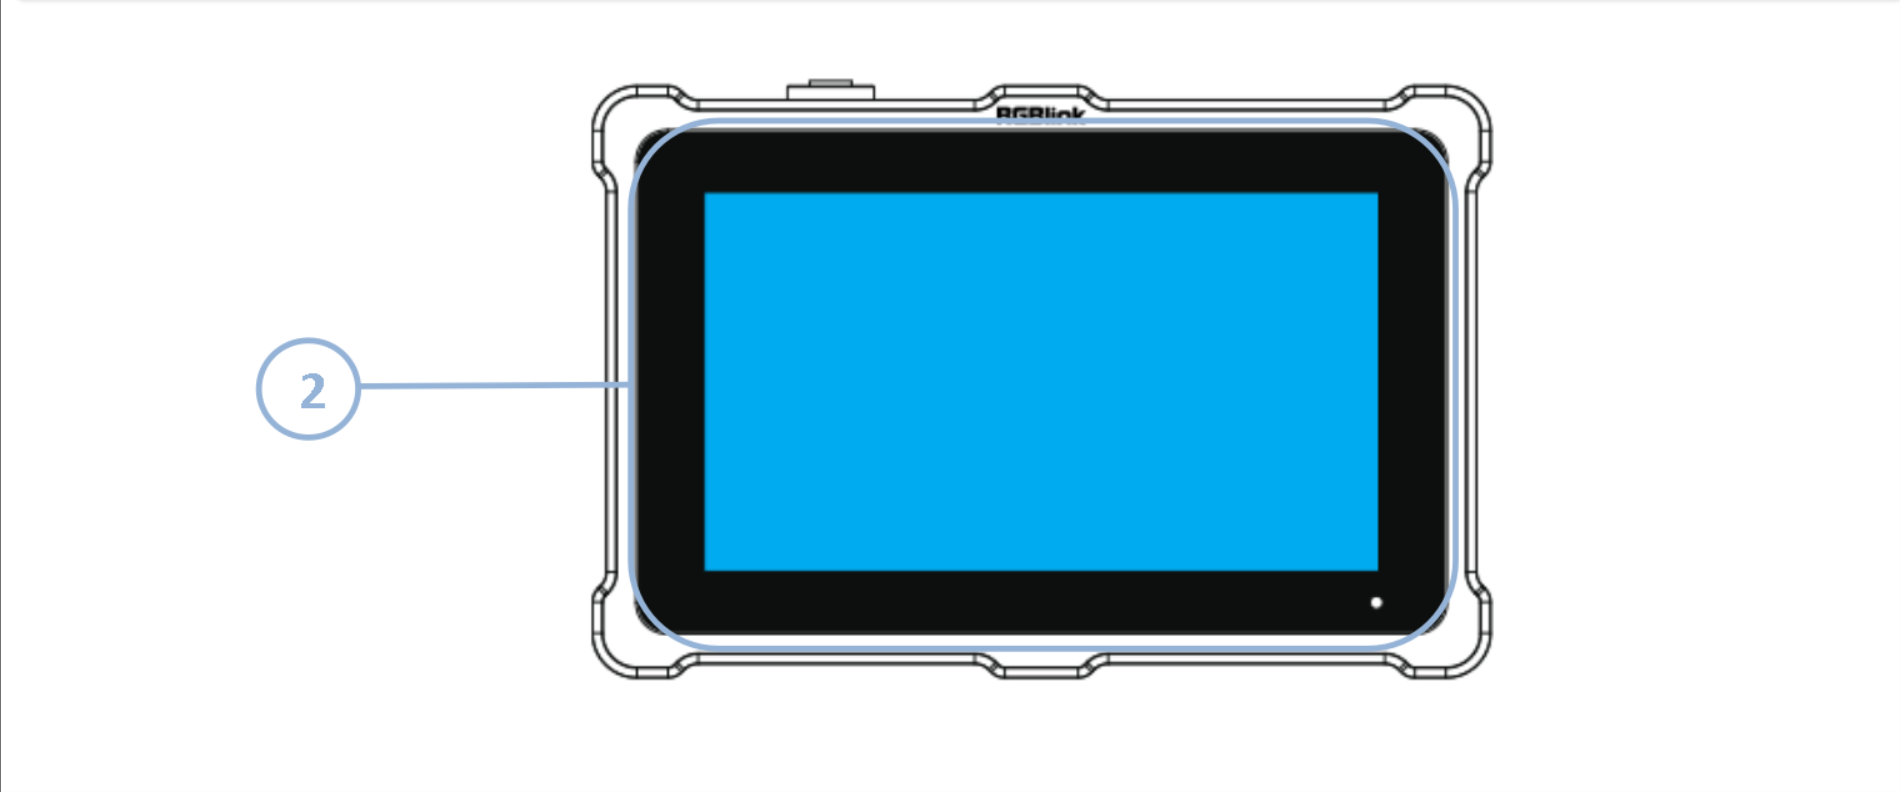
1.2Front Panel

No.ItemDescription
1Power ButtonGently press to turn on,long press 3 seconds to turn off
2Touch Screen5.5 inch touch screen for menu control

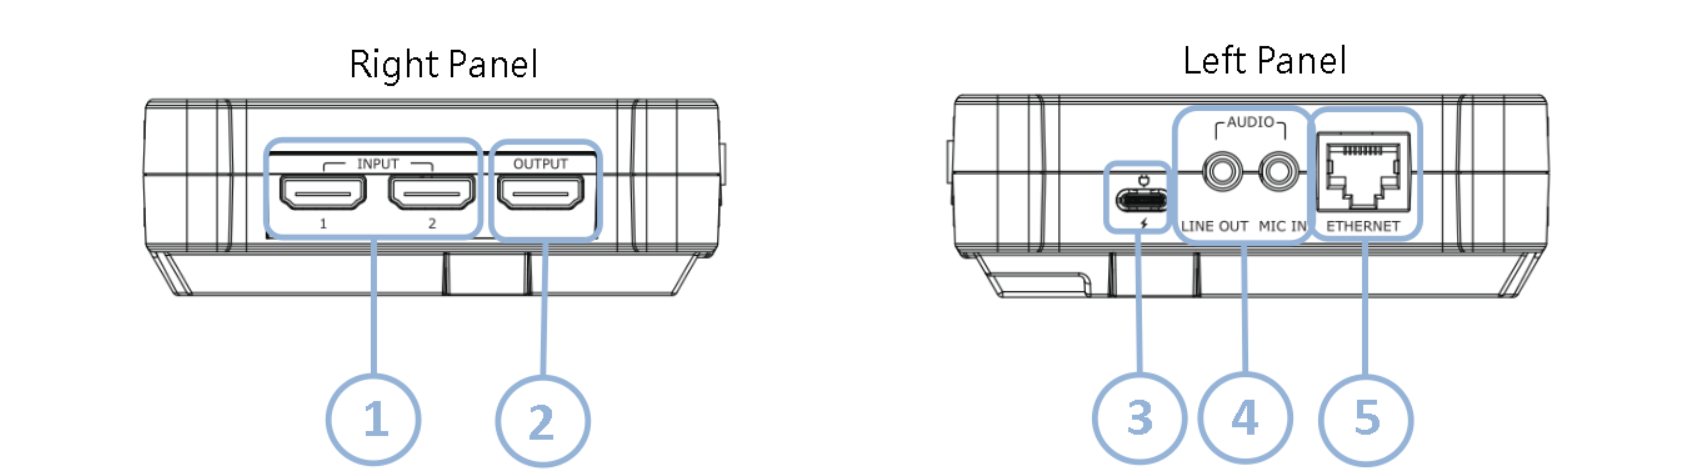
1.3Interface Panel

No.ConnectorsNumberDescription
1HDMI IN2×HDMI INConnect to camera and computer
2HDMI OUT1×HDMI OUTConnect to external monitor
3Type C1×PD Type CConnect to the power supply
4Audio1×MIC IN/LINE OUTConnect to microphone and earphone
5LAN1×RJ45Gigabit network port
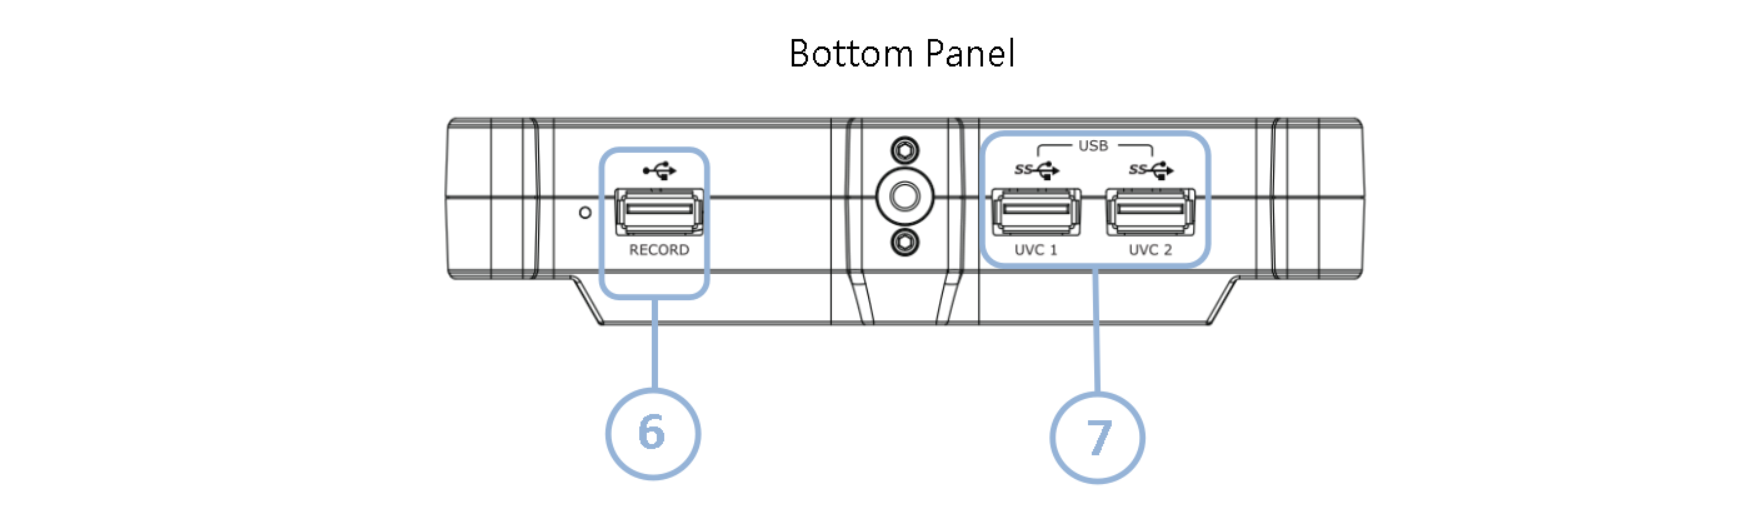
6USB 2.01×USB Type AConnect to hard disk for recording,and storage up to 2T
7USB 3.02×USB Type AConnect to USB camera for UVC capture

2Install Your Product

2.1 Connecting the Power Supply

TAO 1pro 2 can be powered by a power adapter or battery.

  1. Using a power adapter: Connect the power adapter to the power input of TAO 1pro 2.

  1. Using a battery: The battery is not included with the device. For compatible battery models, see Optional: Install the Battery.

2.2 Connecting Input Sources

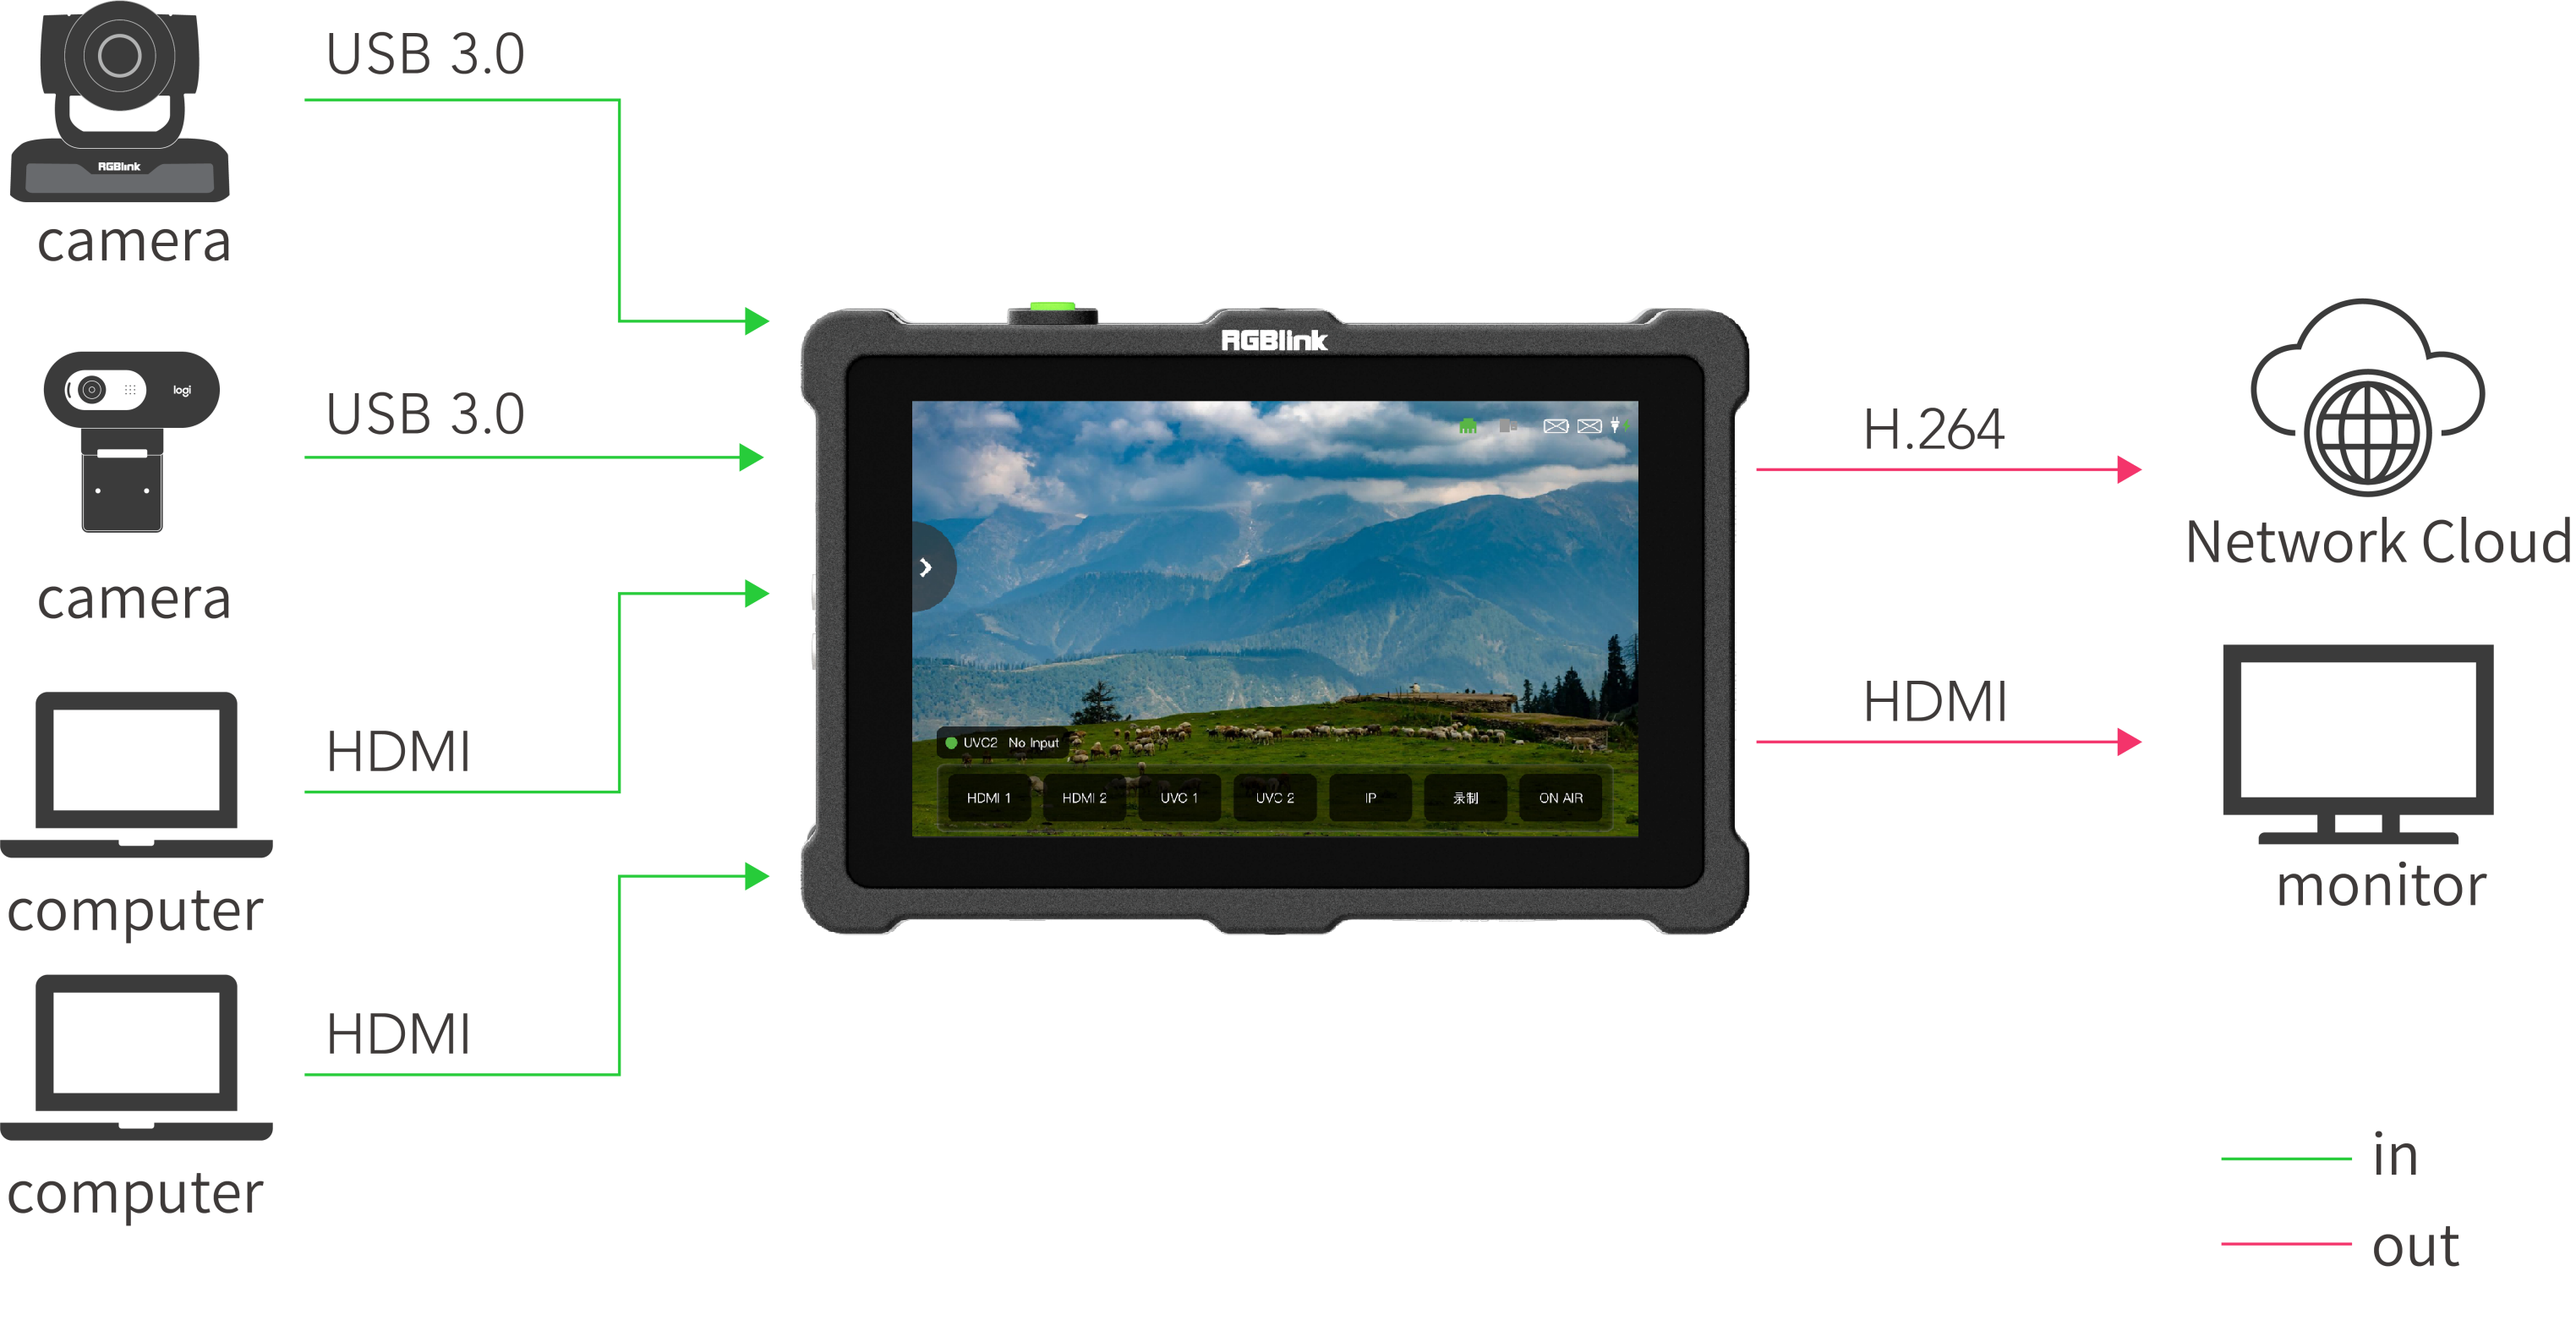
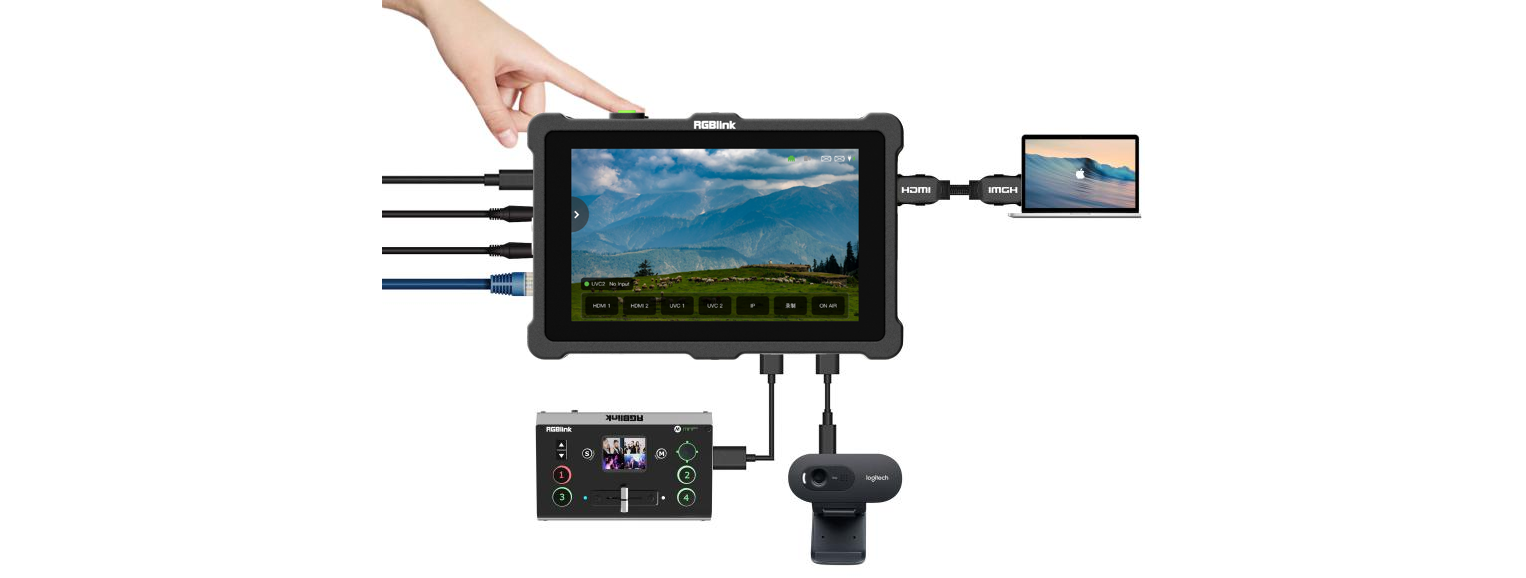
TAO 1pro 2 provides two HDMI 1.3 inputs and two USB 3.0 inputs for connecting cameras, computers, and other compatible video devices.

  • HDMI input: Connect the video source to an HDMI input on TAO 1pro 2 using an HDMI cable.
  • USB camera: Connect a UVC-compliant camera to a USB 3.0 input on TAO 1pro 2 using a USB cable.

After an input source is connected, TAO 1pro 2 detects the input signal and displays the corresponding video and resolution on the touchscreen.

📢  Notes

TAO 1pro 2 supports 1080p@50/60 input. Use standard progressive signals to ensure proper video capture.

2.3 Connecting a Display Device

TAO 1pro 2 provides one HDMI 2.0 output for connecting a display, monitor, or other HDMI display device.

  1. Connect the HDMI output of TAO 1pro 2 to the HDMI input of the display device using an HDMI cable.
  2. Turn on TAO 1pro 2 and the display device.
  3. Configure the HDMI output parameters as needed.
📢  Notes

An HDMI 1.3 HD monitor is recommended for general use.

2.4 Connecting to a Network

TAO 1pro 2 connects to a wired network through its Gigabit Ethernet port for network streaming, NDI transmission, and Web App control.

Connect the Ethernet port of TAO 1pro 2 to a router or local area network using an Ethernet cable.

For Web App control, see 3.2 Web App.

2.5 Connecting a Microphone and External Monitoring Device

TAO 1pro 2 provides one 3.5 mm microphone input and one 3.5 mm audio output for connecting a microphone and headphones or external speakers, respectively.

2.6 Turning On TAO 1pro 2

After connecting the input sources, output device, and power supply, press the power button on the top of the device. TAO 1pro 2 starts up and displays the home screen.

📢 Notes

It is recommended to connect the input sources, output device, and network before turning on the device.

1.2.1Optional: Install the Battery

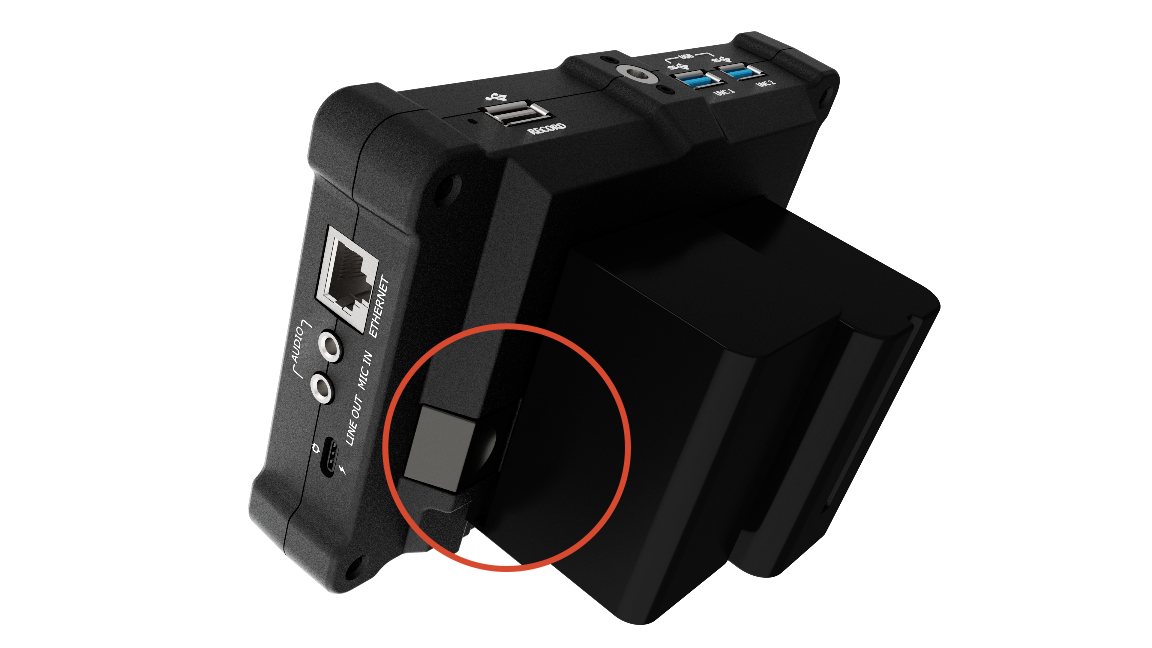
TAO 1pro 2 can be powered via the USB Type-C port or by installing up to two backup batteries. See the battery compatibility table below for supported battery models.

设备电池座卡锁示意

Installing a Battery

  1. Press the battery lock button.
  2. Slide the battery into the slots.
  3. Push the battery into the slots until it locks into place.
📢  Notes

Make sure the battery is fully locked in place before using the device.

Removing a Battery

  1. Press the battery lock button.
  2. Remove the battery from the battery slots.

Compatible Batteries

 📢  Notes

The battery compatibility table is for reference only and may not include all compatible models. Actual compatibility is subject to the batteries supported by the device.  

TAO 1pro 2 is compatible with the following battery models:

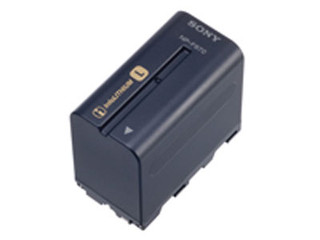
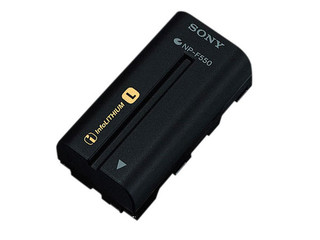
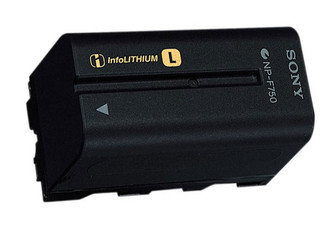
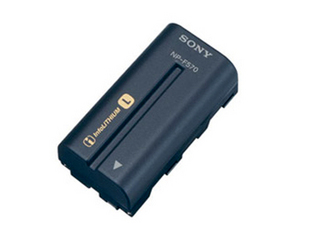
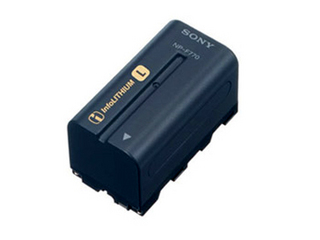
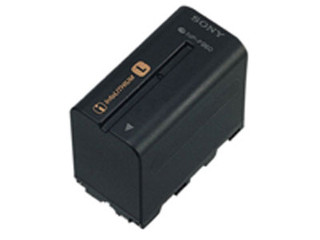
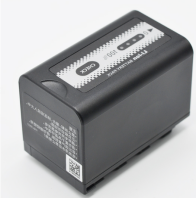
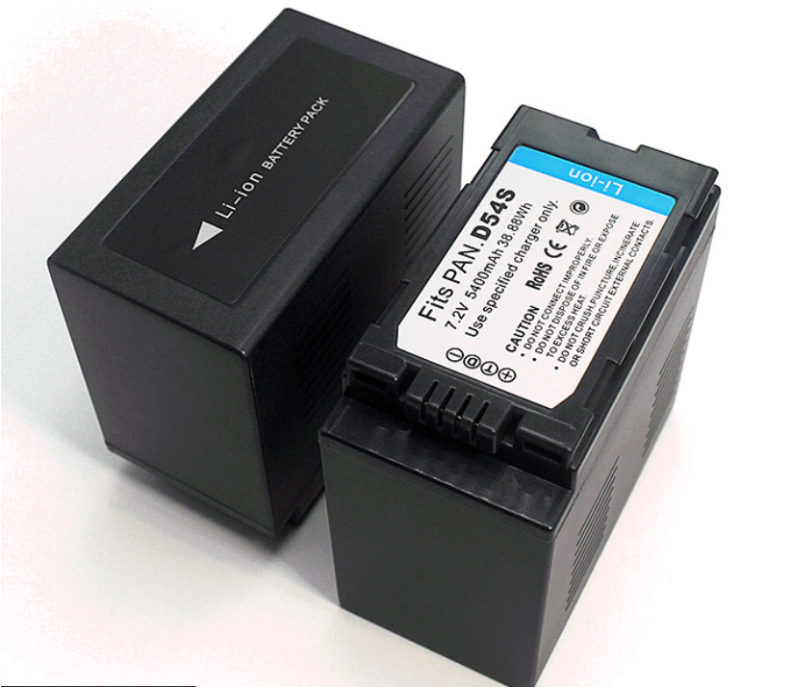
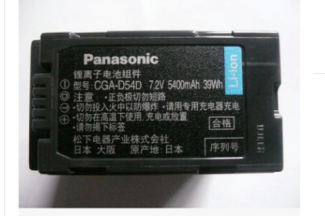
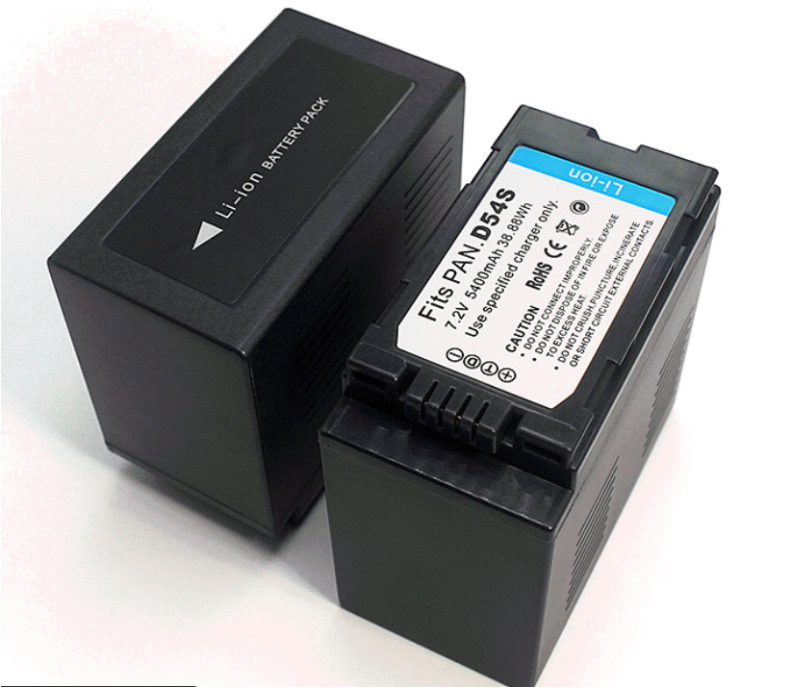
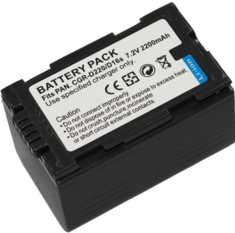
NO.ImageModelCapacityWeightBattery Life
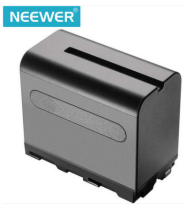
1NEEWER 9706600mAh600g3–4 hours
2Sony NP-F9706600mAh300g3–4 hours
3Sony NP-F5501500mAh95gApprox. 1 hour
4Sony NP-F7503000mAh200g1.5 hours
5Sony NP-F5702200mAhApprox. 100gApprox. 1 hour
6Sony NP-F7704400mAhApprox. 200g2–3 hours
7Sony NP-F9605400mAh300g2–3 hours
8Panasonic AG-VBR59MC5900mAh300gApprox. 3 hours
9Panasonic D54S5400mAh300g2–3 hours
10Panasonic CGA-D54D5400mAh300g2–3 hours
11Panasonic CGA-D54H5400mAh300g2–3 hours
12Panasonic CGR-D28S4200mAh300gApprox. 2 hours
13Panasonic CGR-D16S2200mAh300gApprox. 1 hour
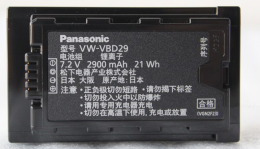
14Panasonic VBD292900mAh100g1–2 hours
15Panasonic VBD9810400mAh100gApprox. 5 hours

3Use Your Product

Once installation and setup are complete, refer to this chapter for operating instructions.

The interfaces, images, and illustrations in this chapter are for reference only. Actual displays may vary by version. Please refer to the actual interface on your device.

3.1Touchscreen

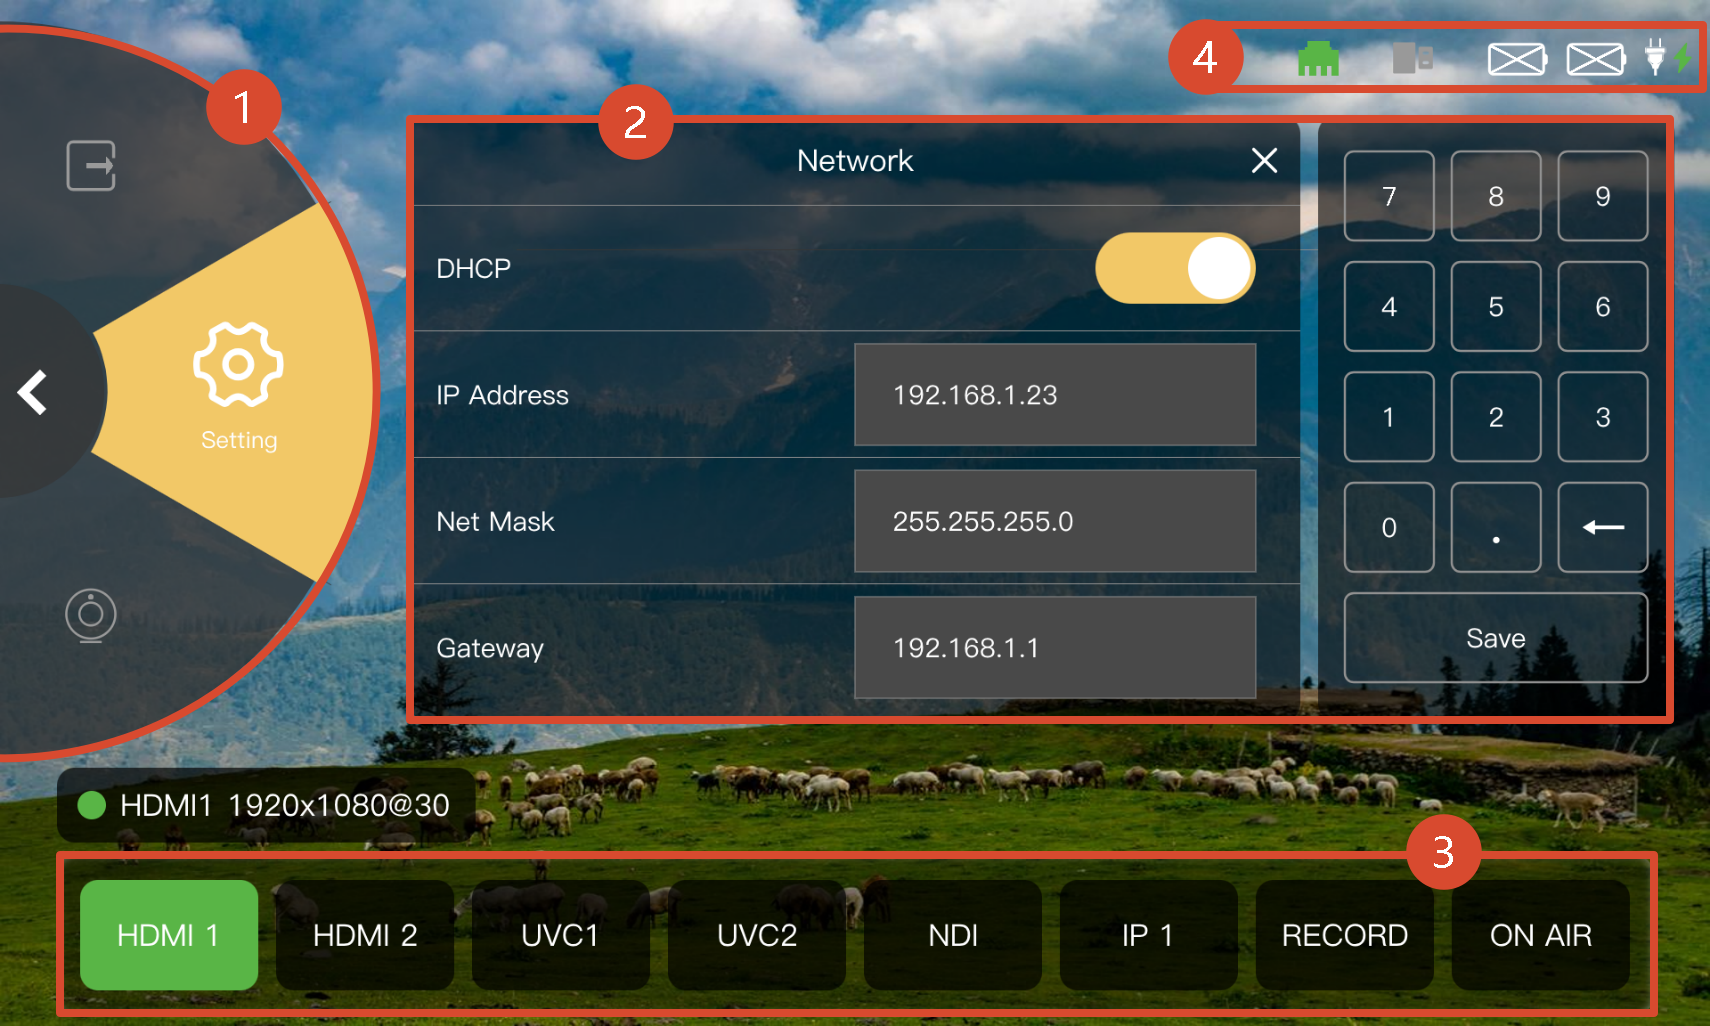
No.AreaOperation
①Navigation AreaIncludes four main functions: Input, Output, UVC Control, and Settings. Rotate the scroll wheel clockwise or counterclockwise to select a function.
②Operation AreaTap the screen to operate the corresponding function page.
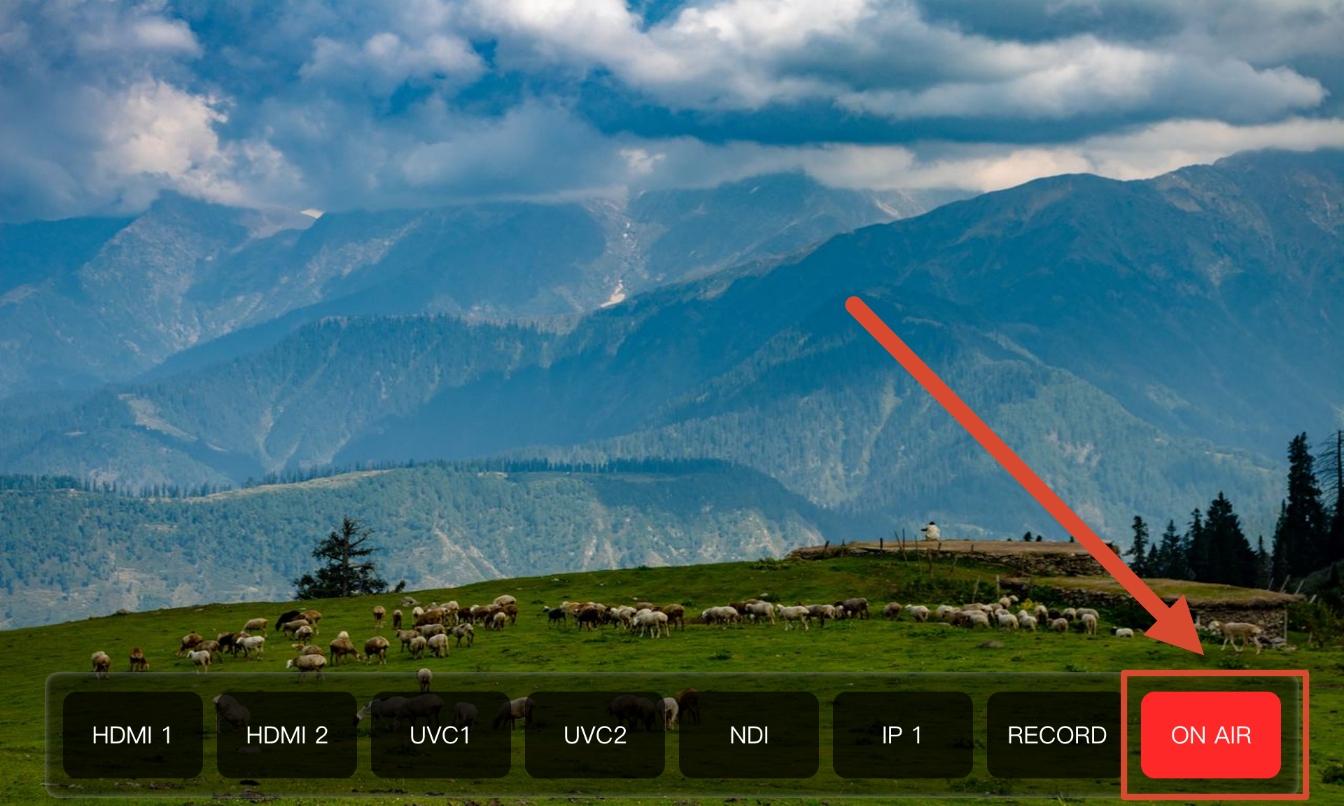
③Selection AreaIncludes: + Input Sources: Select an input source to display its settings in the Operation Area. + RECORD: Available only when an external storage device is connected. + ON AIR: Starts or stops streaming.
④Status AreaDisplays device status, including network connection, power, and USB connection status.

3.1.1Input

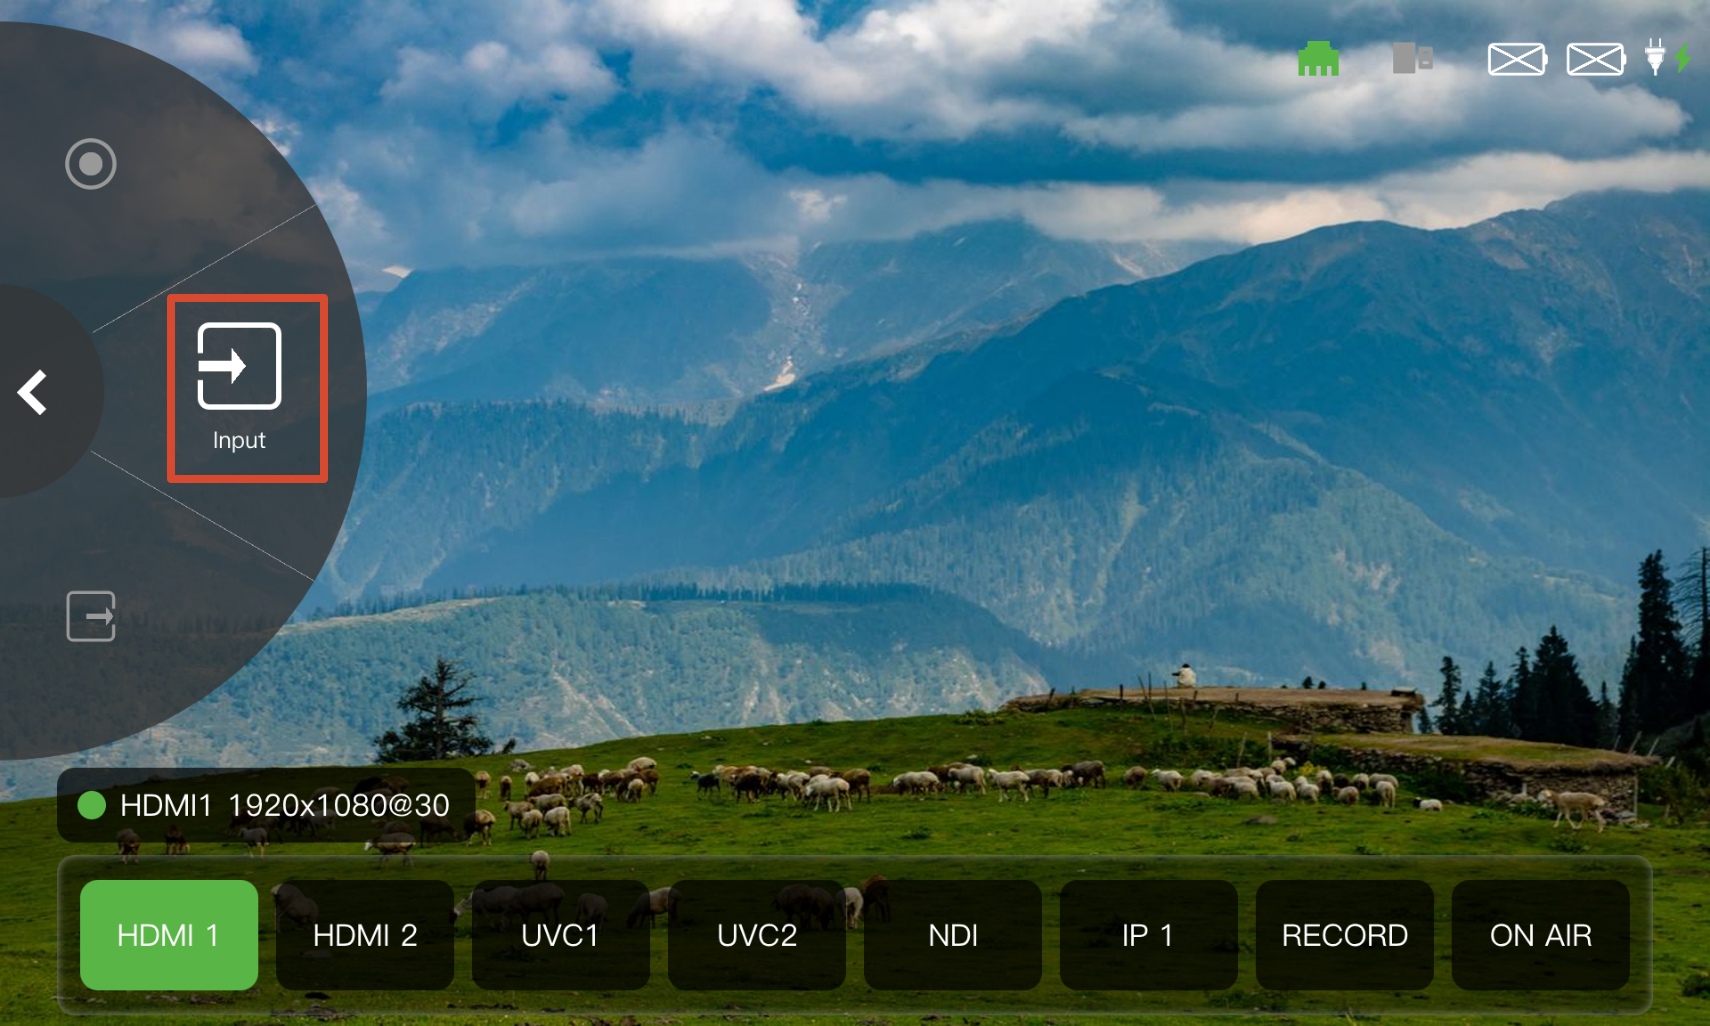
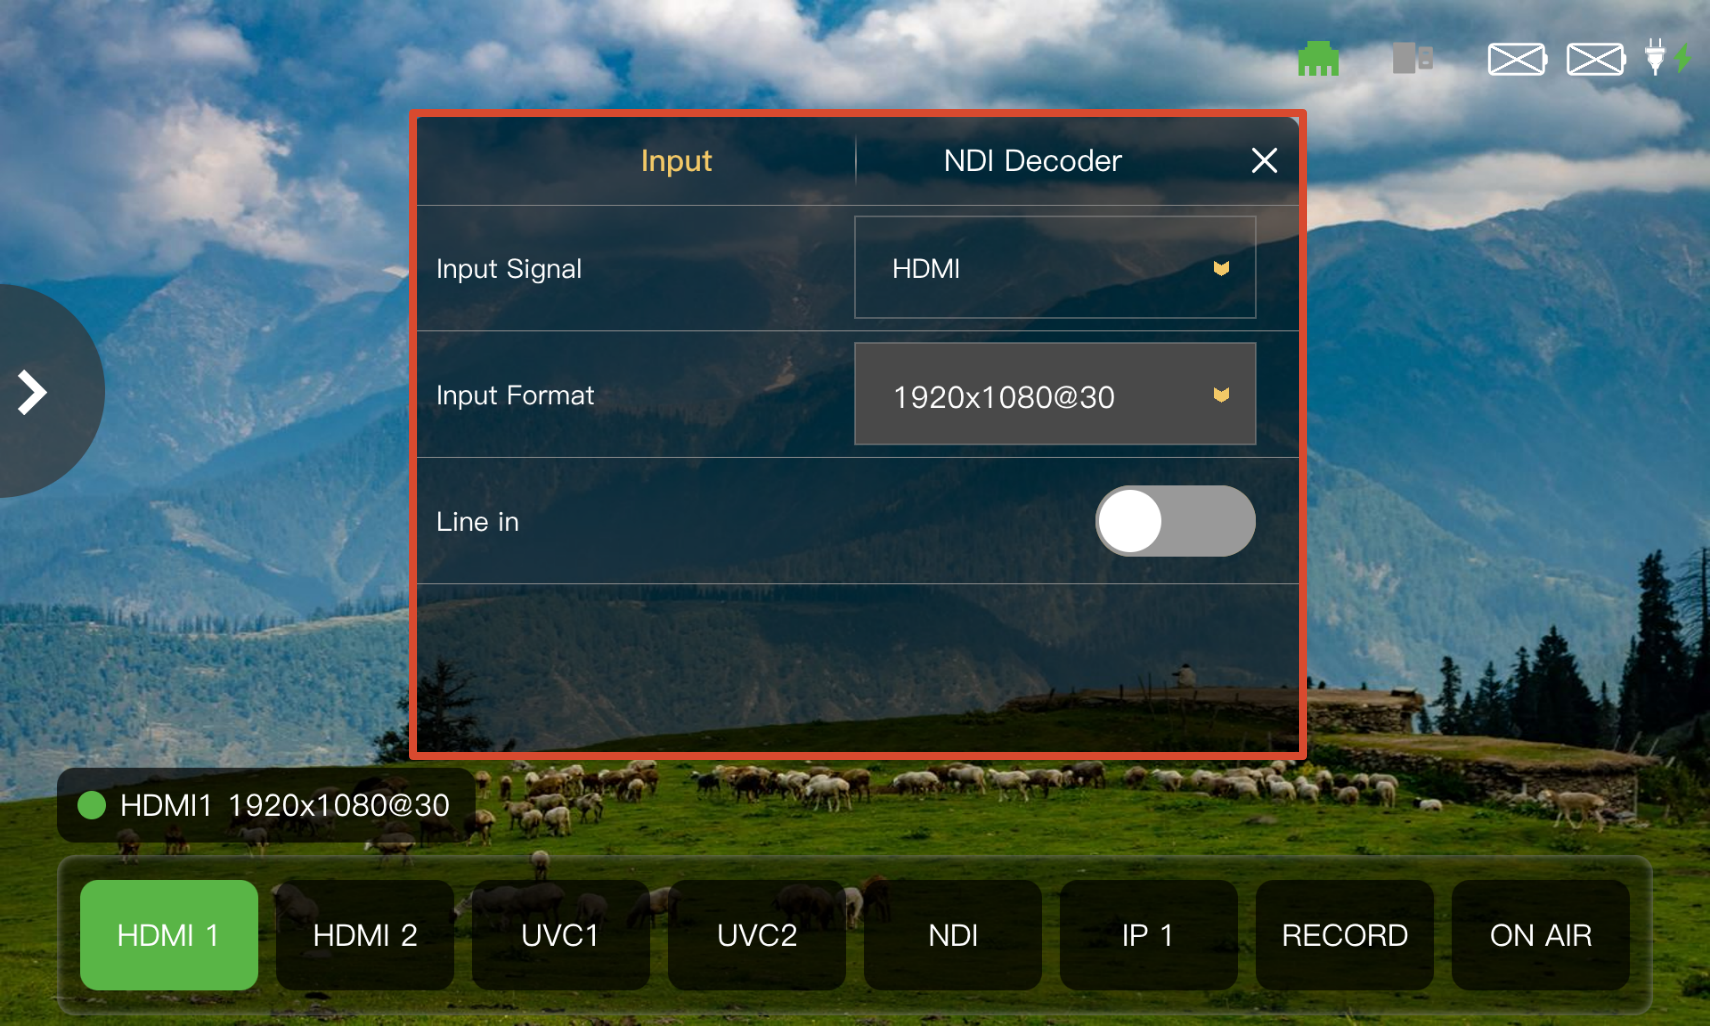
Select Input in the Navigation Area to configure input sources and NDI decoding in the Operation Area.

👉

Input

TAO 1pro 2 supports selecting an input source from the Input Signal drop-down list or the Input Source Selection Area.

  1. Select an input source from the Input Signal drop-down list, or tap the corresponding input source button in the Input Source Selection Area.
  2. Select the resolution of the connected input source from the Input Format drop-down list.
  3. Enable or disable Line in input.
📢  Notes

The selected input source button is displayed in green in the Input Source Selection Area.

NDI Decoding

TAO 1pro 2 supports NDI decoding for receiving NDI video signals over the network and using them as input sources through the NDI input.

After the device is connected to the network, the page displays the device names of the detected NDI sources. Tap Activate to enable an NDI source.

For details on NDI decoding, see 3.2.3 NDI.

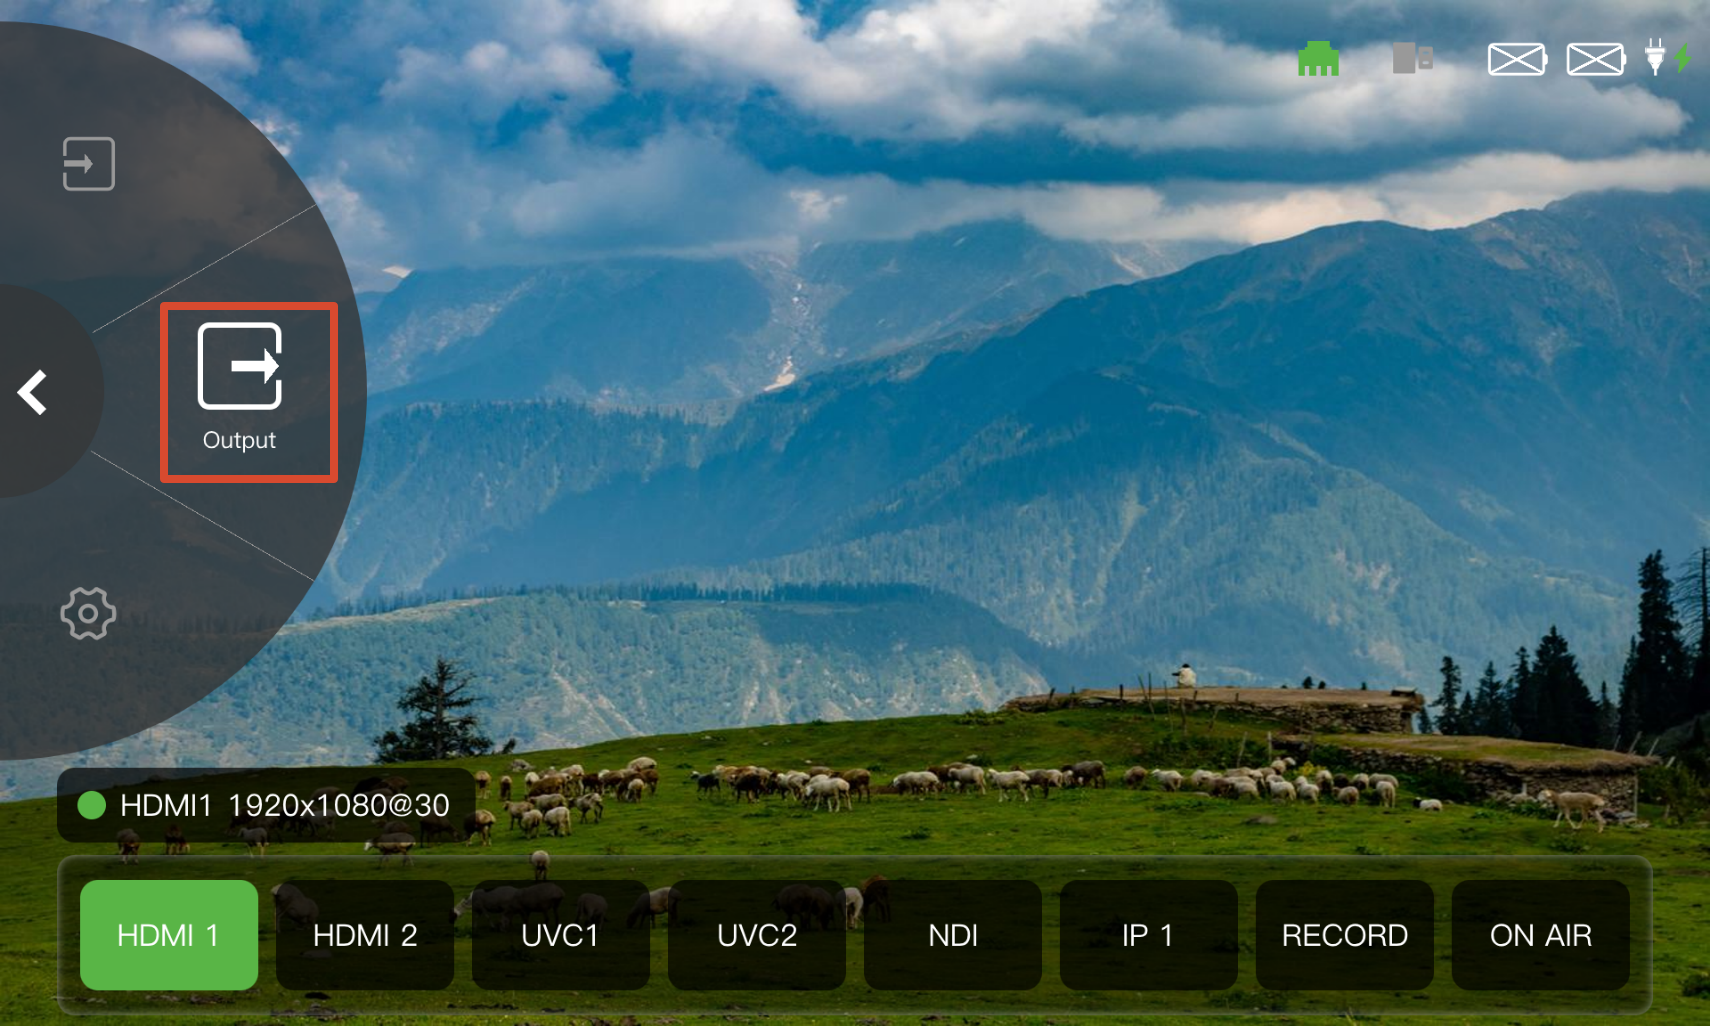
3.1.2Output

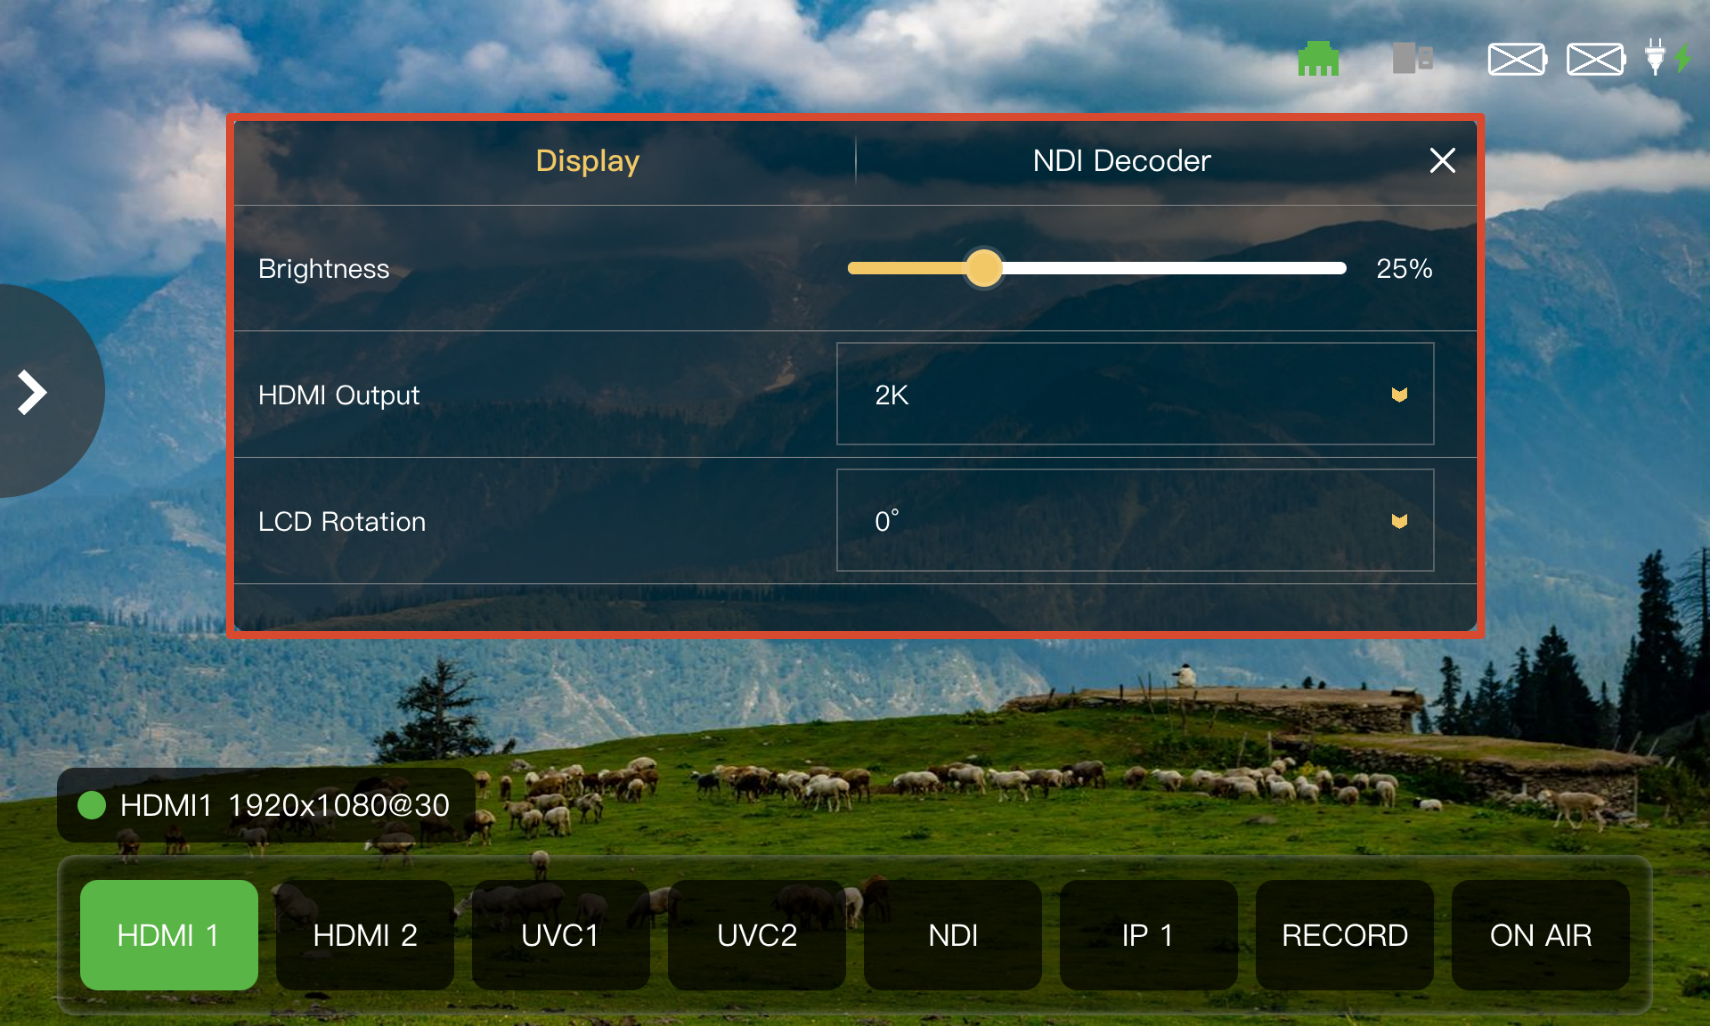
Select Output in the Navigation Area to configure display parameters and NDI encoding in the Operation Area.

👉

Display

  1. Drag the slider to adjust the output brightness.
  2. Select the HDMI output resolution from the HDMI Output drop-down list.
  3. Select the screen orientation from the LCD Rotation drop-down list. Available options are 0° and 180° to accommodate different device orientations.

NDI Encoding

TAO 1pro 2 supports NDI encoding for converting the video output of TAO 1pro 2 into an NDI signal and sending it over the network to other NDI devices or software.

After the device is connected to the network, tap Activate to enable NDI encoding.

For details on NDI encoding, see 3.2.3 NDI.

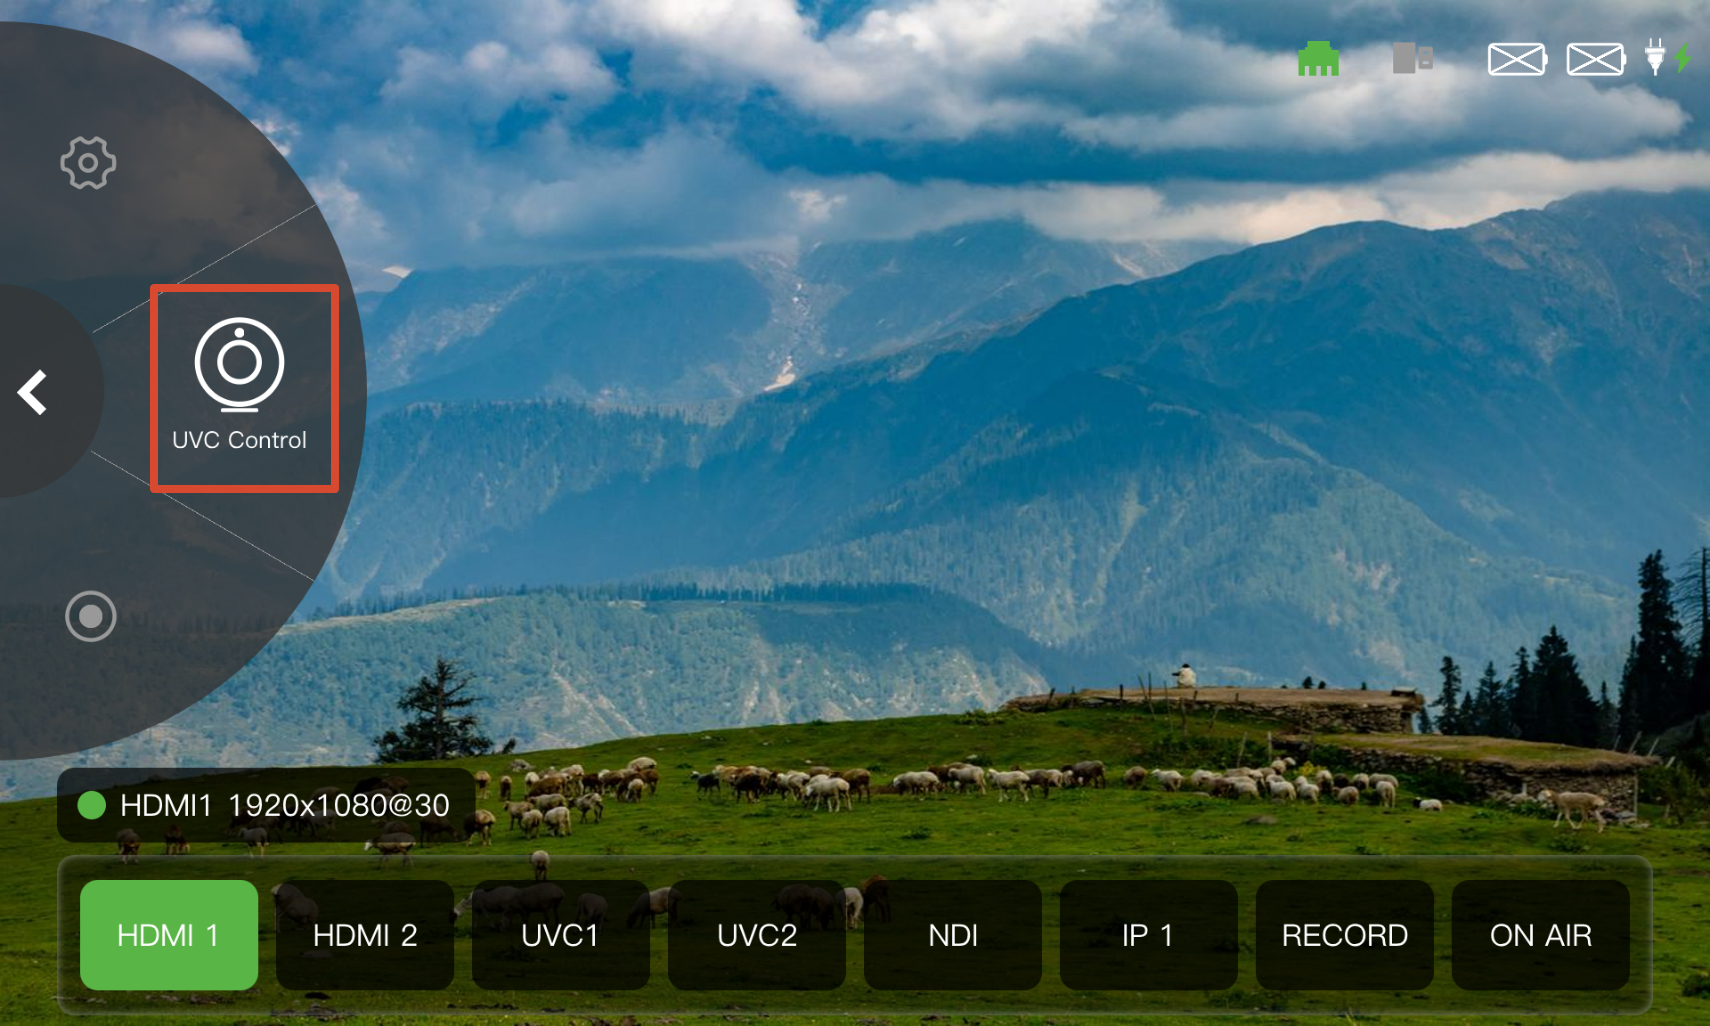
3.1.3UVC Control

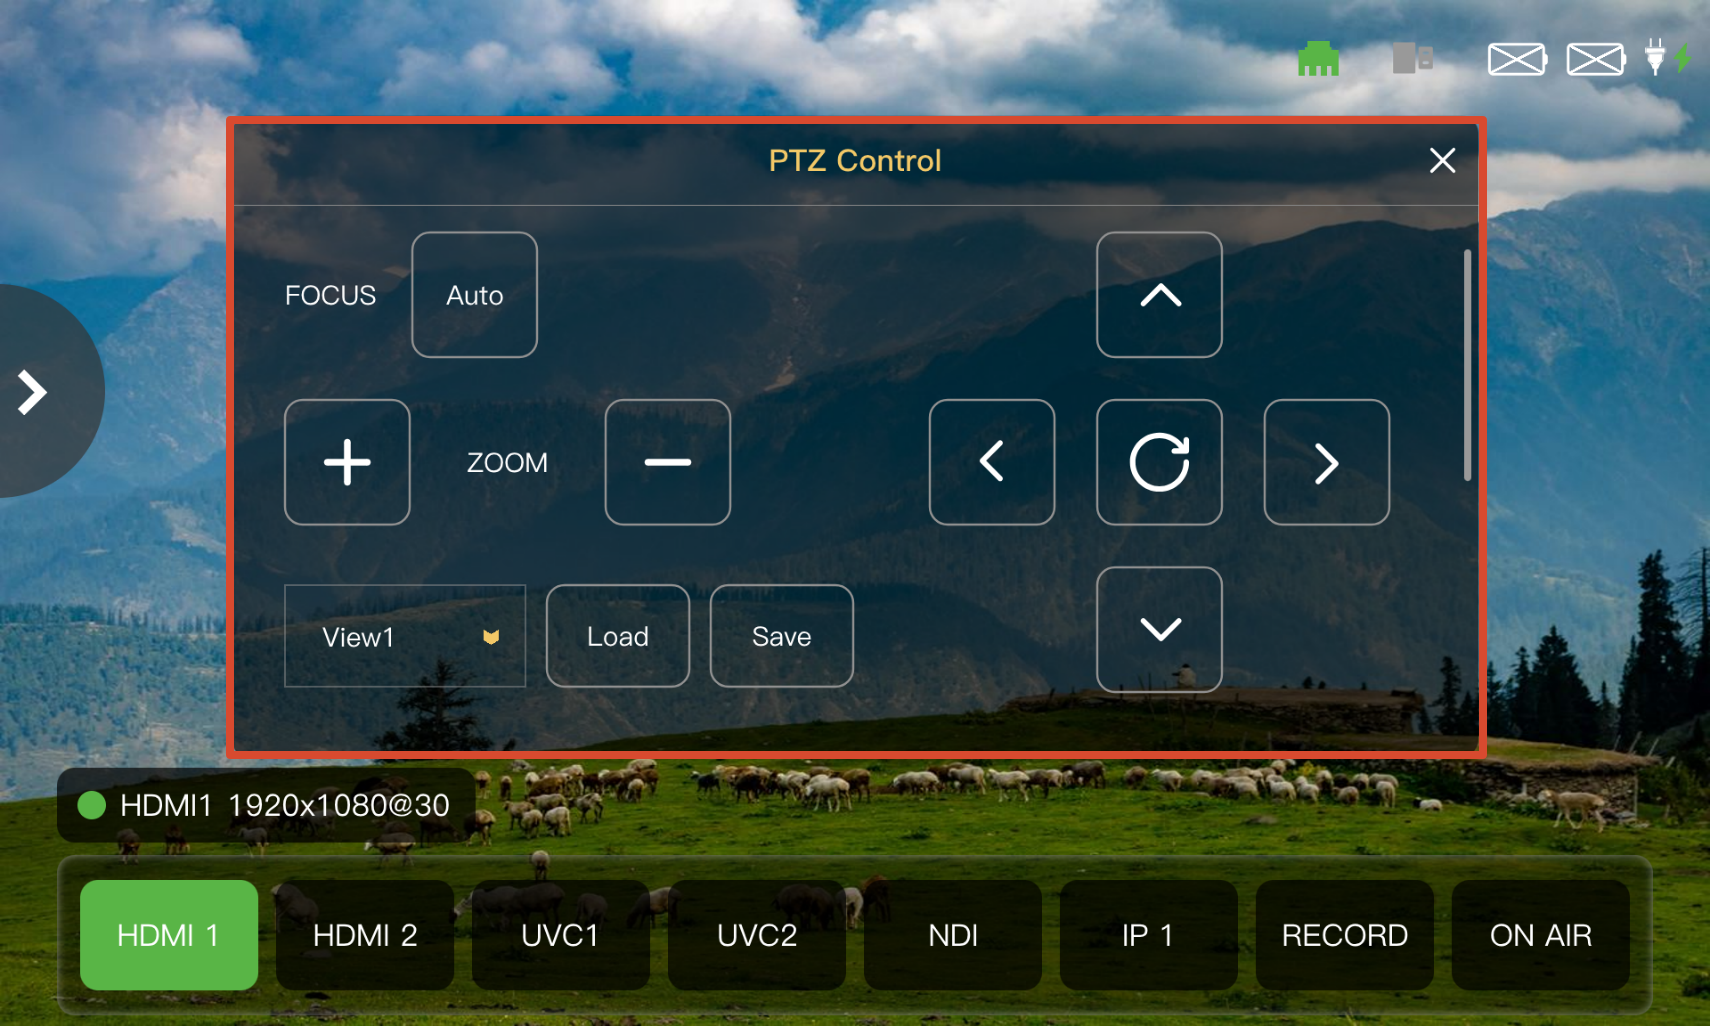
After connecting a PTZ camera that supports UVC control, select UVC Control in the Navigation Area to control the camera in the Operation Area.

👉

Display

FunctionOperation
FocusEnable Auto to activate autofocus.
ZOOMTap + to zoom in or - to zoom out.
PositionTap the arrow buttons to adjust the camera position. Tap the reset button to return the camera to its initial position.

Views

Save the current PTZ parameters and quickly recall the corresponding camera position using a View.

  1. Adjust the camera to the desired position.
  2. Select a view from the scene drop-down list. Six views are available.
  3. Tap Save to save the current PTZ parameters.
  4. Select a saved view from the drop-down list.5. Tap Load to recall the corresponding PTZ parameters.

3.1.4RECORD

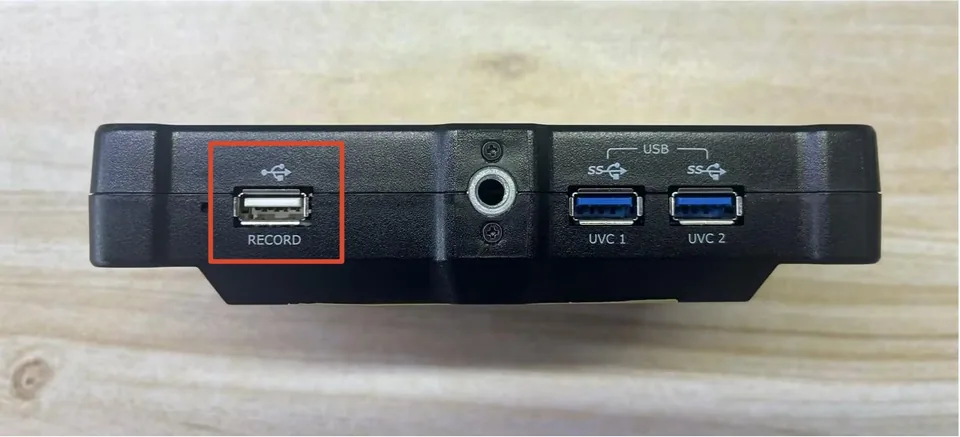
TAO 1pro 2 supports recording the current program output to an external storage device.

Connect the storage device to the RECORD port before using the recording function.

Document image

🚨  Warning

Do not disconnect the external storage device during recording. Doing so may cause data corruption or prevent the recording file from being saved properly.

Starting a Recording

  1. Connect the external storage device to the RECORD port.
  2. Check the Status Area in the upper-right corner of the device screen to confirm that the USB device is detected.
  3. Tap RECORD in the Selection Area to start recording. The button turns red.
  4. The recording duration is displayed on the device screen.

Stopping a Recording

  1. Tap the red RECORD button to stop recording.
  2. Wait for the recording file to finish saving.
  3. Disconnect the external storage device only after the recording is complete.
📢  Notes

If no external storage device is connected or the device is not detected, the RECORD button in the Selection Area is grayed out and a corresponding message, such as _"USB drive not detected"_, is displayed.

Recording Specifications

ItemSpecification
Video FormatMP4
Video CodecYUV420, 8-bit
Video Resolution1080p
Video Frame Rate30 fps
Audio FormatAAC
Audio Sample Rate48 kHz
Audio Bit Depth16-bit

3.1.5ON AIR

TAO 1pro 2 supports RTMP streaming, with up to two platforms supported simultaneously for each view.

  1. Set the streaming URLs in the Web App. For details, see 3.2.4 Network Stream, Output.

  2. Tap ON AIR in the Selection Area on the device screen to start streaming.

3.1.6Settings

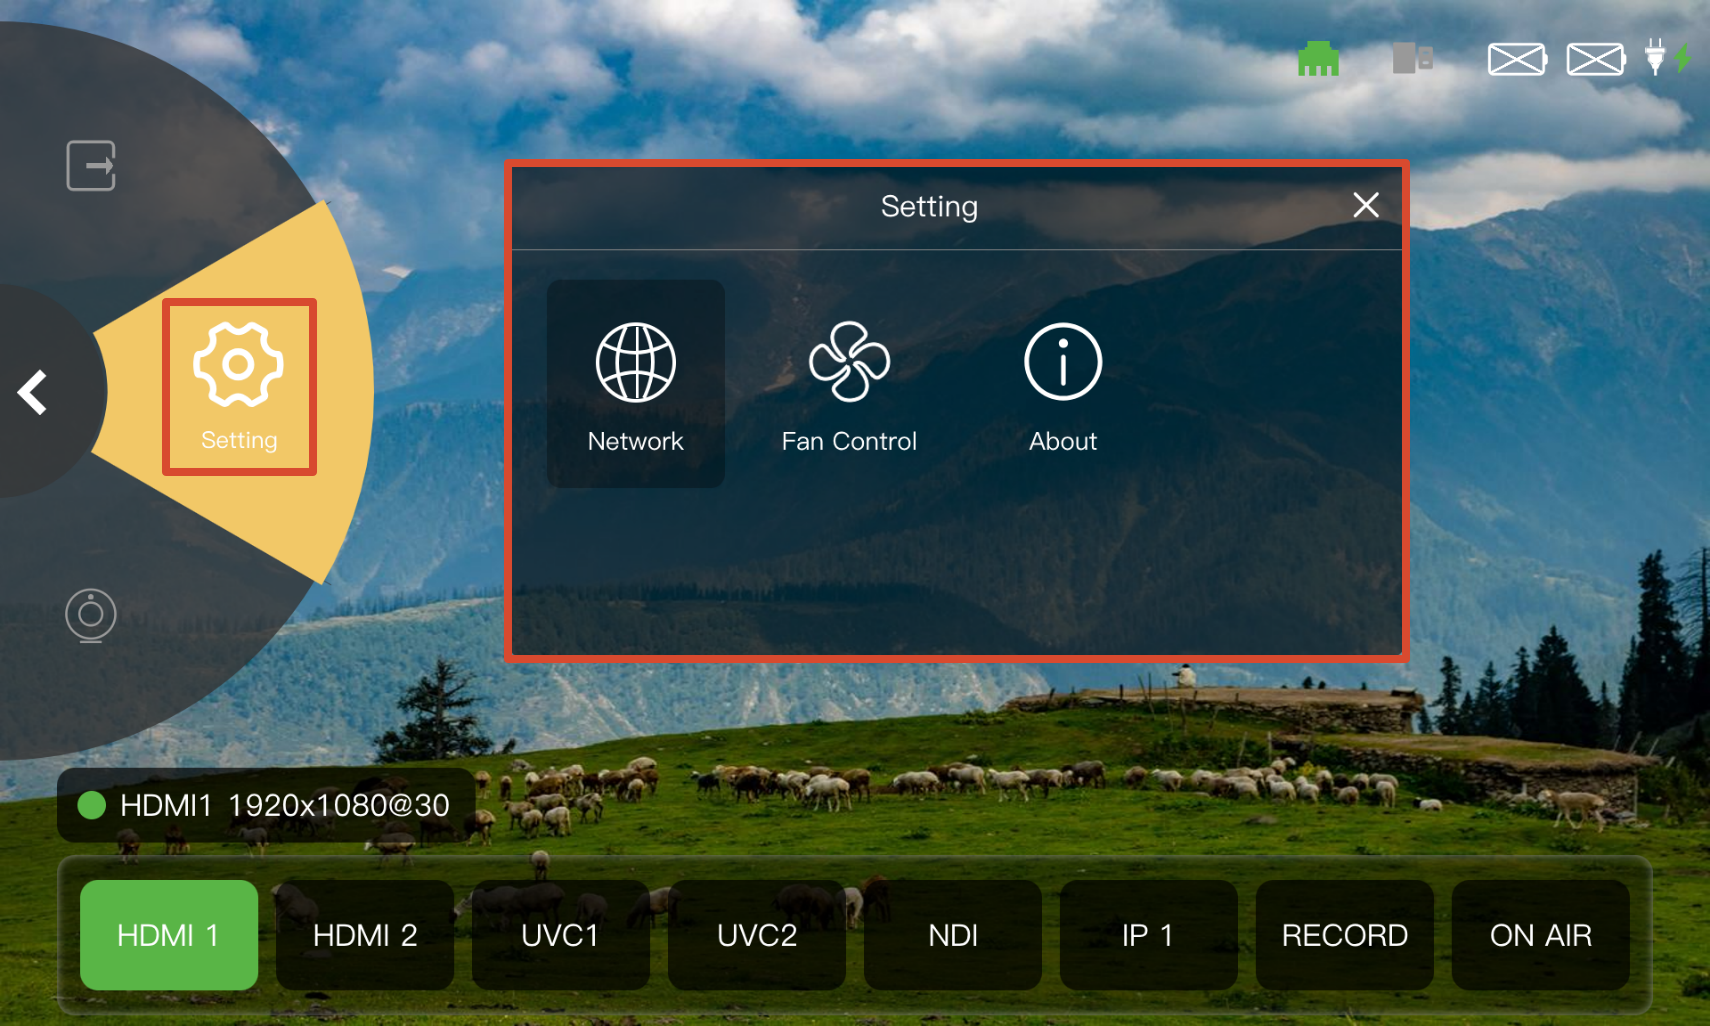
Select Setting in the Navigation Area to configure network, fan, and device settings in the Operation Area.

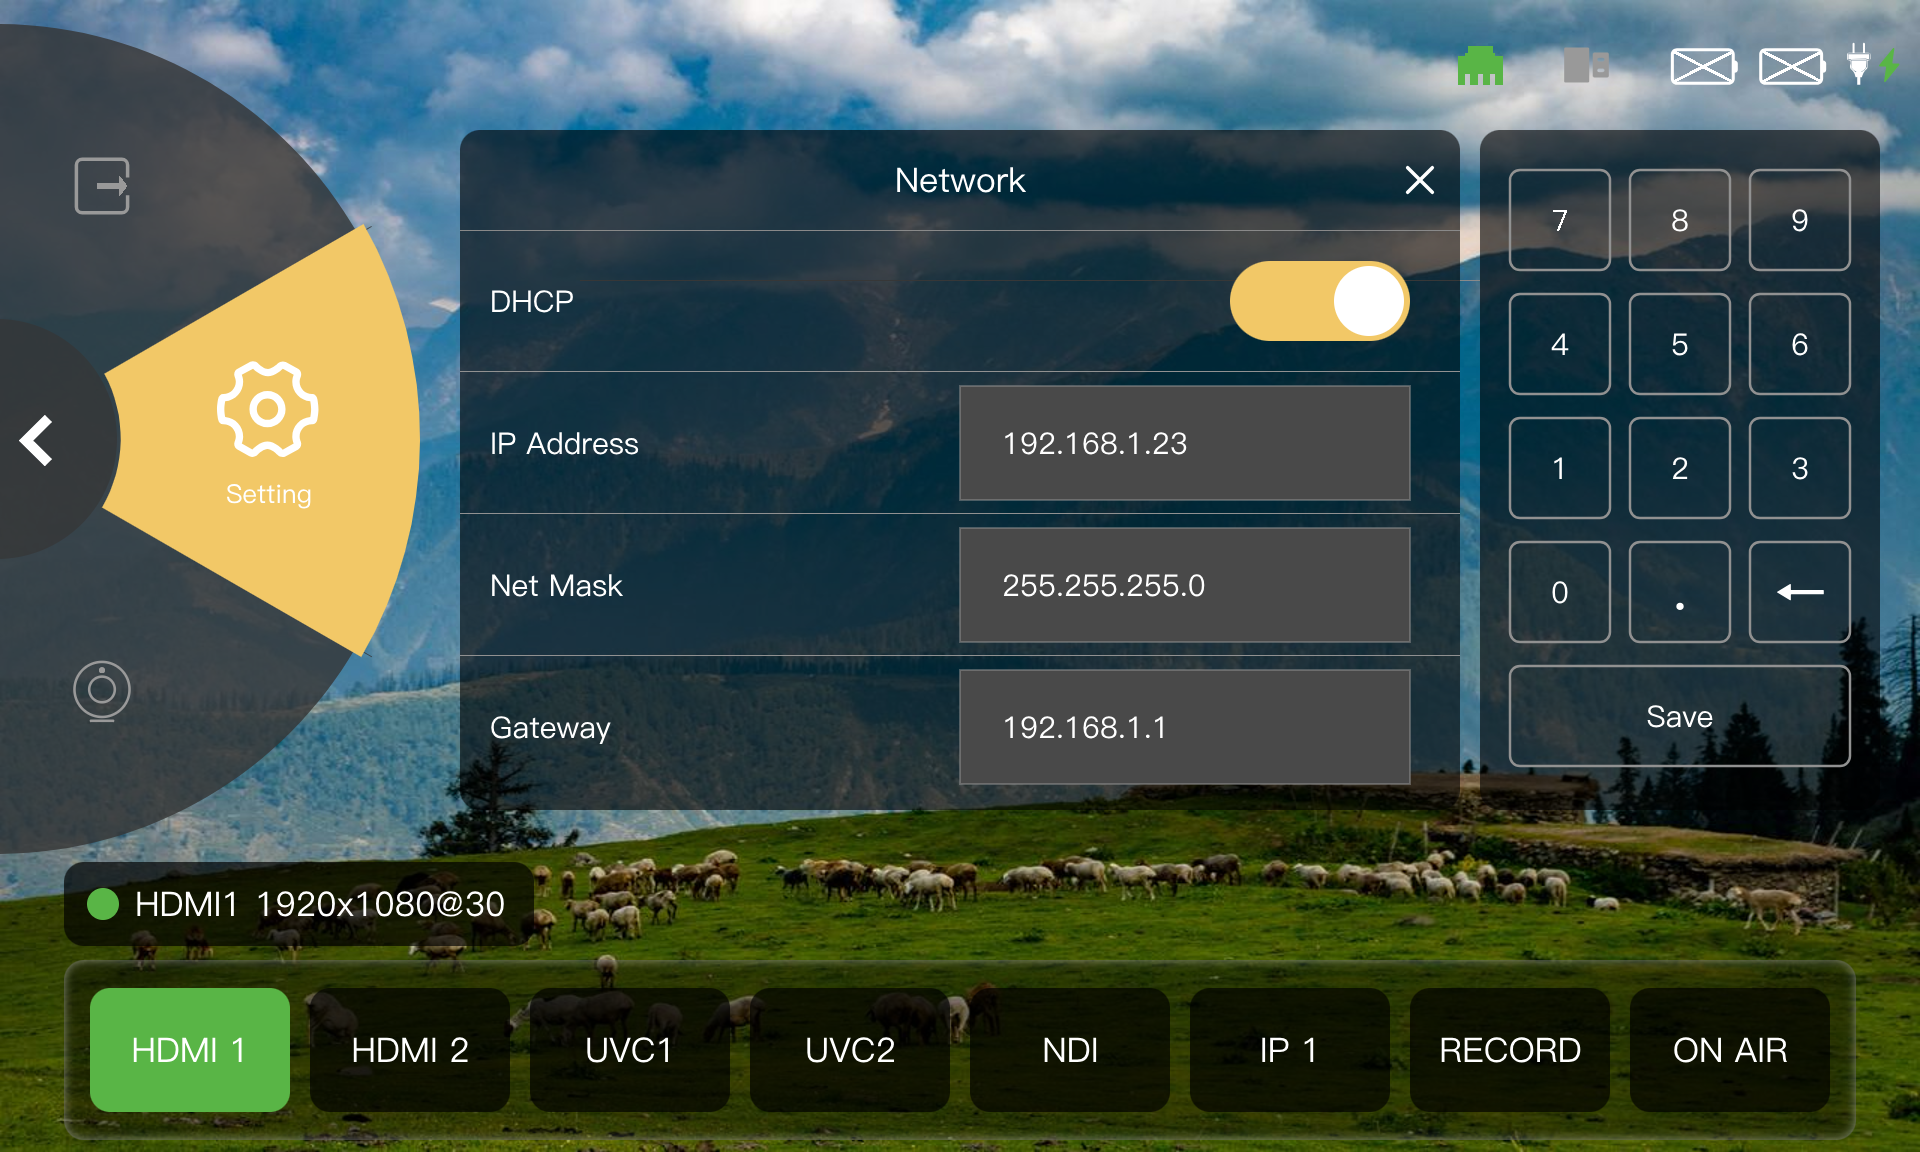
Network

TAO 1pro 2 supports automatic network configuration via DHCP and manual configuration.

Using DHCP to obtain network parameters automatically:

  1. Enable DHCP.
  2. View the automatically assigned IP address, subnet mask, and gateway.

Configuring network parameters manually:

  1. Disable DHCP.
  2. Enter the IP address, subnet mask, and gateway using the numeric keypad on the right.

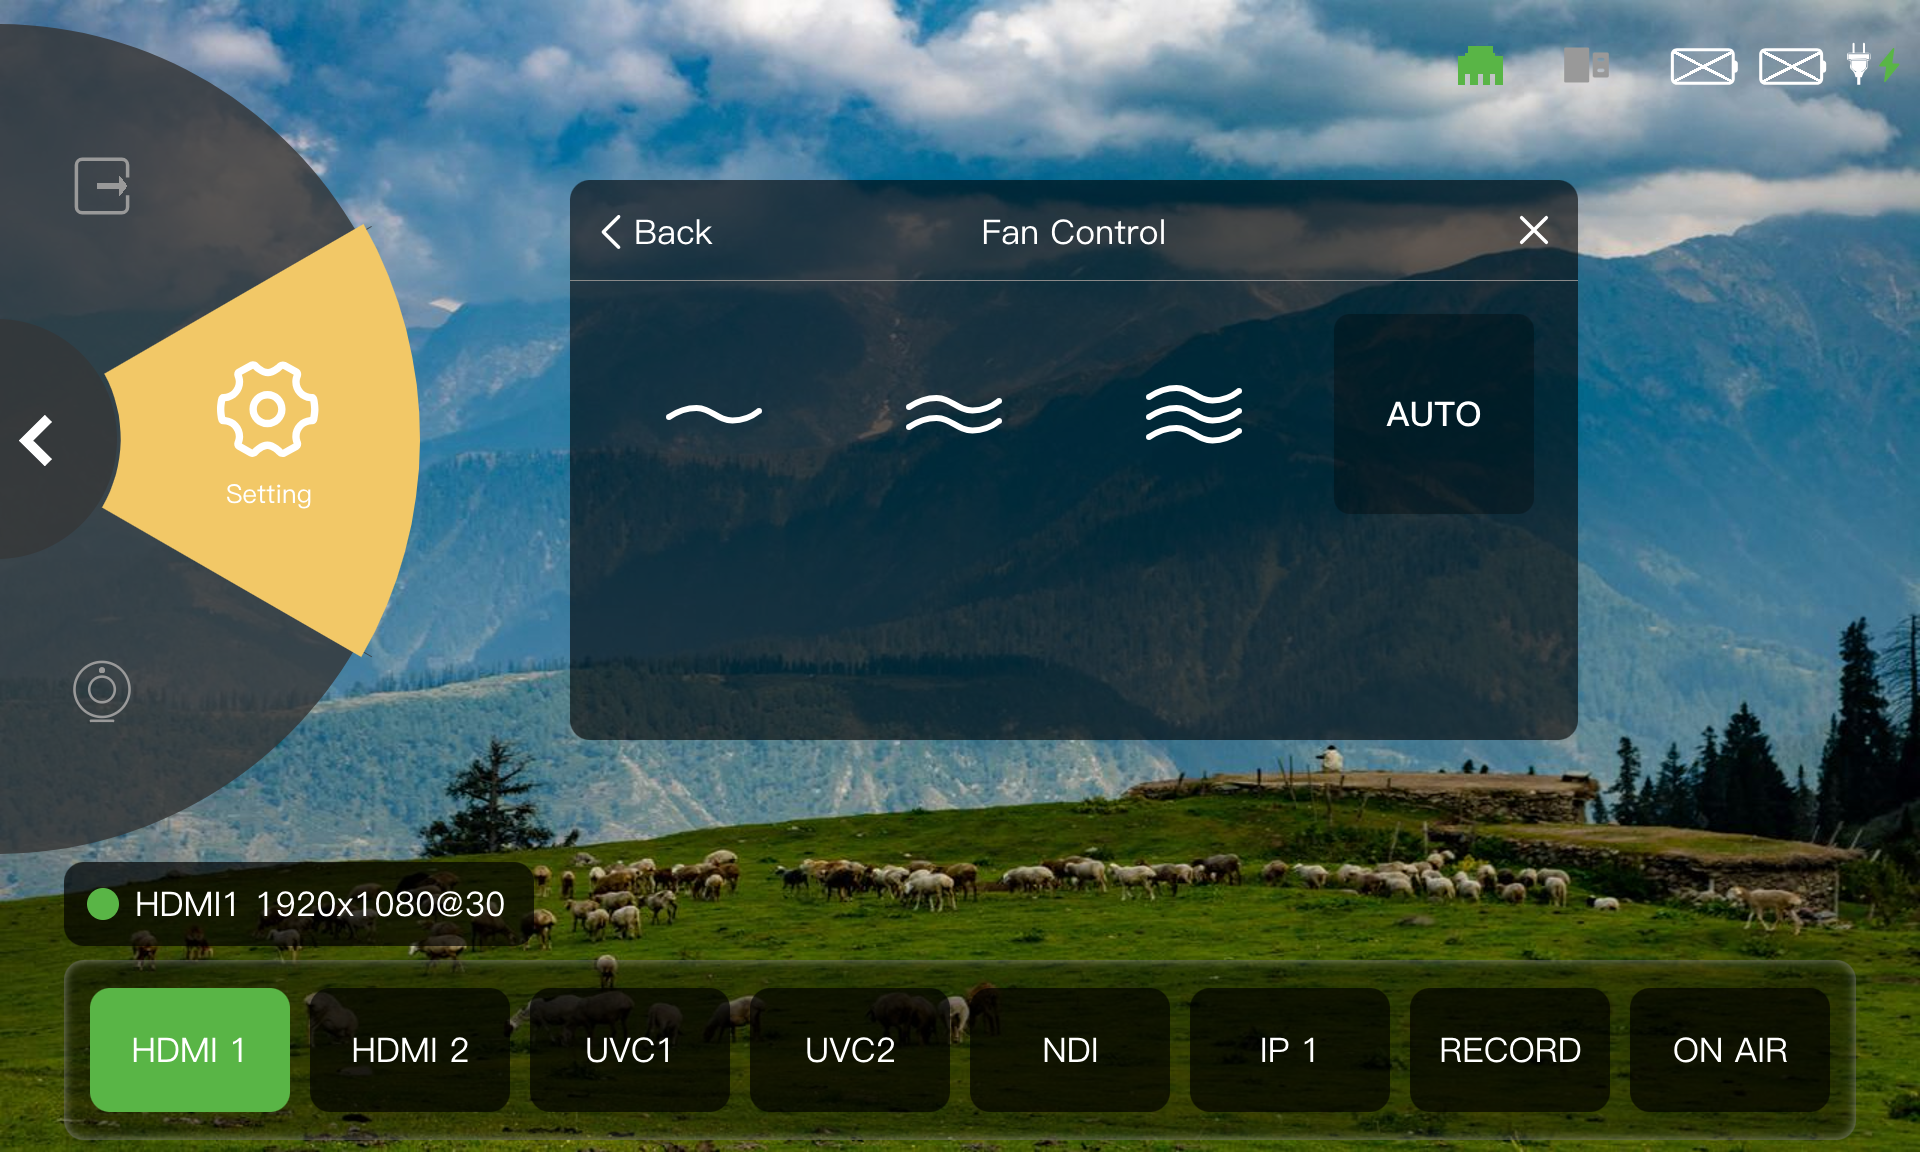
Fan Control

TAO 1pro 2 supports manual fan speed adjustment and automatic fan speed control.

  1. Select a fan speed level from 1 to 3.
  2. Tap AUTO to enable automatic mode.

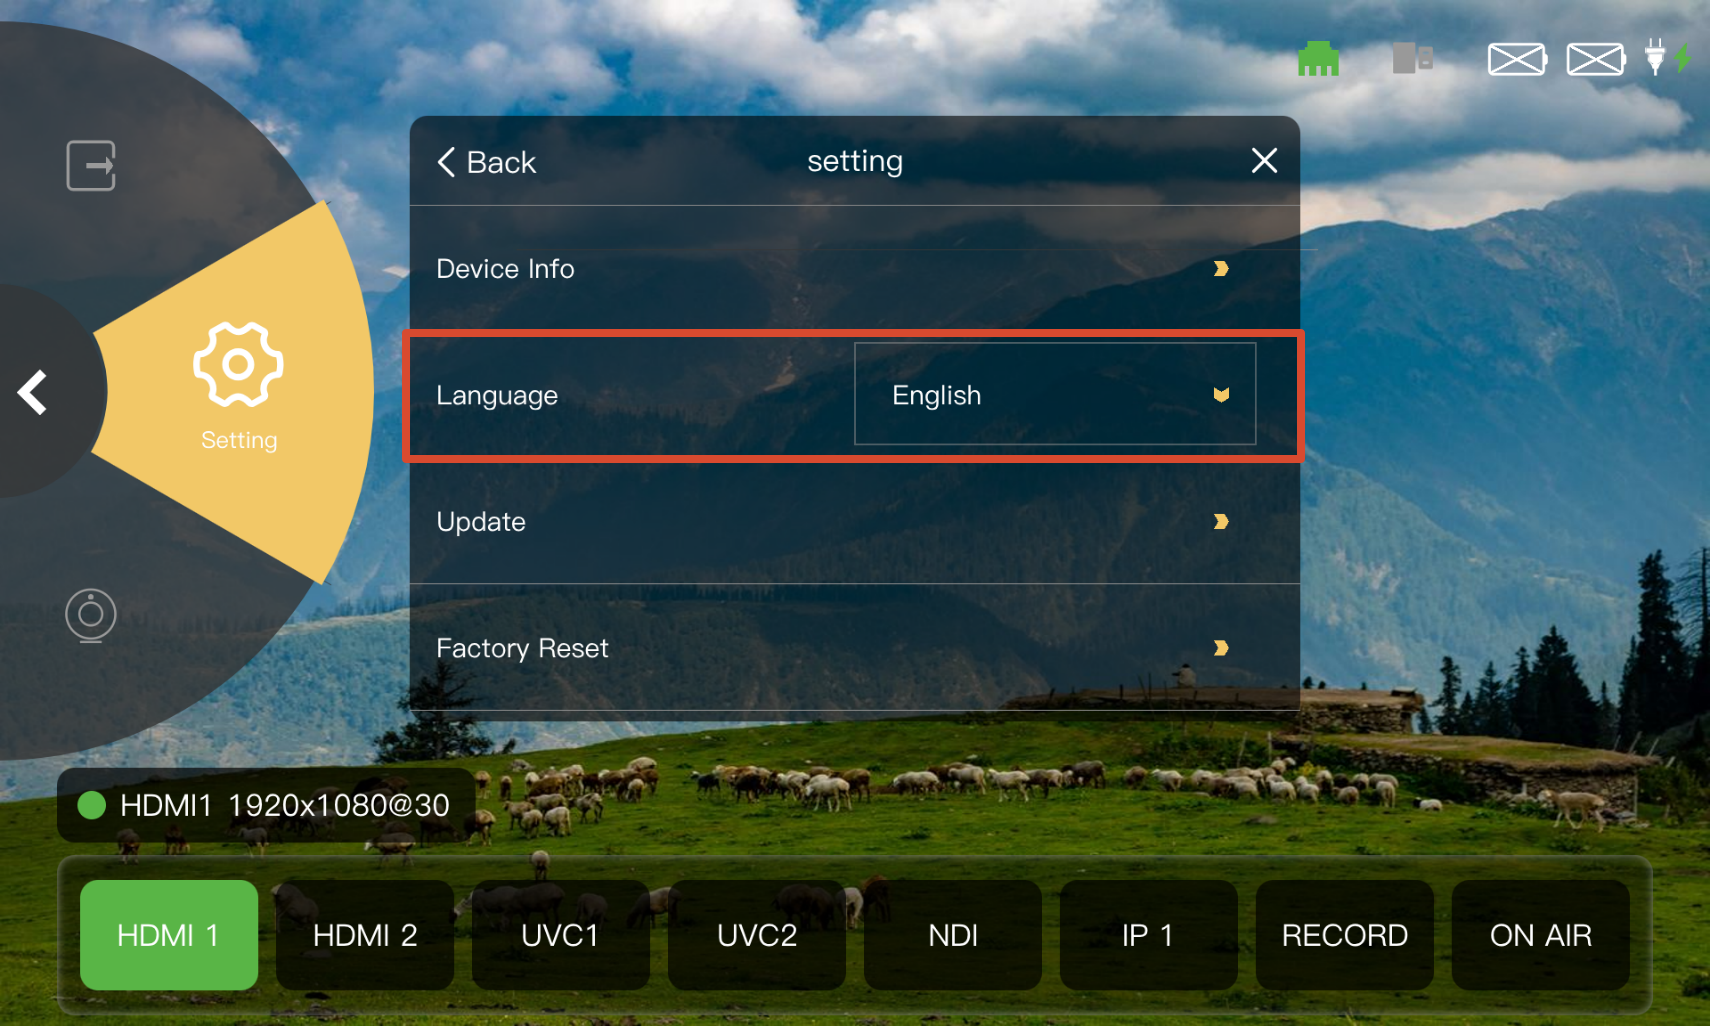
About

The About page provides device information, language settings, software upgrade, and factory reset options.

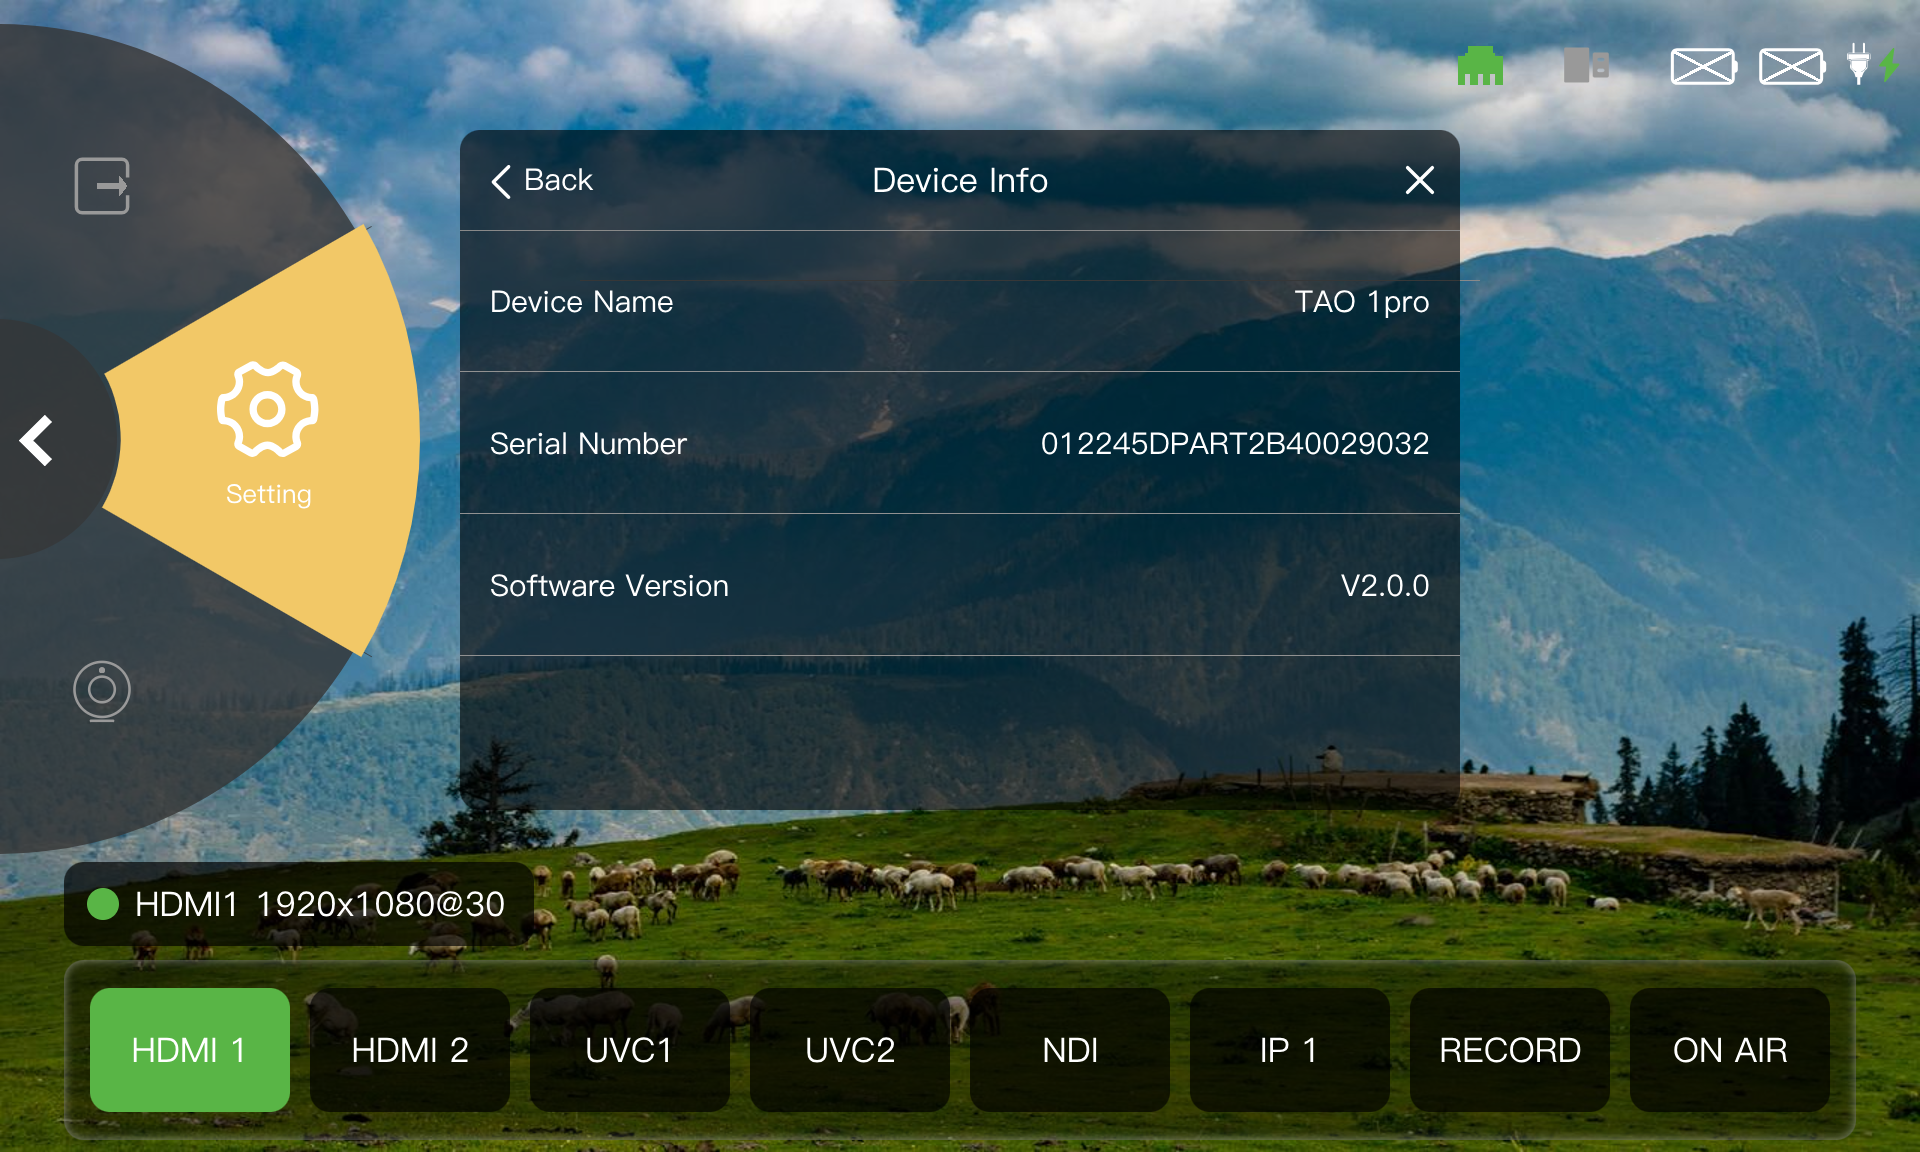
Device Information

View the device name, serial number, and software version.

Language

Select the language for the device interface. TAO 1pro 2 supports Chinese, English, and German.

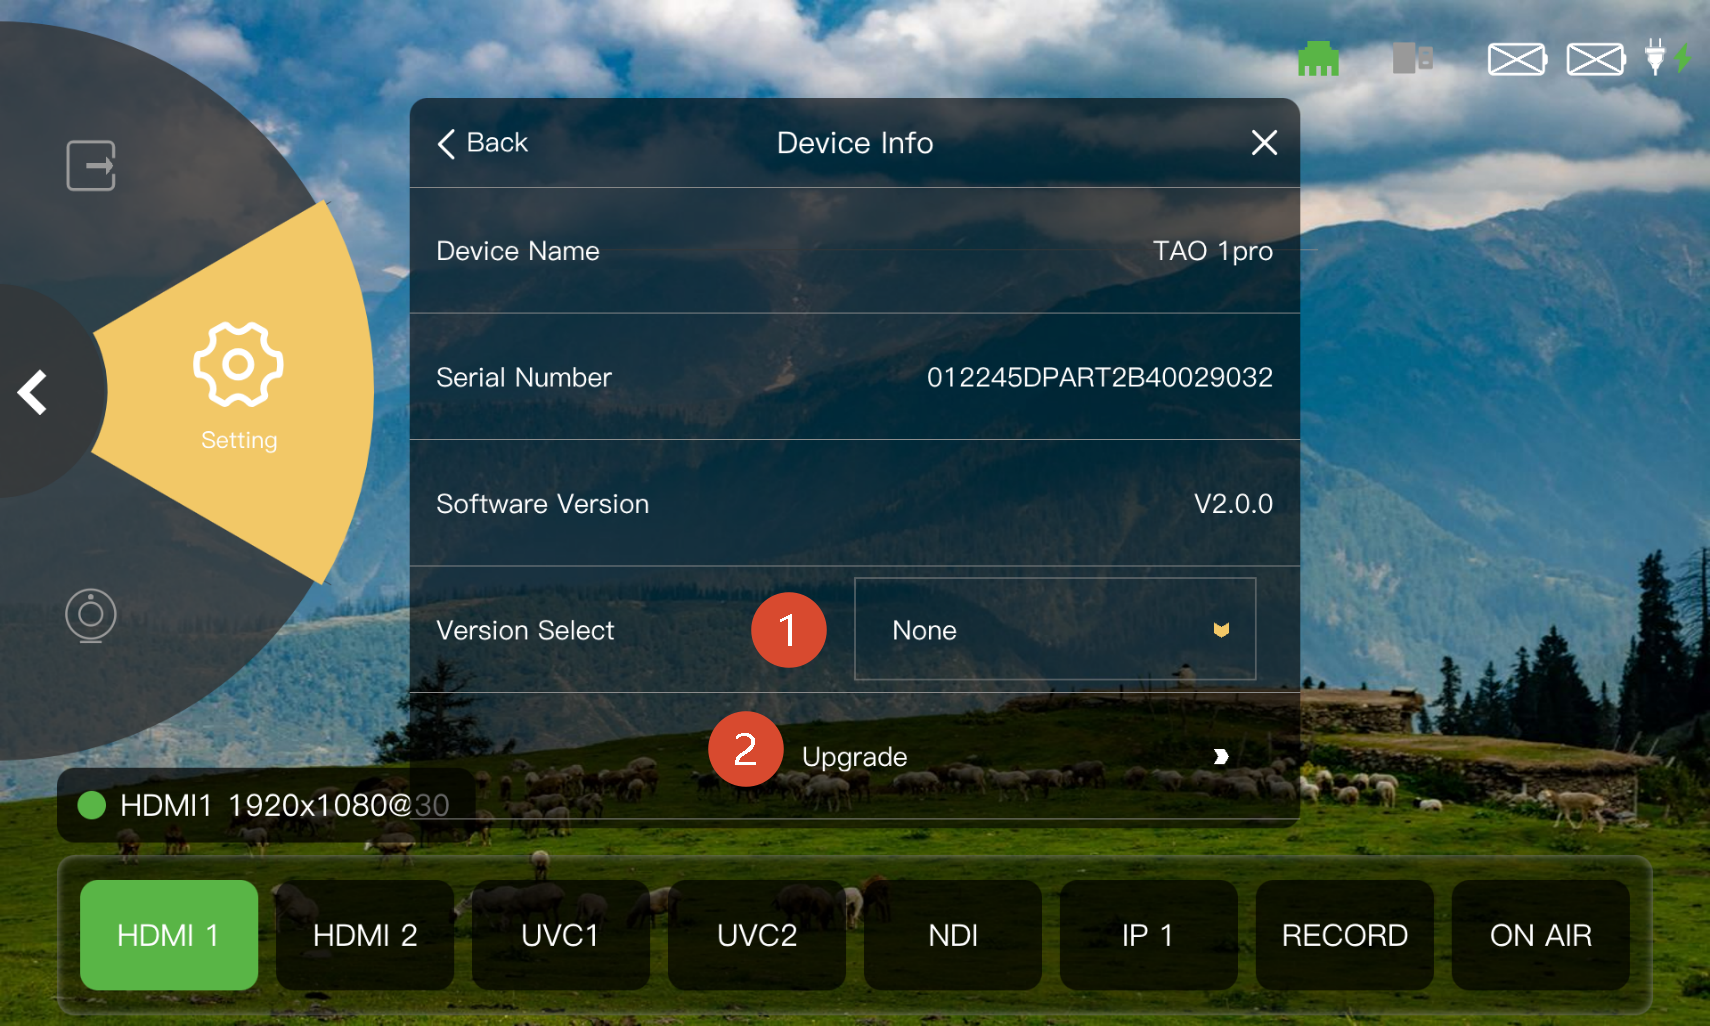
Upgrade

  1. Select the upgrade version from the version drop-down list.
  2. Tap Update to enter the upgrade page.
  3. Follow 4. Upgrade to complete the software upgrade.

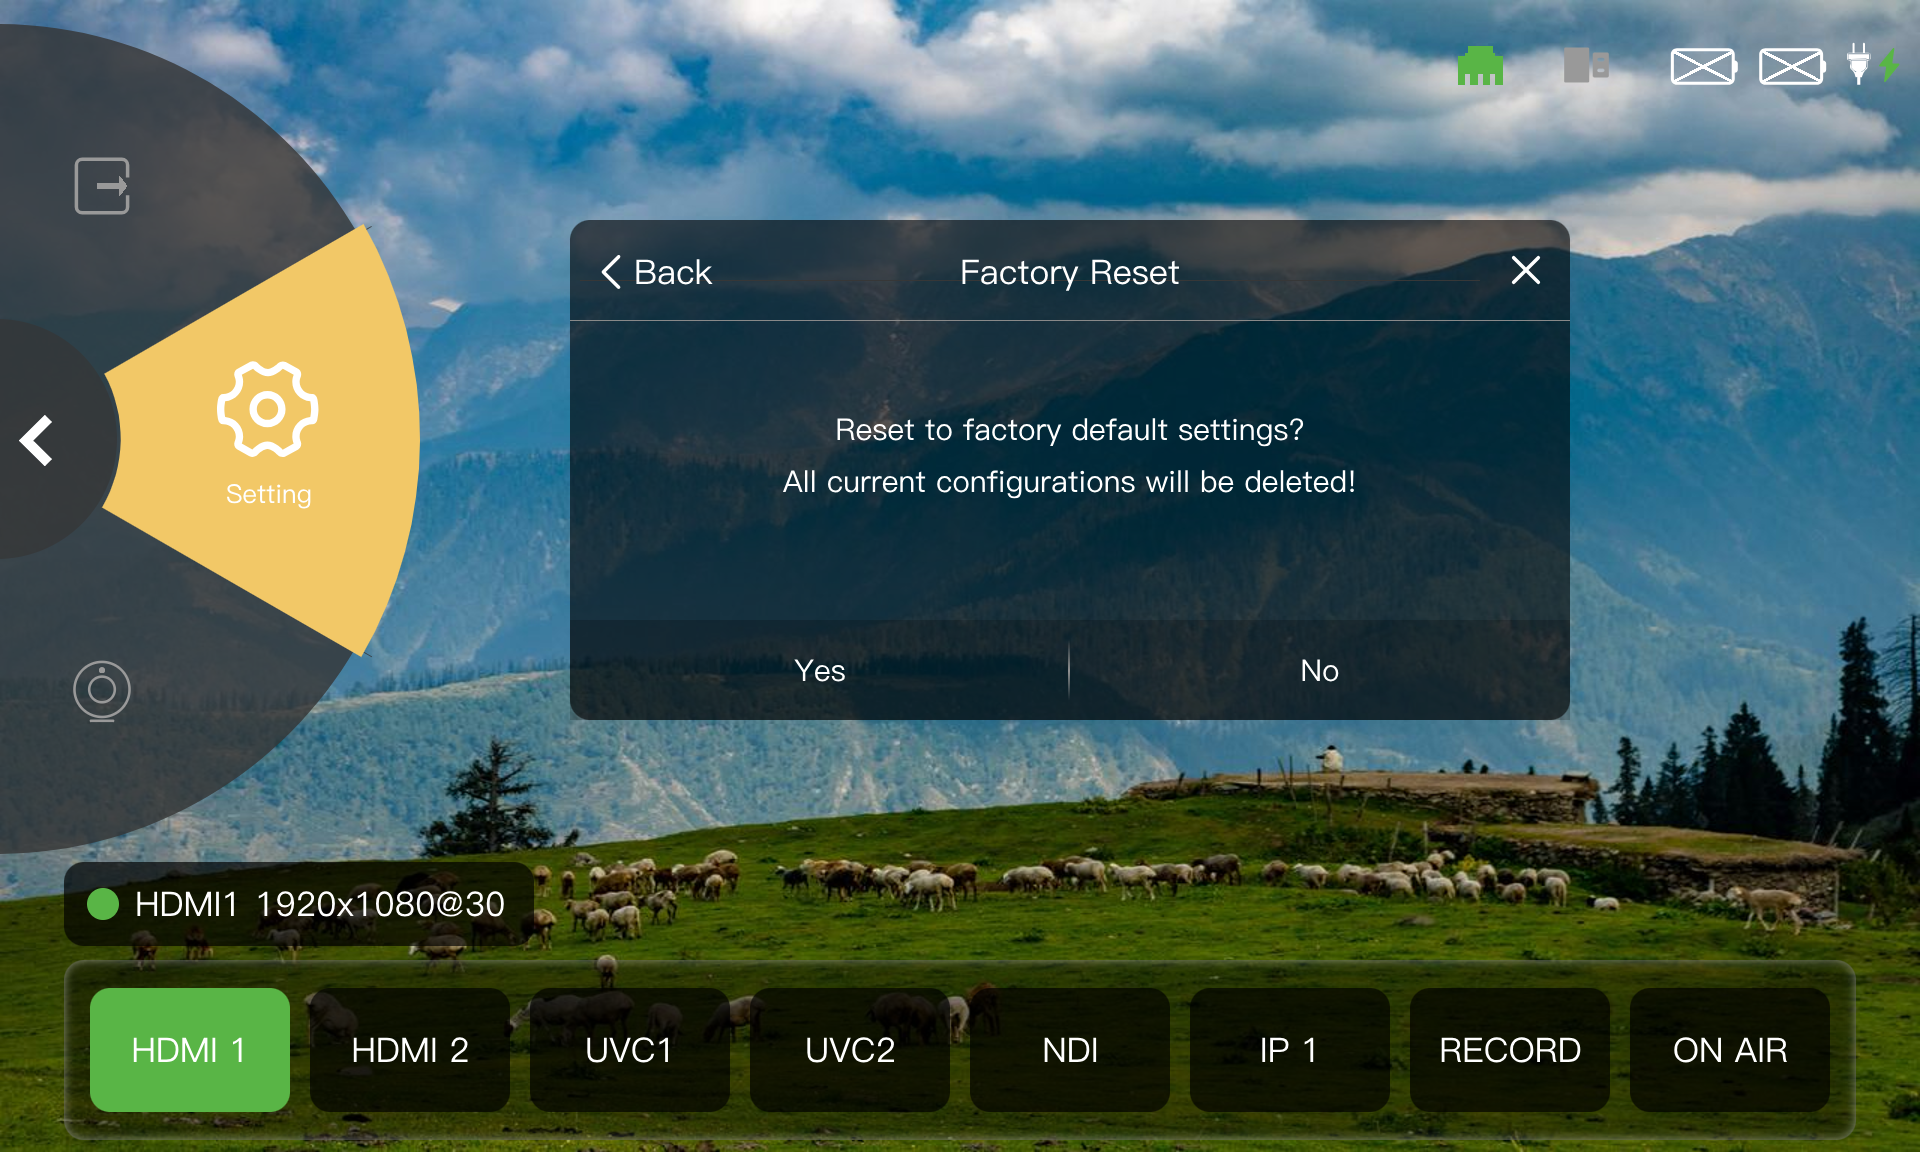
Factory Reset

A factory reset deletes all device configurations. This operation cannot be undone.

  1. Tap Factory Reset.
  2. Select Yes in the confirmation dialog to perform the factory reset.

3.1.7Status Area

View the device status in the upper-right corner of the screen, including network, power, and USB connection status.

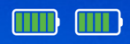
IconStatusIconStatusIconStatusIconStatus
No network connectionNo USB device connectedNo power supply connectedNo battery installed
Network connectedUSB device connectedPower supply connectedBattery levels for both batteries

3.2Web App

TAO 1pro 2 can be controlled through the Web App without installing additional software.

On TAO 1pro 2:

  1. Complete the network connection as described in 2.4 Connecting to a Network.
  2. Select Setting > Network in the Navigation Area.
  3. Enable DHCP and view the assigned IP address under IP Address.

On a computer connected to the same local network as TAO 1pro 2:

  1. Open a web browser and enter the device IP address in the address bar.
  2. Press Enter to access the device.
  3. The Web App opens in the browser, allowing remote control of the device.

Default login credentials:

  • Username: admin
  • Password: admin

3.2.1Dashboard

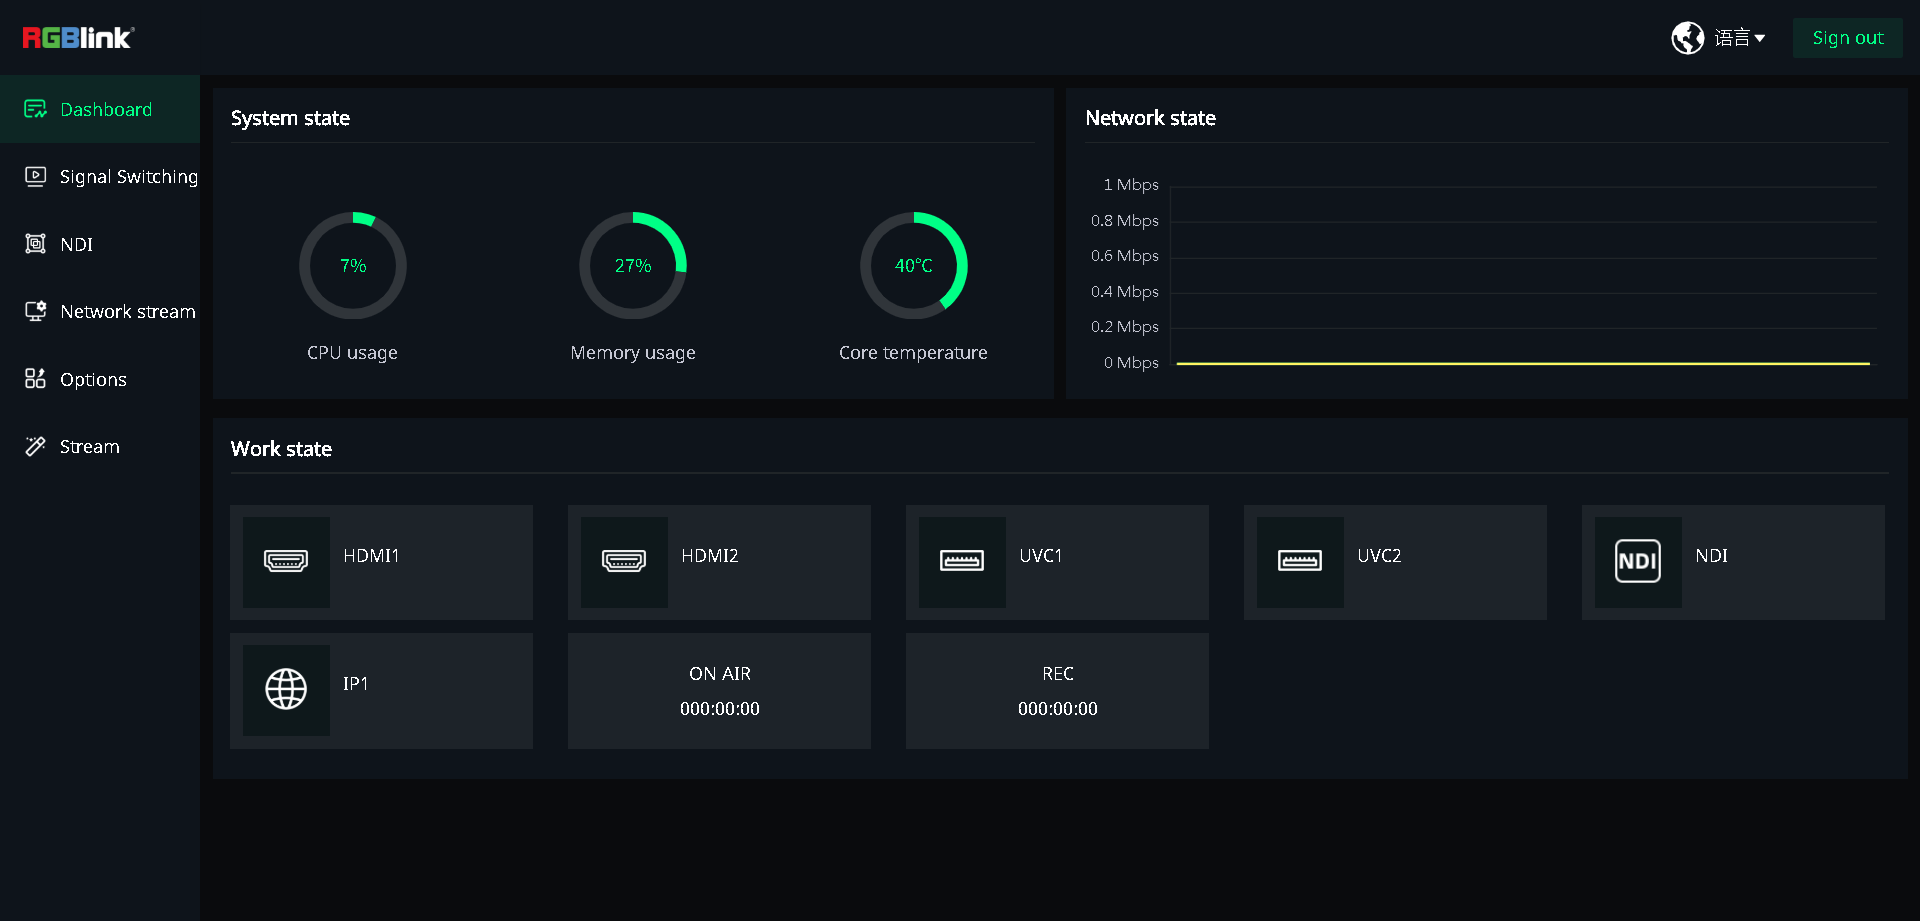
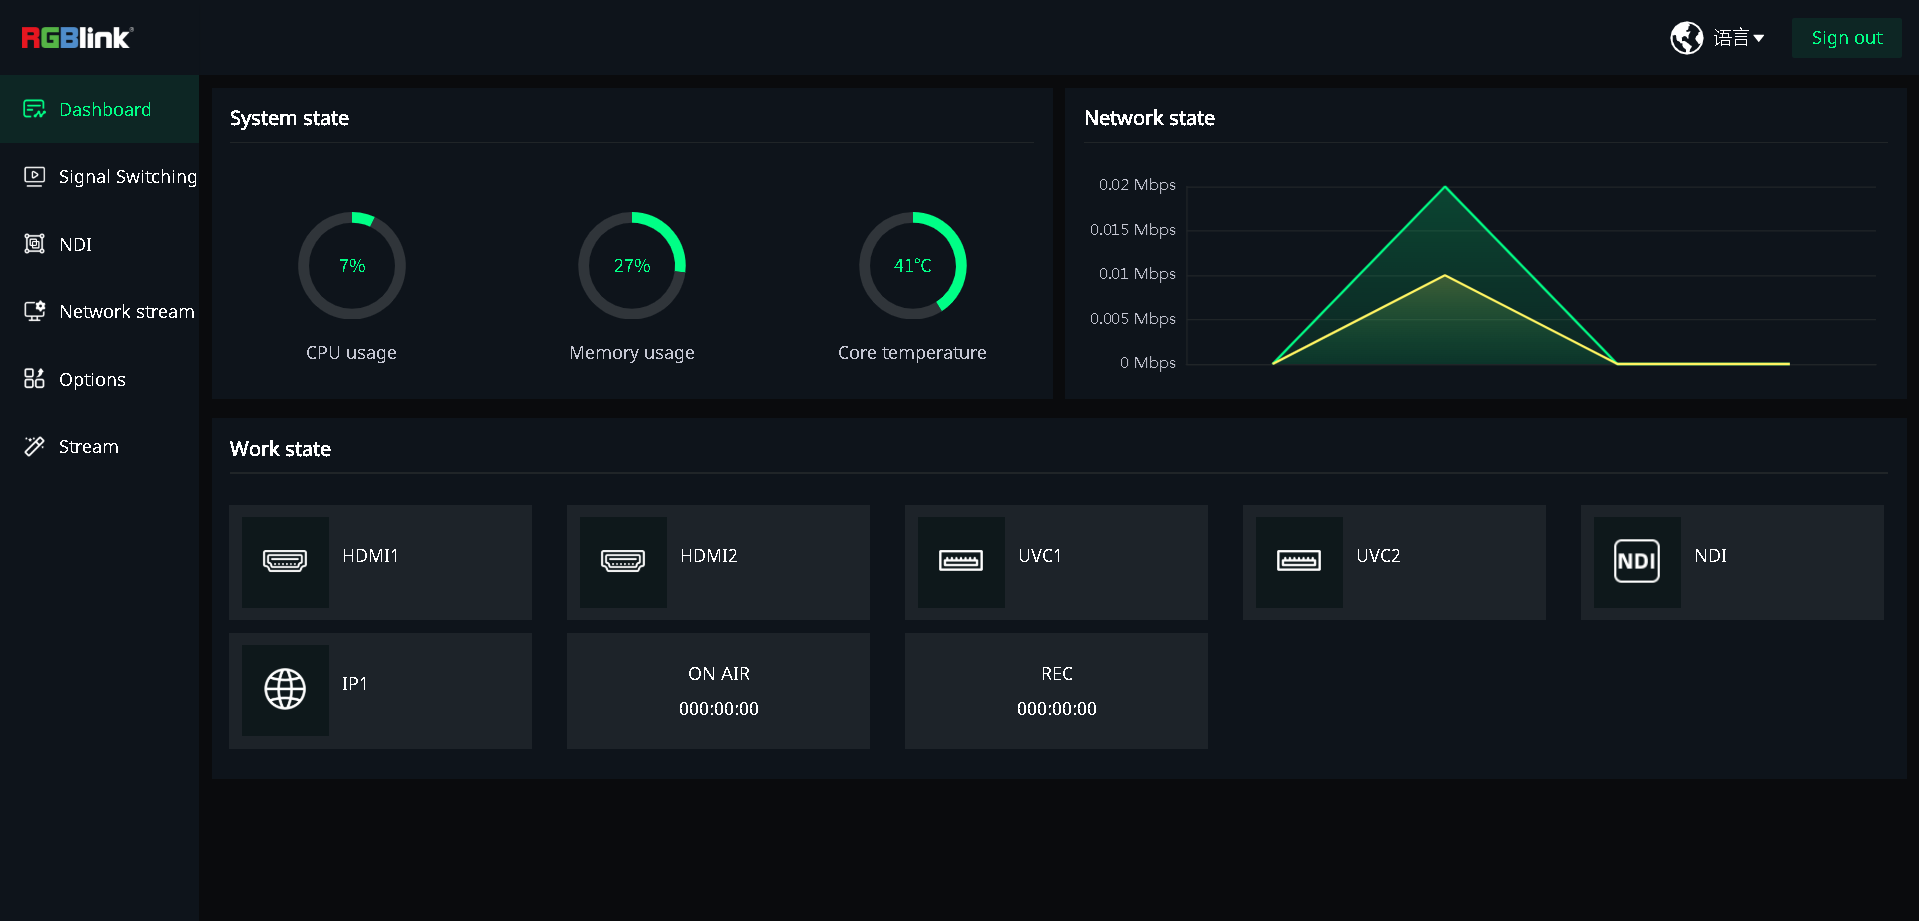
Dashboard displays the device's system, network, and operating status.

System State

System State displays the current system status, including:

  • CPU usage
  • Memory usage
  • Core temperature

Network State

Network State displays the current network status, including upload and download speeds.

Work State

Work State displays the current status of the function buttons in the Selection Area, including HDMI 1, HDMI 2, UVC 1, UVC 2, NDI, IP1, ON AIR (streaming), and REC (recording).

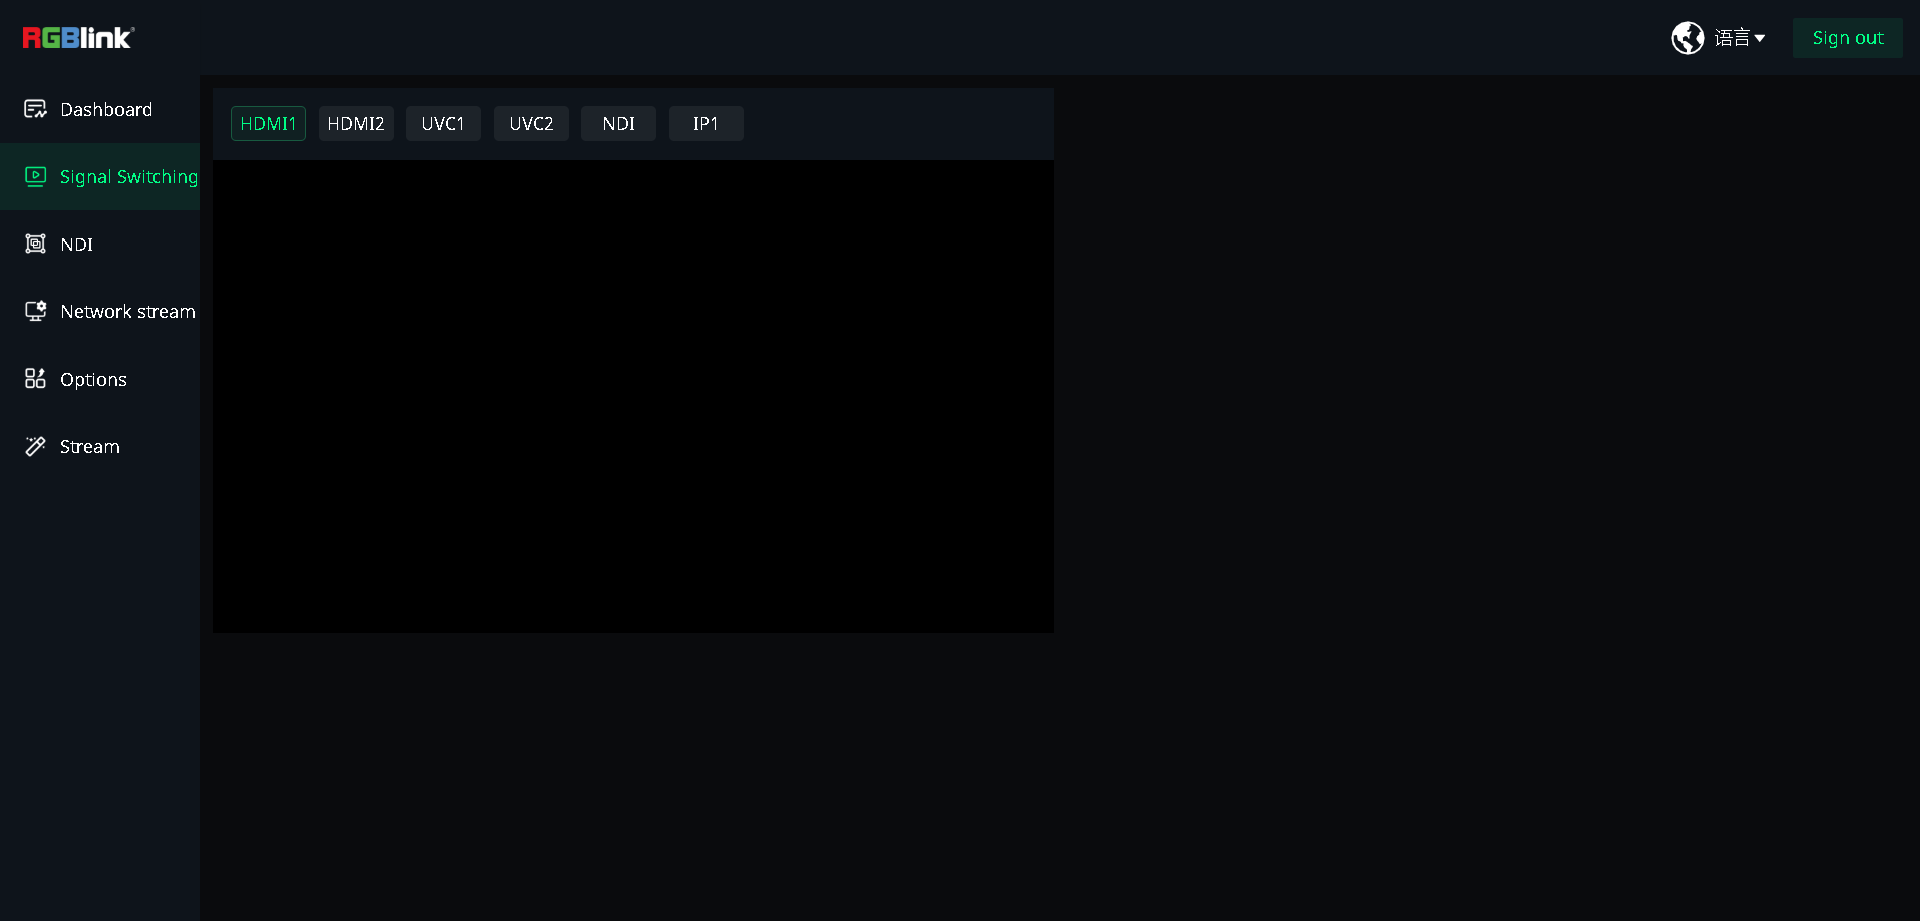
3.2.2Signal Switching

Signal Switching is used to switch and view the current video input source.

Tap HDMI 1, HDMI 2, UVC 1, UVC 2, NDI, or IP1 to switch to and view the selected video input.

3.2.3NDI

TAO 1pro 2 supports NDI encoding and decoding, allowing users to send or receive NDI signals over a local area network.

📢  Notes

NDI encoding and NDI decoding cannot be enabled simultaneously.

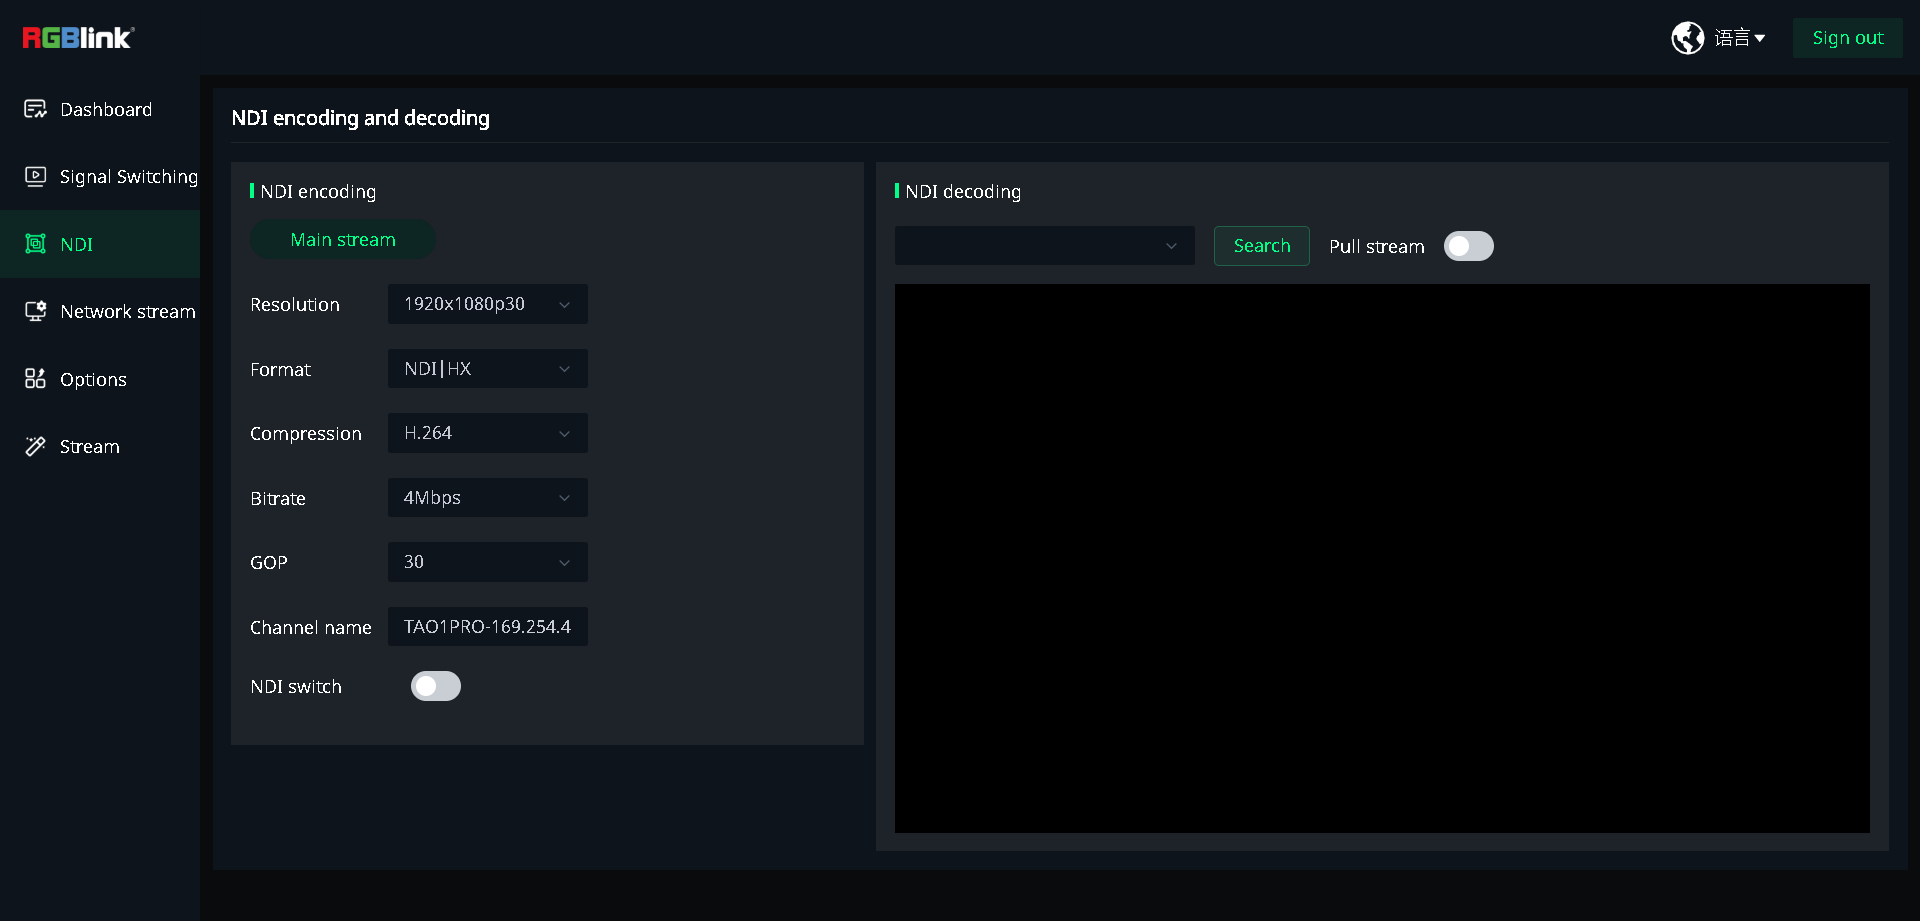
NDI Encoding

NDI encoding converts the video output of TAO 1pro 2 into an NDI signal and sends it over the network to other NDI devices or software.

  1. Enable NDI Switch.
  2. Select the parameters from the Resolution, Bitrate and GOP drop-down lists.
  3. Format defaults to NDI|HX, and Compression defaults to H.264.
  4. Save the settings.
📢  Notes

Channel name  is automatically assigned by the system and cannot be modified.

NDI Decoding

NDI decoding receives NDI video signals over the network and uses them as the NDI input source on TAO 1pro 2.

  1. Tap Search to search for available NDI sources.
  2. Select an NDI source from the drop-down list.
  3. Enable Pull stream.
  4. View the received NDI video on the screen.

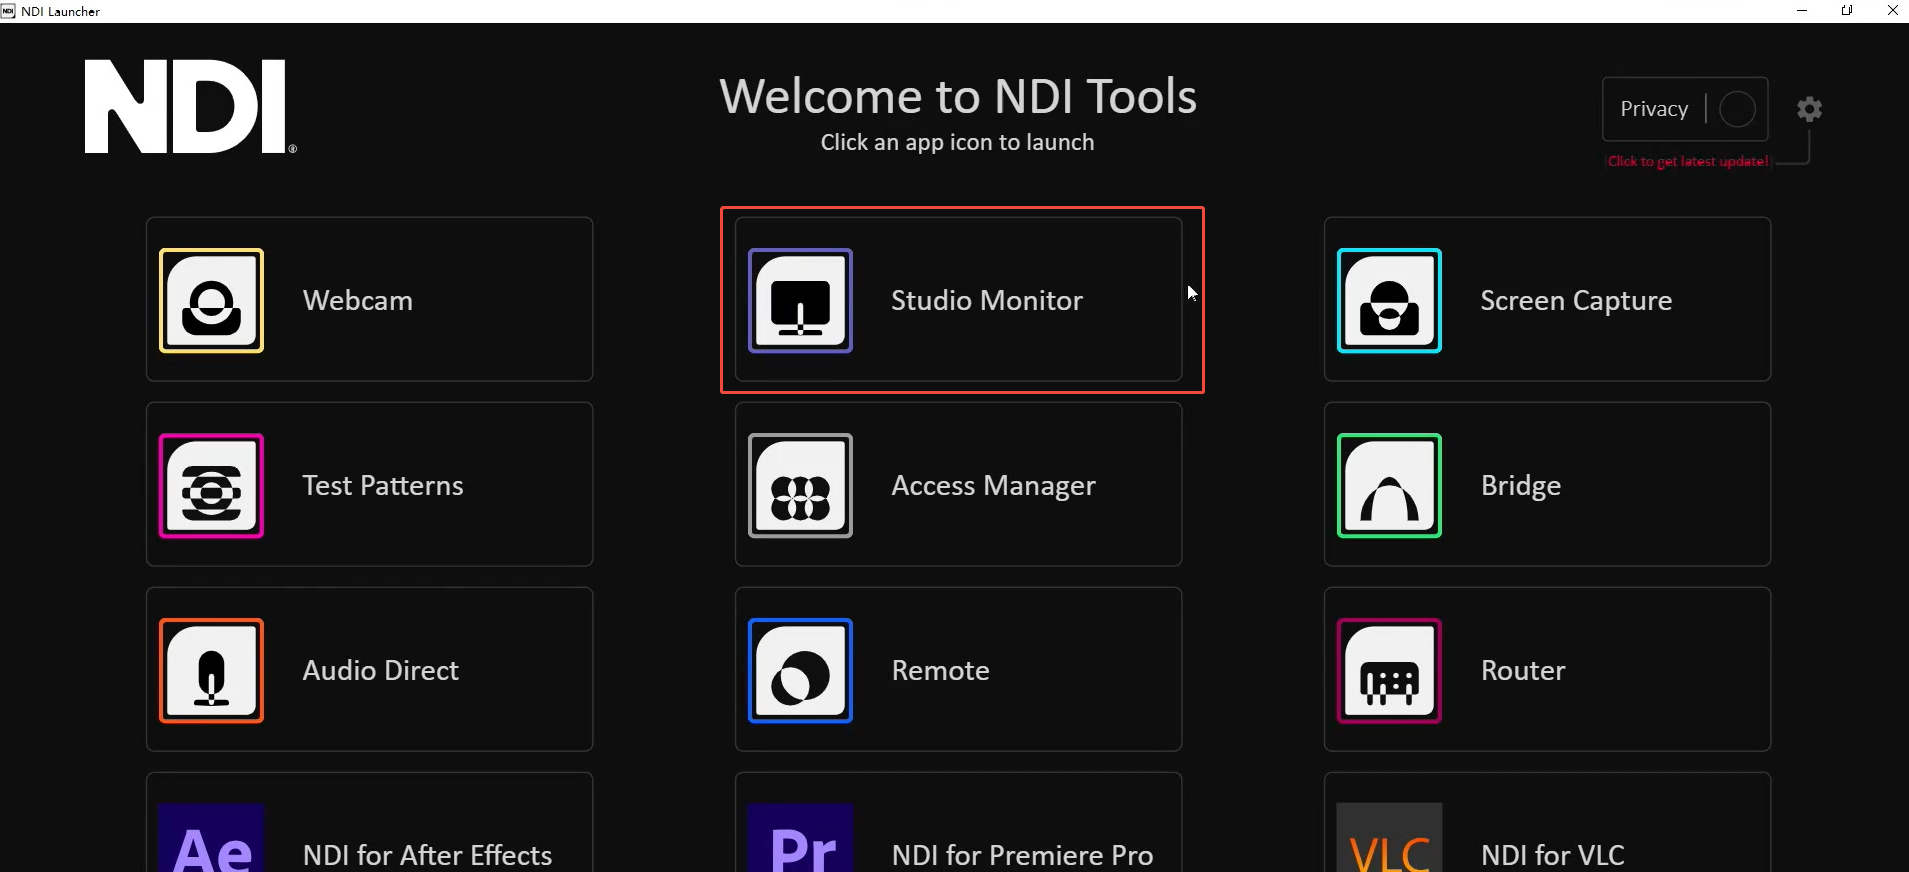
NDI Tools

To view or use the NDI signal sent by TAO 1pro 2 on a computer, use NDI Tools.

Procedure:

  1. Go to NDI – Removing the limits of video connectivity. to download and install NDI Tools.
  2. Connect the computer and TAO 1pro 2 to the same local area network.
  3. Enable NDI encoding on TAO 1pro 2.
  4. Open Studio Monitor in NDI Tools and select the TAO 1pro 2 NDI signal from the device list. The signal is named TAO1PRO-IP address.
  5. View the NDI video.

📢  Notes

NDI Tools is a third-party computer application. Its features and interface may vary depending on the software version.

3.2.4Network Stream

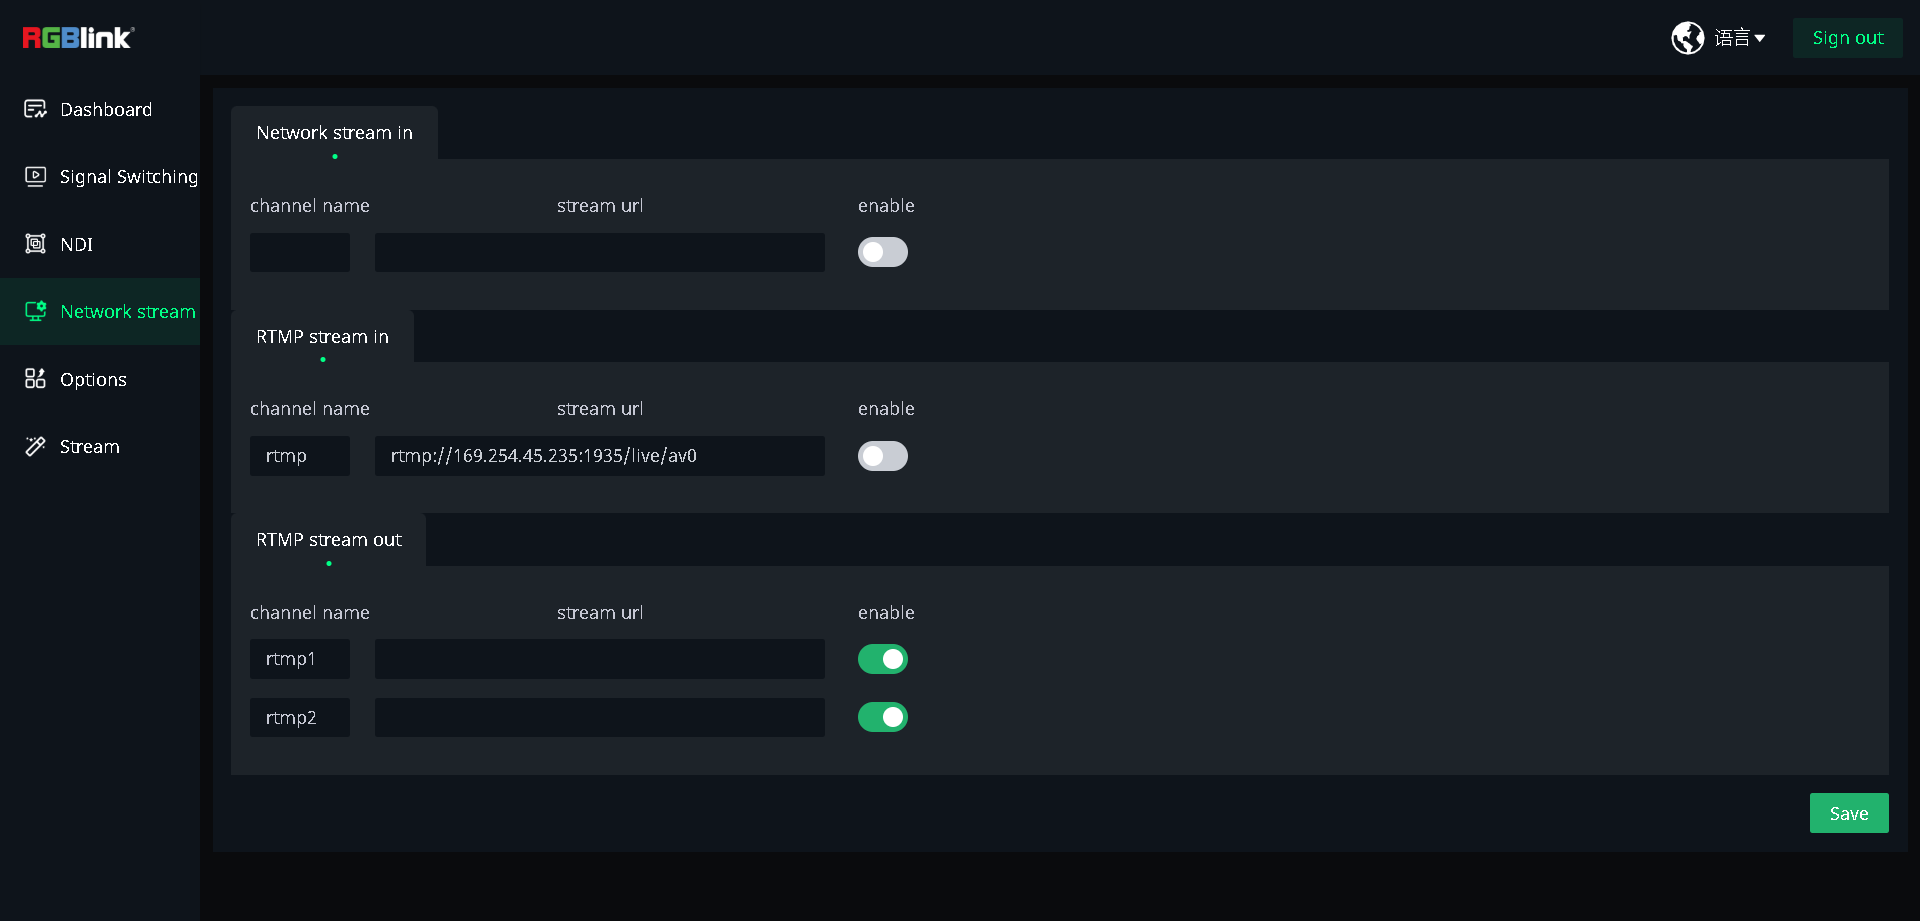
Network Stream is used to configure network video input and RTMP streaming output.

Input

TAO 1pro 2 supports RTSP/RTMP stream decoding for receiving video streams over the network and using them as the IP1 input source.

  1. Enter a channel name and enter the network or RTMP stream URL in stream url.
  2. Turn on the corresponding enable switch.
  3. Tap Save to apply the settings.

Output

TAO 1pro 2 supports RTMP streaming, with up to two different platforms or services supported per view.

🚨 Risk Warning

Do not share your stream key with anyone or display it during a live stream. Doing so may result in unauthorized account access, stream hijacking, or other potential risks and losses.

If your stream key is exposed:

1. Immediately reset the stream key on the corresponding platform.
2. Stop the current live stream.
3. Restart streaming using the new stream key.

  1. View Streaming to Live Platforms to check how to get stream key from other platforms.
  2. Enter the streaming URL provided by the platform in stream url for the corresponding RTMP output channel.
  3. Turn on the corresponding enable switch.
  4. Tap Save to apply the settings.
📢  Notes

RTMP streaming uses landscape orientation. No resolution setting is required, and the streaming bitrate is fixed at 4 Mbps.

After the device restarts, RTMP streaming is disabled by default. Enable ON AIR again to start streaming.

3.2.5Options

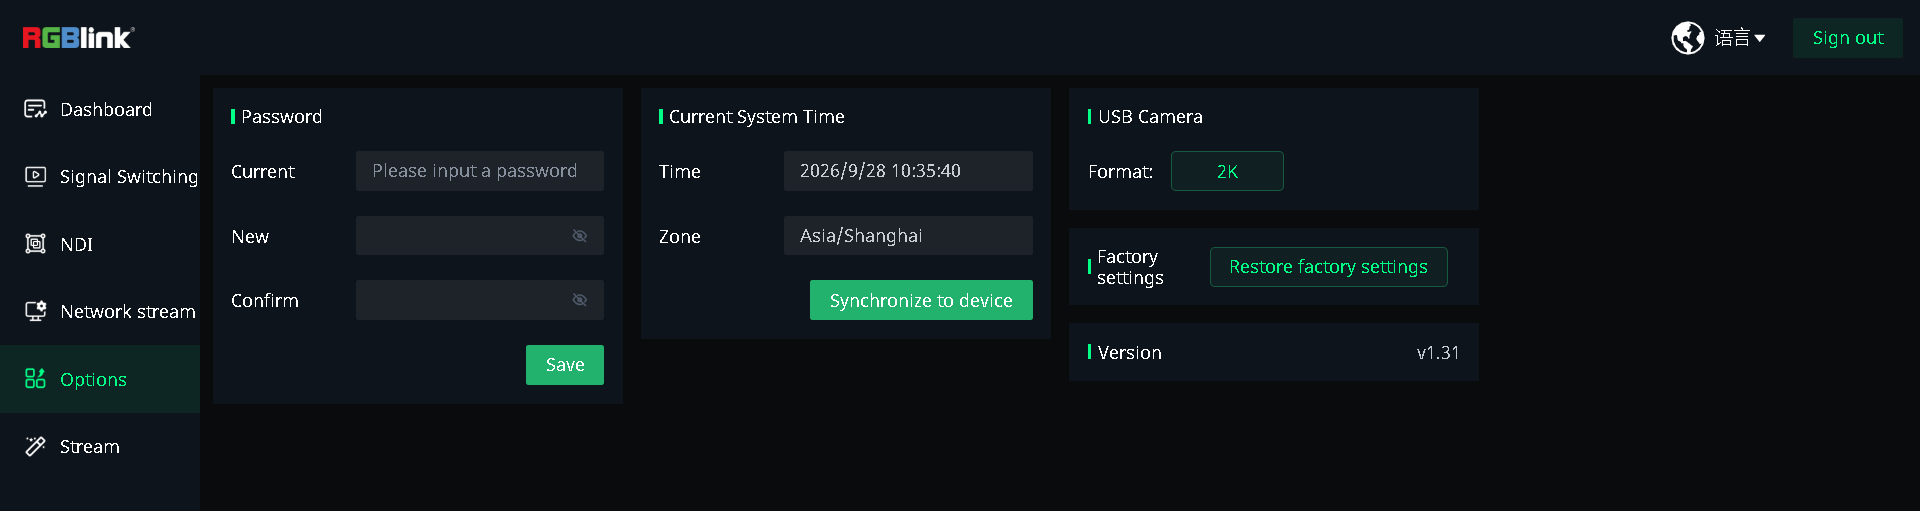
Options is used to set the device password and system time, configure the USB camera resolution, view the software version, and restore the device to factory settings.

Password Settings

Set the Web App login password.

  1. Enter the old password, new password, and confirmation password.
  2. Tap Save to apply the new password.

Current System Time

View the current system time and time zone, and synchronize the settings with the device.

USB Camera

The USB camera output resolution is 2K.

Factory Reset

Tap Restore factory settings to restore the device to factory settings.

🚨  Warning

A factory reset deletes all user configurations on the device. This operation cannot be undone.

Version

View the current software version of the device.

3.2.6Stream

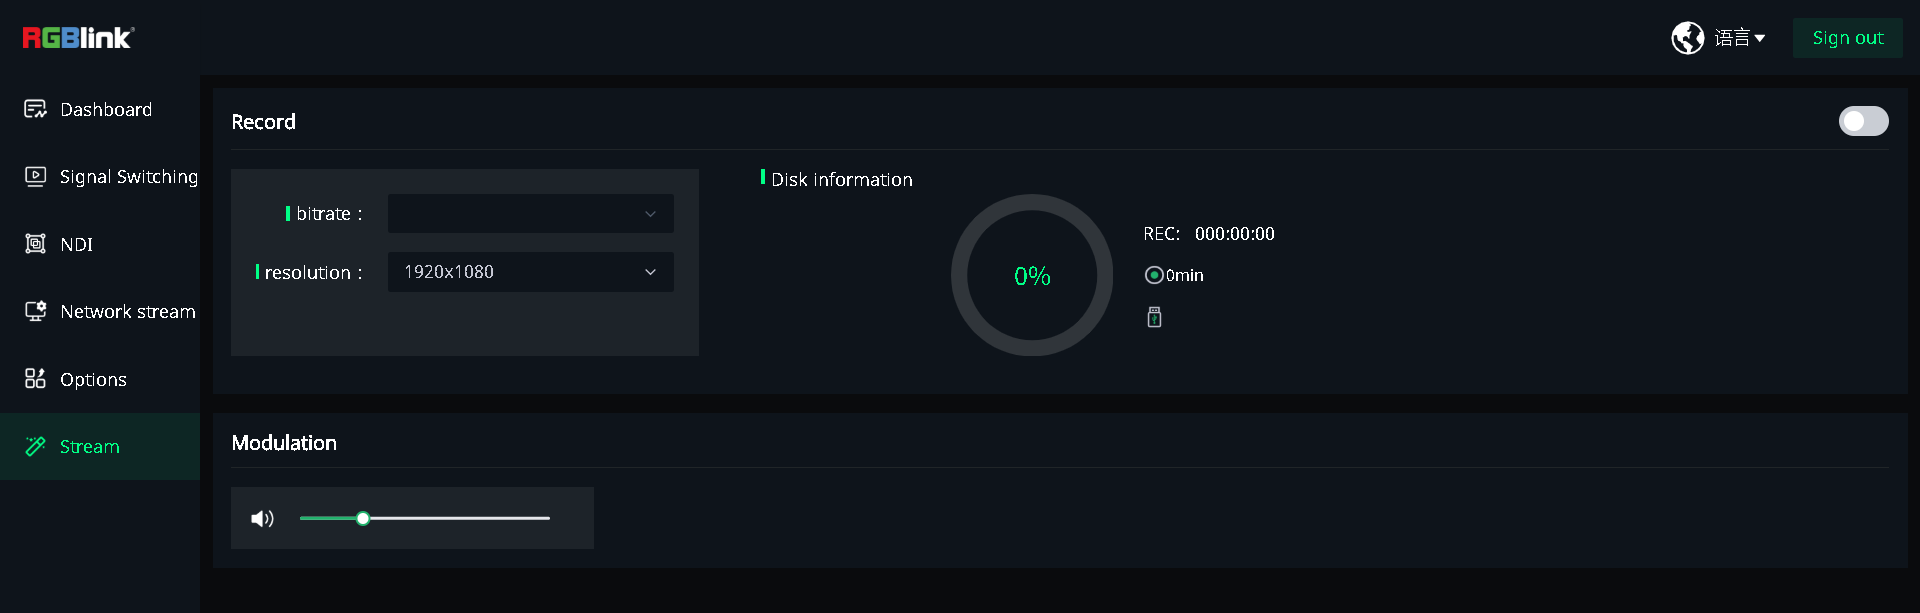
Stream is used to configure recording settings, view storage information, and adjust the output volume.

Record

The recording resolution and bitrate are fixed. Storage device information is displayed on the right.

  1. View the recording resolution under resolution.
  2. View the recording bitrate under bitrate.
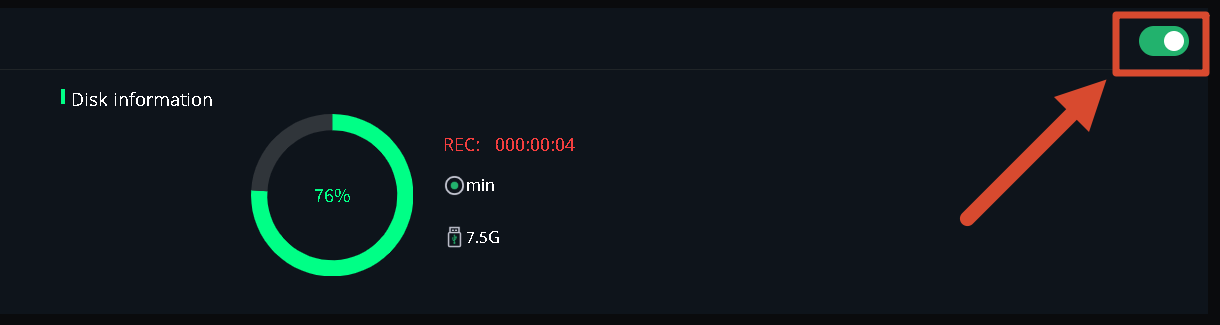
  3. View the available storage capacity and estimated recording time under Disk Information.
  4. Enable the recording switch in the upper-right corner to start recording. The RECORD button in the Selection Area on the device screen also turns red.

📢  Notes

Make sure a compatible storage device is connected before starting a recording.

Volume Adjustment

Drag the volume slider to adjust the output volume.

4Upgrade

TAO 1pro 2 supports software upgrades via a USB drive.

🔔  The latest version is V1.5.9_3.91_2.18.


⚠️  Notes

TAO 1pro does not support upgrading to the TAO 1pro 2 software via a USB drive. Do not use the TAO 1pro 2 upgrade package to upgrade a TAO 1pro device.

Preparing for the Upgrade

Go to the RGBlink official website and open the TAO 1pro 2 product page. Download the corresponding upgrade package from Downloads > XPOSE / TAO APP / Firmware.

📢  Notes

1. The USB drive must use the FAT32 file system.
2. Do not extract or rename the upgrade package.
3. Do not disconnect the power during the upgrade. Otherwise, the device may fail to start properly.

Upgrade Procedure

  1. Copy the upgrade file to the root directory of the USB drive.
  2. Insert the USB drive into the USB port labeled RECORD on the device.
  3. Go to Setting > About > Update.
  4. Select the target version, tap Upgrade, and tap Yes in the confirmation dialog to start the upgrade.
  5. The device displays "Upgrading. Do not turn off the power during the upgrade."
  6. Wait for the device to restart automatically.
  7. Go to Setting > About > Update again to view the software version.
  8. Confirm that the displayed version matches the target version.

Document image

5FAQ

Q: Recording stops automatically after it starts. What should I do?

A: Make sure the USB drive has been fully recognized by the device.

Before starting a recording, confirm that the USB drive icon in the status area is green. If the icon is gray, wait until the device finishes recognizing the USB drive.


Q: No recording file is found on the USB drive after recording. What should I do?

A: Make sure the device has finished recognizing the USB drive before starting the recording.

After a USB drive is connected, the device needs some time to recognize the files on the drive. Start recording only after the USB drive icon turns green.


Q: What video format and recording specifications does TAO 1pro 2 support?

A: TAO 1pro 2 records video in MP4 format at 1080p30, 8-bit.


Q: Can TAO 1pro 2 play back recorded videos?

A: TAO 1pro 2 does not currently support playback of recorded files on the device.


Q: What encoding methods does TAO 1pro 2 support?

A: TAO 1pro 2 supports RTMP streaming and NDI encoding. RTMP sends the device's video output as an RTMP stream to a streaming platform. NDI encoding converts the device's video output into an NDI signal and sends it over the network to other NDI devices or software.

NDI encoding and NDI decoding cannot be enabled simultaneously.


Q: What is the streaming latency of TAO 1pro 2?

A: The device-side streaming latency is typically less than 100 ms. For streaming over the Internet, actual latency also depends on the network environment, streaming platform, and transmission path.


Q: Why does the LCD screen or HDMI output become choppy during recording?

A: During recording, the preview frame rate on the LCD screen and HDMI output may decrease, while the recorded video remains at 1080p30. A lower preview frame rate does not affect the frame rate of the recorded file.


Q: Will using monitoring, recording, signal switching, NDI encoding, and streaming simultaneously affect each other?

A: When multiple functions are used simultaneously, the device adjusts preview performance based on available system resources. When recording or other resource-intensive functions are running, the preview frame rate on the LCD screen and HDMI output may decrease.


Q: Does the RTMP streaming URL of TAO 1pro 2 change?

A: The RTMP streaming URL is provided by the streaming platform. Whether it remains fixed depends on the platform's streaming settings.


Q: Can I change the input resolution directly after connecting an input signal?

A: TAO 1pro 2 has limitations on input signal detection. After changing the resolution of the source signal, restart the device to detect the input signal again. TAO 1pro 2 does not support EDID.


Q: What HDMI input signals does TAO 1pro 2 support?

A: TAO 1pro 2 supports 1080p50, 1080p60, and 720p HDMI input signals, including interlaced signals.

When using a computer as the HDMI input source, set its output resolution to 1080p50 or 1080p60.


Q: Does TAO 1pro 2 support signal failover?

A: TAO 1pro 2 does not currently support signal failover. If an input signal is lost, the corresponding video displays a black screen.


Q: The video is not displayed correctly when the HDMI output is connected to a 4K display. What should I do?

A: Make sure all input, output, and display devices are connected before powering on TAO 1pro 2. Do not disconnect or replace HDMI cables, input sources, or displays while the device is running.

If the issue persists, check the display's input resolution and aspect ratio settings.

6.Technical Support

Document image

7.Revision History

VersionDateDescriptionAuthor
V1.02026-09-28First release.ZYL

1.8Declarations

FCC/Warranty

Federal Communications Commission (FCC) Statement

This equipment has been tested and found to comply with the limits for a class A digital device, pursuant to Part 15 of the FCC rules. These limits are designed to provide reasonable protection against harmful interference when the equipment is operated in a commercial environment. This equipment generates, uses, and can radiate radio frequency energy and, if not installed and used in accordance with the instruction manual, may cause harmful interference to radio communications. Operation of this equipment in a residential area may cause harmful interference, in which case the user will be responsible for correcting any interference.
Guarantee and Compensation

RGBlink provides a guarantee relating to perfect manufacturing as part of the legally stipulated terms of guarantee. On receipt, the purchaser must immediately inspect all delivered goods for damage incurred during transport, as well as for material and manufacturing faults. RGBlink must be informed immediately in writing of any complains.

The period of guarantee begins on the date of transfer of risks, in the case of special systems and software on the date of commissioning, at latest 30 days after the transfer of risks. In the event of justified notice of compliant, RGBlink can repair the fault or provide a replacement at its own discretion within an appropriate period. If this measure proves to be impossible or unsuccessful, the purchaser can demand a reduction in the purchase price or cancellation of the contract. All other claims, in particular those relating to compensation for direct or indirect damage, and also damage attributed to the operation of software as well as to other service provided by RGBlink, being a component of the system or independent service, will be deemed invalid provided the damage is not proven to be attributed to the absence of properties guaranteed in writing or due to the intent or gross negligence or part of RGBlink.

If the purchaser or a third party carries out modifications or repairs on goods delivered by RGBlink, or if the goods are handled incorrectly, in particular if the systems are commissioned operated incorrectly or if, after the transfer of risks, the goods are subject to influences not agreed upon in the contract, all guarantee claims of the purchaser will be rendered invalid. Not included in the guarantee coverage are system failures which are attributed to programs or special electronic circuitry provided by the purchaser, e.g. interfaces. Normal wear as well as normal maintenance are not subject to the guarantee provided by RGBlink either.

The environmental conditions as well as the servicing and maintenance regulations specified in this manual must be complied with by the customer.

Operators Safety Summary

The general safety information in this summary is for operating personnel.

Do Not Remove Covers or Panels

There are no user-serviceable parts within the unit. Removal of the top cover will expose dangerous voltages. To avoid personal injury, do not remove the top cover. Do not operate the unit without the cover installed.

Power Source

This product is intended to operate from a power source that will not apply more than 230 volts rms between the supply conductors or between both supply conductor and ground. A protective ground connection by way of grounding conductor in the power cord is essential for safe operation.

Grounding the Product

This product is grounded through the grounding conductor of the power cord. To avoid electrical shock, plug the power cord into a properly wired receptacle before connecting to the product input or output terminals. A protective-ground connection by way of the grounding conductor in the power cord is essential for safe operation.

Use the Proper Power Cord

Use only the power cord and connector specified for your product. Use only a power cord that is in good condition. Refer cord and connector changes to qualified service personnel.

Use the Proper Fuse

To avoid fire hazard, use only the fuse having identical type, voltage rating, and current rating characteristics. Refer fuse replacement to qualified service personnel.

Do Not Operate in Explosive Atmospheres

To avoid explosion, do not operate this product in an explosive atmosphere.

Installation Safety Summary

Safety Precautions

For all product installation procedures, please observe the following important safety and handling rules to avoid damage to yourself and the equipment.

To protect users from electric shock, ensure that the chassis connects to earth via the ground wire provided in the AC power Cord.

The AC Socket-outlet should be installed near the equipment and be easily accessible.

Unpacking and Inspection

Before opening product shipping box, inspect it for damage. If you find any damage, notify the shipping carrier immediately for all claims adjustments. As you open the box, compare its contents against the packing slip. If you find any shortages, contact your sales representative.

Once you have removed all the components from their packaging and checked that all the listed components are present, visually inspect the system to ensure there was no damage during shipping. If there is damage, notify the shipping carrier immediately for all claims adjustments.

Site Preparation

The environment in which you install your product should be clean, properly lit, free from static, and have adequate power, ventilation, and space for all components.

About Us / Find Support

Xiamen RGBlink Science & Technology Co., Ltd. designs and manufactures professional video processing, switching, streaming and LED display control products for live events, broadcast, education and fixed installations.

Need help?

Choose one of the following support options:

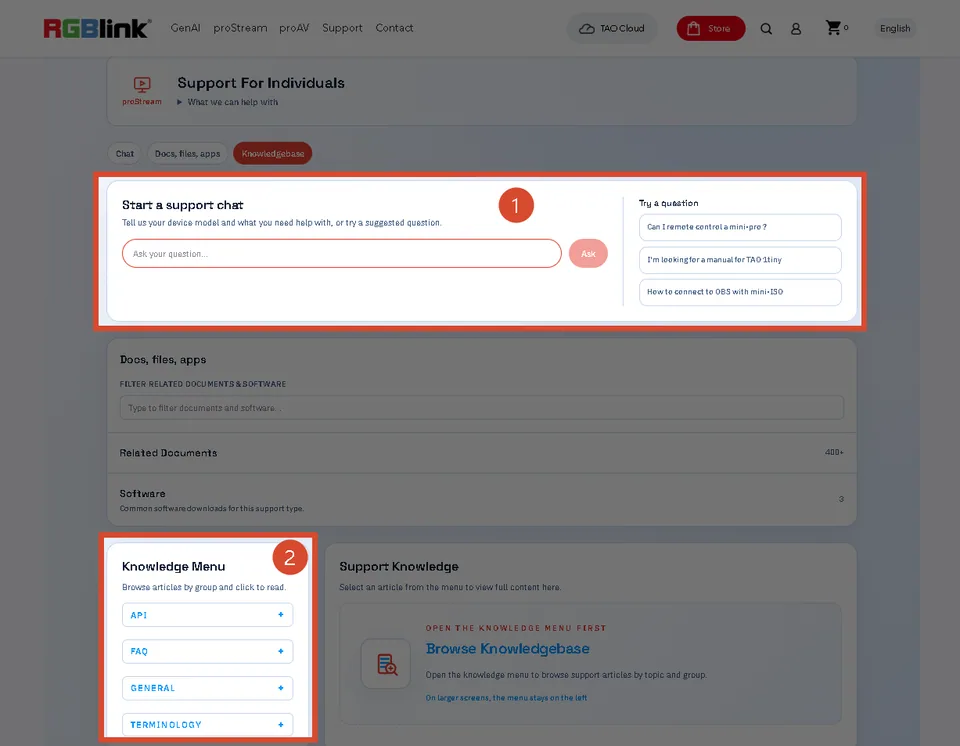
  • AI Support Search (Recommended): Visit Support > Support proStream/proAV/proEvents on the RGBlink official website and ask the RGBlink AI Bot for quick answers.
  • FAQs: Visit Support > Support proStream/proAV/proEvents on the RGBlink official website and browse Knowledge Menu > FAQ.
  • Contact Technical Support: Visit the Technical Support page of this manual or the RGBlink official website for our contact details.

Document image

RGBlink

www.rgblink.com

© Copyright Xiamen RGBlink Science & Technology Co Ltd