Export PDF

RGBlink
tinyZ

User Manual

tinyZ

981-0011-81-1

RGBlink

www.rgblink.com

November 2026

1tinyZ-Specifications

Document image

Interface

ItemDescription
USB 2.01 × Type-C
Tripod Screw HoleISO 1222 1/4 inch screw
CableUSB 2.0 C to C / 1.5m*1
Privacy CoverN/A (Privacy Mode)

Performance

ItemDescription
Sensor Type1/2.55'' SONY Sensor
Diagonal Field of ViewFoV(H): 73° (EFL:25mm) FoV(D): 78°
Digital Zoom1.5X (Disabled at 4K/1080P@60fps)
LensImaging lens: 5P AI lens: 6P
ApertureF1.8 (imaging)
Focus ModeAuto Focus + AI Tracking
Focus Distance10-300cm
ResolutionMJPEG (Default): 3840×2160@30fps (4K, default, no zoom), 2560×1440@30fps, 1920×1080@30/60fps (no zoom @60fps), 1280×960@30fps, 1280×720@30/60fps, 1024×576@30/60fps, 960×720@30fps, 800×600@30fps, 640×480@30fps, 640×360@30/60fps
YUY: 640480@30FPS, 640360@30FPS
Gimbal - HorizontalManual: 310° Motorized: 300° (Non-detachable)
Gimbal - VerticalManual: 180° Motorized: 180° (Non-detachable)
Gimbal Rotation SpeedTracking (max): 100°/s Fine-tuning (min): 60°/s
AudioMicrophones: 3-mic array
Frequency Response: 100-10KHz
Noise Reduction Algorithm: YES ( Live Streaming/Original/Noise Cancellation Mode)
Call Distance: 8ft (recommended)
Video FormatYUY2 / MJPEG

Compatibility

ItemDescription
Hardware2.4 GHz Intel® Core 2 Duo processor or higher 2 GB RAM or higher USB 2.0 port
SystemWindows (Win10 and above; 64-bit only), macOS (10.14 and above). With USB port, works in USB video device class (UVC) mode,Linux
SoftwareDomestic: DouYu, HuYa, YY Live, Kuaishou, Douyin, OBS; Overseas: OBS, Twitch, YouTube, Facebook, XSplit, ManyCam

Power

ItemDescription
Input Voltage5V
Input Current500mA
Power Consumption2W

Working Environment

ItemDescription
Operating Temperature0°C ~ 40°C
Storage Temperature-10°C ~ 65°C

Physical

ItemDescription
WeightNet Dimension53 × 53 × 73mm ±1mm
Package Dimension144 × 72 × 93mm
DimensionNet Weight120±5g
Package Weight325.5±5g
PackingPacking Quantity40pcs / CAR
Outer Box Dimensions395 × 390 × 310mm ±5mm
Outer Box Gross Weight14.13 kg±0.5kg

Order Codes

Product CodeItem
981-0011-81-1tinyZ

1.1Revision History

VersionDateDescriptionAuthor
V1.02025-09-15First release.Alyssa
V1.12026-04-21Update partial specifications.Alyn

2tinyZ-Quick Start

Welcome to the Quick Start Guide.

Follow the steps in this guide to quickly set up your device and get started.

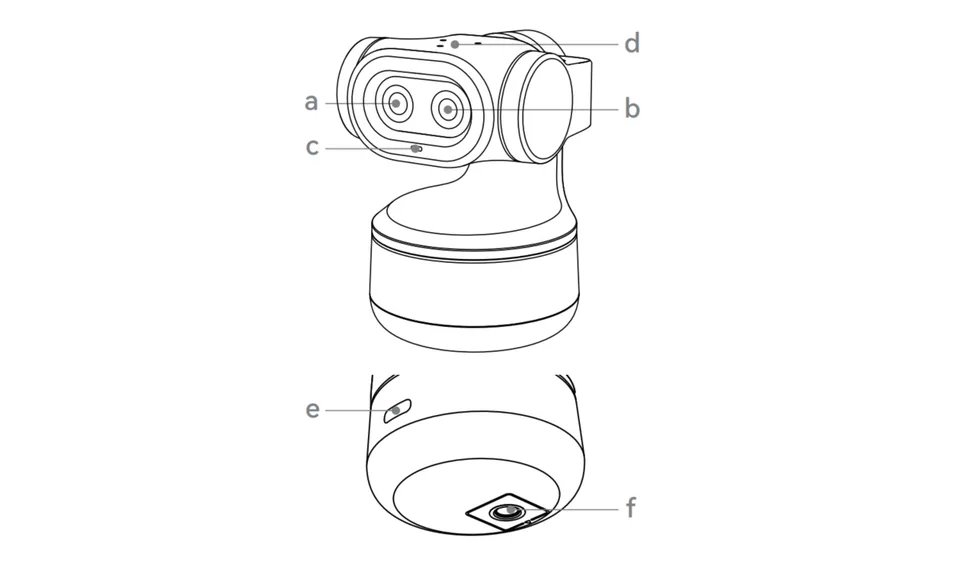
2.1Parts Info

Document image

No.Description
a4K Ultra HD Imaging Camera
bAI-Assisted Camera
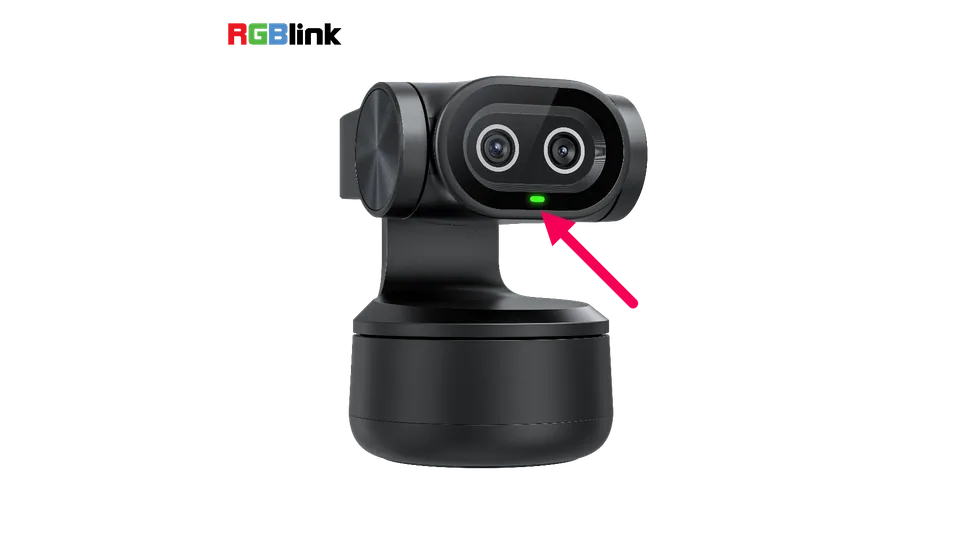
cIndicator Light
d3-Microphone Array
eUSB-C Port
fUNC 1/4-20 Threaded Hole

2.2Bracket

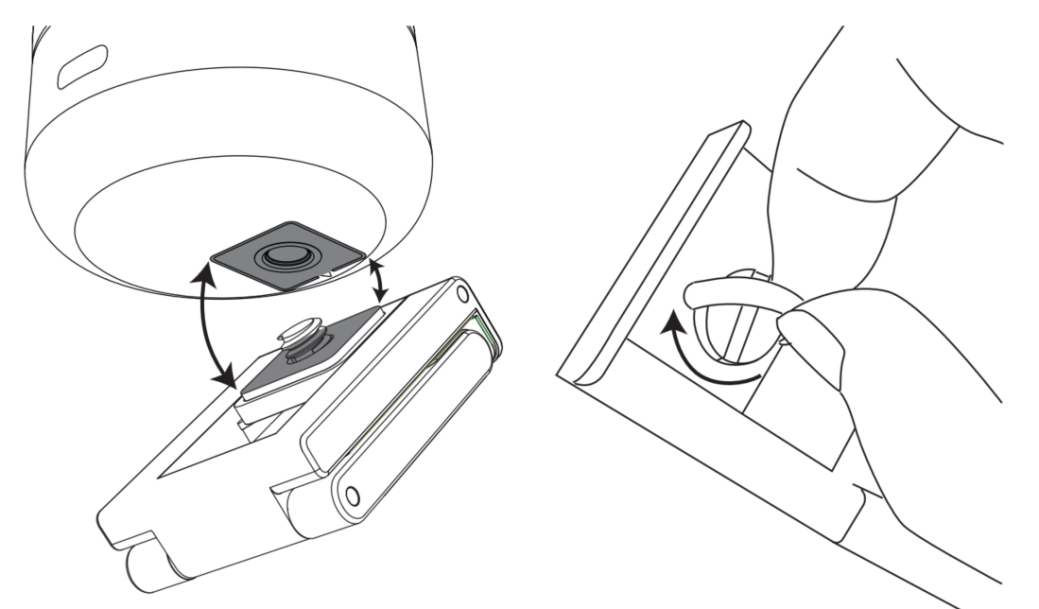
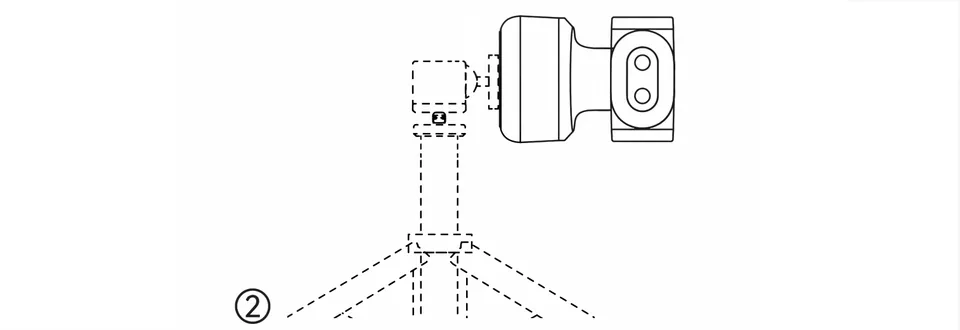
Refer to the illustration below.

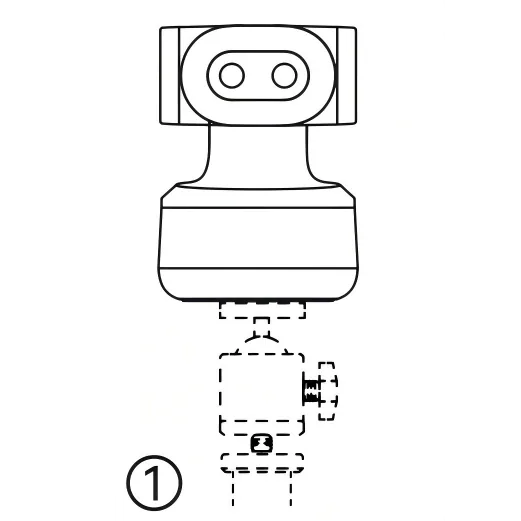
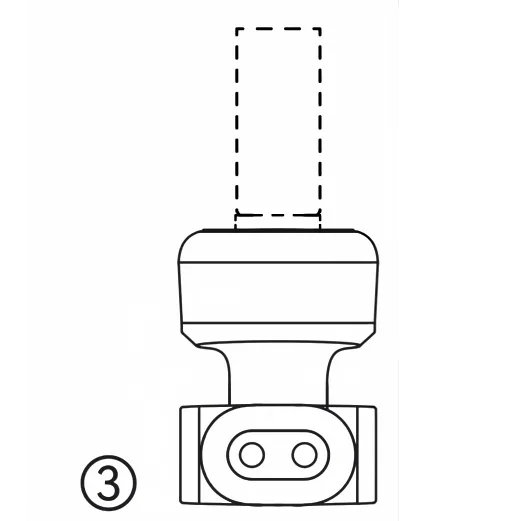
Align the bracket with the bottom positioning marks, then secure it in place.

2.3Connection

  • Connect the device to a computer using the included USB cable to output video.
    For optimal performance, select a resolution of 3840 × 2160 on your computer.
  • The tinyZ video stream can be accessed via OBS, Zoom, Microsoft Teams, Google Meet, TikTok Live Studio, or other live streaming platforms.
📢 Notes

To avoid compatibility issues, always use the included USB cable when connecting to a computer.

Slight device warming during extended camera operation is normal. 

2.4How to Use

Operating Mode

Standard Mode

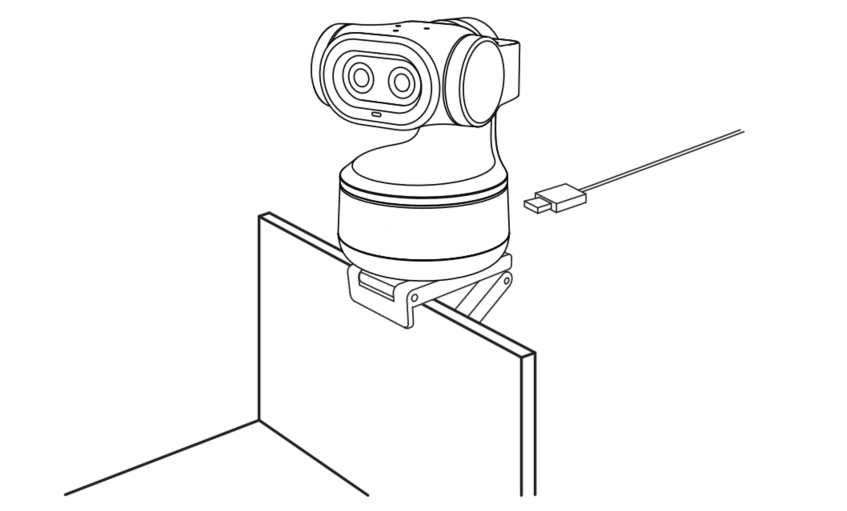
Place the camera on a flat surface after connecting it to a computer.
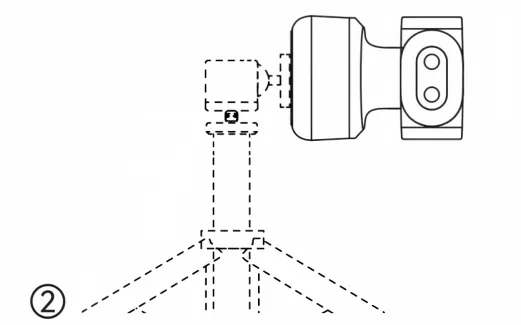
Alternatively, mount it on top of a monitor using a bracket (as shown below).
For bracket assembly instructions, refer to section Bracket.

Tracking Mode

With gesture tracking enabled, the camera automatically follows subject movement.

Privacy Mode

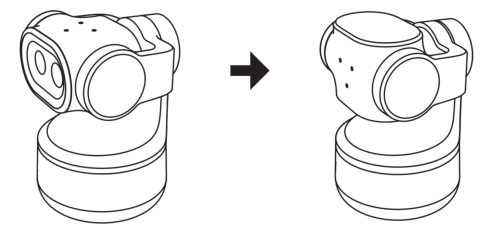
Manually tilt the gimbal downward until the indicator light turns off.
The device will then enter Privacy Mode.

Gesture Control

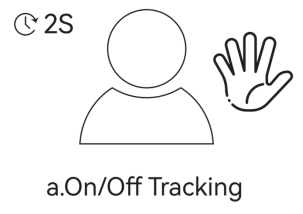
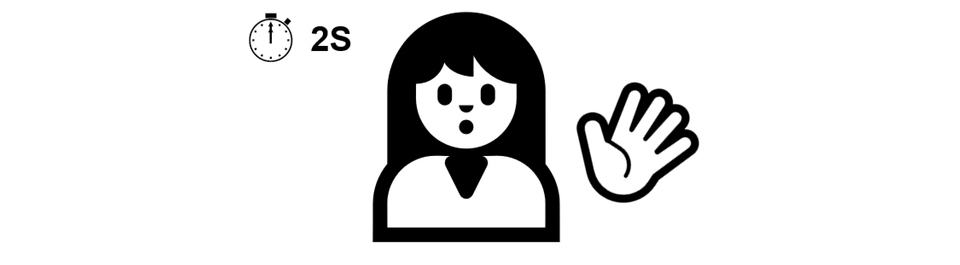
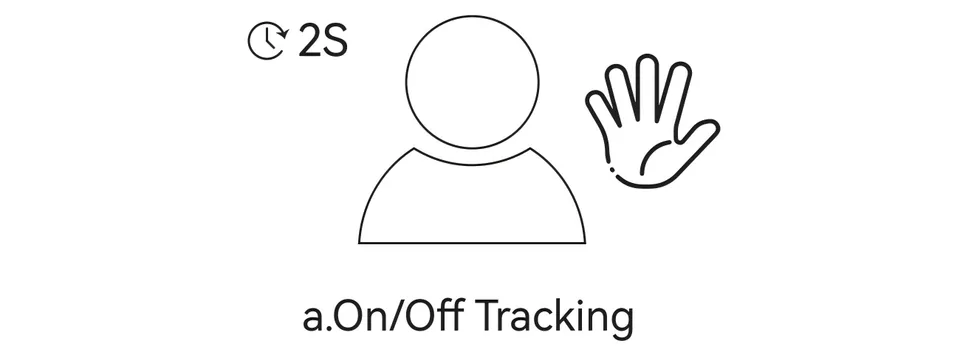
Hold the gesture for 2 seconds for recognition.

Enable / Exit Tracking Mode

  • As shown in Figure a, perform the gesture. When the green indicator flashes blue twice and then turns solid blue, tracking mode is successfully enabled.
  • Perform the same gesture again to exit tracking mode. The indicator returns to solid green.

📢 Notes

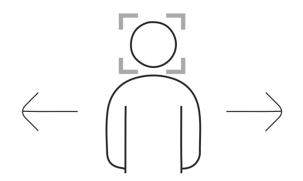
  • Keep the subject centered in the frame during gesture recognition.

Document image

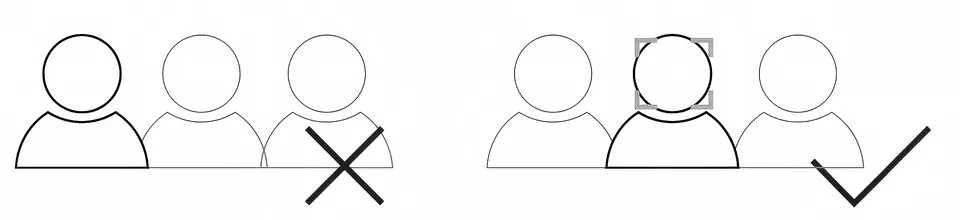
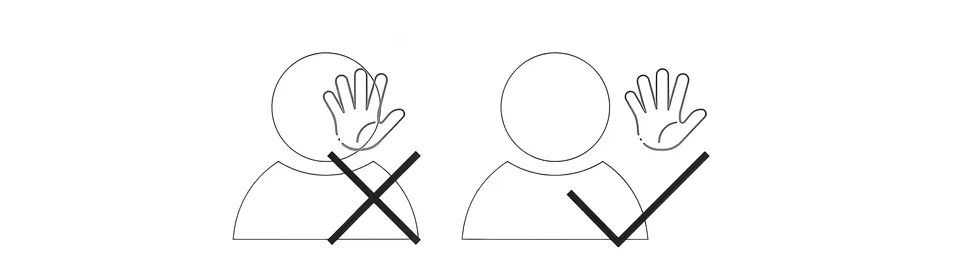
  • Do not cover your face when performing gestures.

Document image

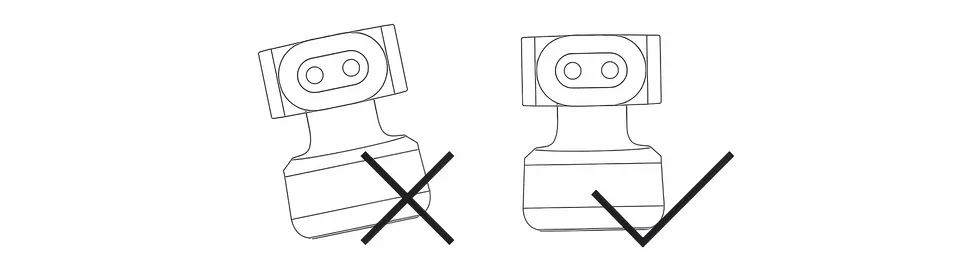
  • Always position the camera upright. Do not tilt the device.

Document image

👁‍🗨 Shooting Mode

OrientationPicture
Landscape ModeUse the camera normally after standard installation.Document image
Portrait ModeMount the camera horizontally using an external accessory to enable portrait orientation.Document image
Ceiling Mount ModeThe camera supports upside-down mounting. The image automatically adjusts.Document image

🚥 Indicator Light Status

Device StatusIndicator
Normal ModeSolid Green
Tracking ModeSolid Blue
Privacy ModeLight Off
Gesture RecognitionBlue Flashes Twice
Target LostSolid Yellow
Firmware UpdateSolid Red
Device ErrorFlashing Red

2.5Revision History

VersionDateDescriptionAuthor
V1.02025-09-22First release.Alyssa
V1.12026-04-21Content migration to yuque. Translation optimization.Alyn

3tinyZ-User Manual

Thank you for choosing RGBlink tinyZ.

This manual provides information on the device features, installation and operation.

Before using the device for the first time, please read this manual carefully to ensure safe and proper use of the product.

3.1Declarations

FCC/Warranty

Federal Communications Commission (FCC) Statement

This equipment has been tested and found to comply with the limits for a class A digital device, pursuant to Part 15 of the FCC rules. These limits are designed to provide reasonable protection against harmful interference when the equipment is operated in a commercial environment. This equipment generates, uses, and can radiate radio frequency energy and, if not installed and used in accordance with the instruction manual, may cause harmful interference to radio communications. Operation of this equipment in a residential area may cause harmful interference, in which case the user will be responsible for correcting any interference.

Guarantee and Compensation

RGBlink provides a guarantee relating to perfect manufacturing as part of the legally stipulated terms of guarantee. On receipt, the purchaser must immediately inspect all delivered goods for damage incurred during transport, as well as for material and manufacturing faults. RGBlink must be informed immediately in writing of any complains.

The period of guarantee begins on the date of transfer of risks, in the case of special systems and software on the date of commissioning, at latest 30 days after the transfer of risks. In the event of justified notice of compliant, RGBlink can repair the fault or provide a replacement at its own discretion within an appropriate period. If this measure proves to be impossible or unsuccessful, the purchaser can demand a reduction in the purchase price or cancellation of the contract. All other claims, in particular those relating to compensation for direct or indirect damage, and also damage attributed to the operation of software as well as to other service provided by RGBlink, being a component of the system or independent service, will be deemed invalid provided the damage is not proven to be attributed to the absence of properties guaranteed in writing or due to the intent or gross negligence or part of RGBlink.

If the purchaser or a third party carries out modifications or repairs on goods delivered by RGBlink, or if the goods are handled incorrectly, in particular if the systems are commissioned operated incorrectly or if, after the transfer of risks, the goods are subject to influences not agreed upon in the contract, all guarantee claims of the purchaser will be rendered invalid. Not included in the guarantee coverage are system failures which are attributed to programs or special electronic circuitry provided by the purchaser, e.g. interfaces. Normal wear as well as normal maintenance are not subject to the guarantee provided by RGBlink either.

The environmental conditions as well as the servicing and maintenance regulations specified in this manual must be complied with by the customer.

Operators Safety Summary

The general safety information in this summary is for operating personnel.

Do Not Remove Covers or Panels

There are no user-serviceable parts within the unit. Removal of the top cover will expose dangerous voltages. To avoid personal injury, do not remove the top cover. Do not operate the unit without the cover installed.

Power Source

This product is intended to operate from a power source that will not apply more than 230 volts rms between the supply conductors or between both supply conductor and ground. A protective ground connection by way of grounding conductor in the power cord is essential for safe operation.

Grounding the Product

This product is grounded through the grounding conductor of the power cord. To avoid electrical shock, plug the power cord into a properly wired receptacle before connecting to the product input or output terminals. A protective-ground connection by way of the grounding conductor in the power cord is essential for safe operation.

Use the Proper Power Cord

Use only the power cord and connector specified for your product. Use only a power cord that is in good condition. Refer cord and connector changes to qualified service personnel.

Use the Proper Fuse

To avoid fire hazard, use only the fuse having identical type, voltage rating, and current rating characteristics. Refer fuse replacement to qualified service personnel.

Do Not Operate in Explosive Atmospheres

To avoid explosion, do not operate this product in an explosive atmosphere.

Installation Safety Summary

Safety Precautions

For all product installation procedures, please observe the following important safety and handling rules to avoid damage to yourself and the equipment.

To protect users from electric shock, ensure that the chassis connects to earth via the ground wire provided in the AC power Cord.

The AC Socket-outlet should be installed near the equipment and be easily accessible.

Unpacking and Inspection

Before opening product shipping box, inspect it for damage. If you find any damage, notify the shipping carrier immediately for all claims adjustments. As you open the box, compare its contents against the packing slip. If you find any shortages, contact your sales representative.

Once you have removed all the components from their packaging and checked that all the listed components are present, visually inspect the system to ensure there was no damage during shipping. If there is damage, notify the shipping carrier immediately for all claims adjustments.

Site Preparation

The environment in which you install your product should be clean, properly lit, free from static, and have adequate power, ventilation, and space for all components.

3.21. About Your Product

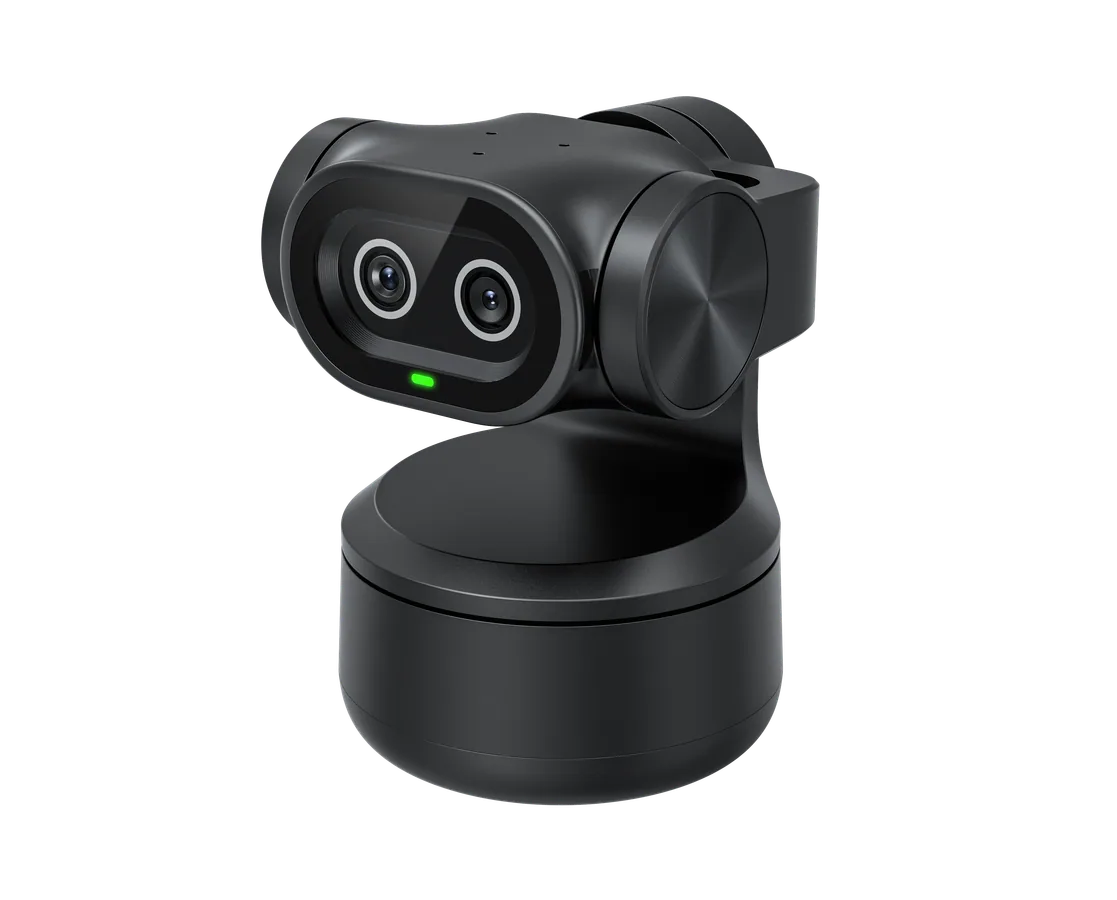
Meet tinyZ

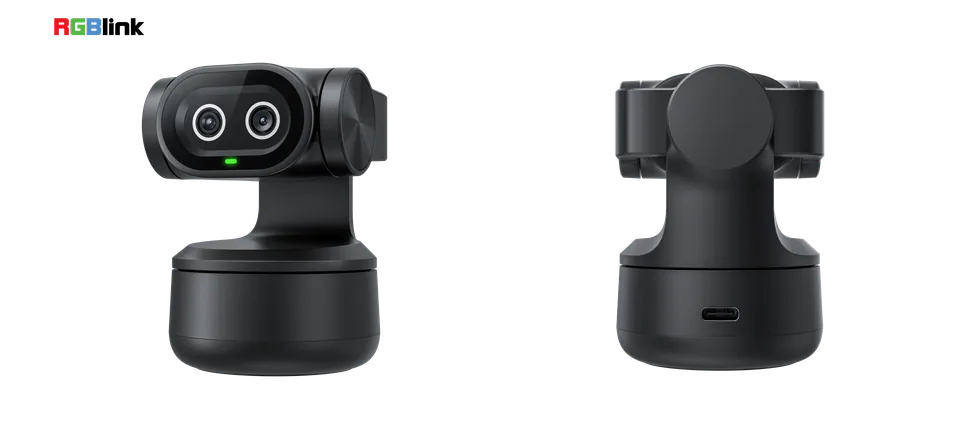
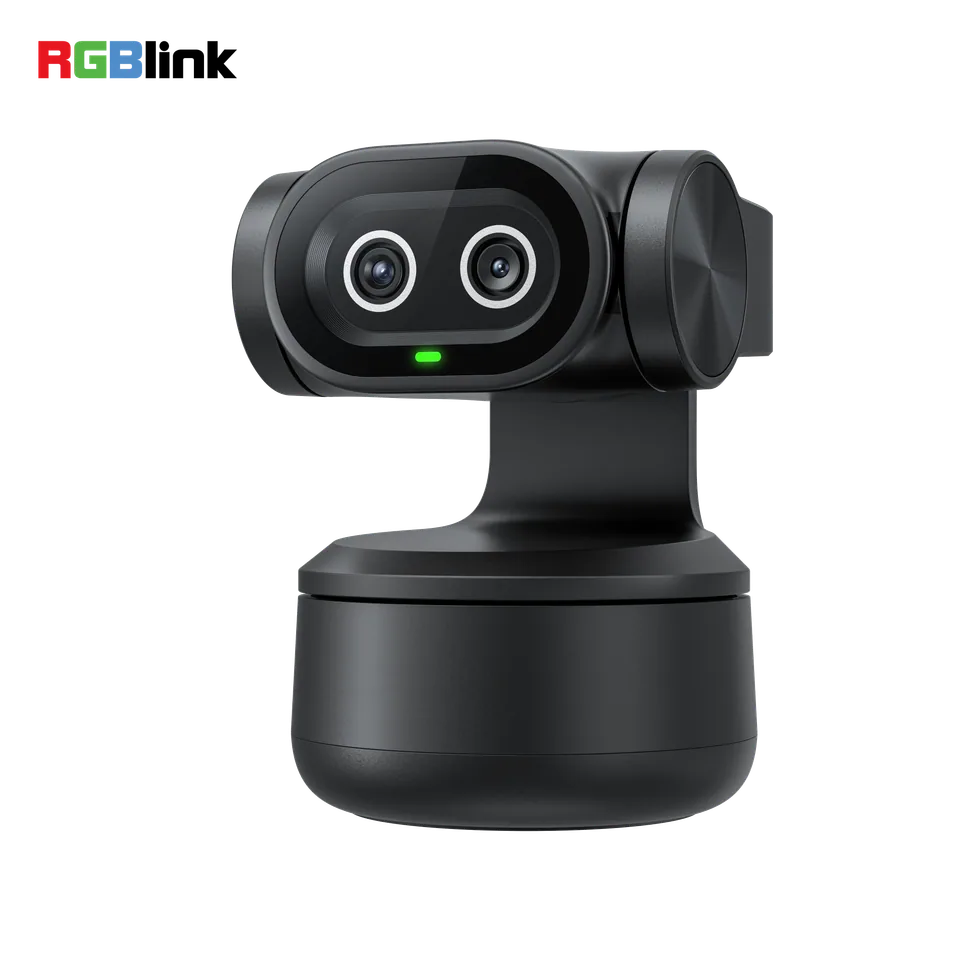
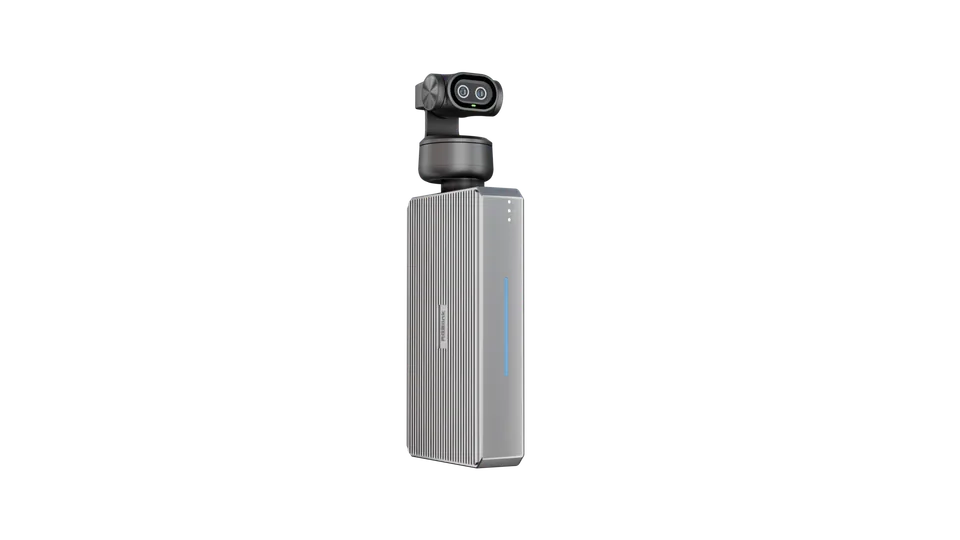
tinyZ is a 4K AI-powered camera developed by RGBlink.

Featuring a built-in microphone array and an AI-assisted lens, tinyZ supports automatic subject tracking, gesture control, and multiple shooting modes to deliver a flexible and intelligent video capture experience.

When paired with streamZ, tinyZ helps users build an integrated live-streaming workstation, simplifying video capture and enabling more efficient live production.

Key Features

  • 4K AI-Powered Imaging
  • Automatic Subject Tracking
  • Gesture Control Supported
  • Multiple Shooting Modes
  • Built-in Microphone Array
  • F1.8 Aperture
  • 12 MP Sony Sensor
  • Responsive Pan-and-Tilt Movement
  • AF and AI Autofocus

3.2.11.1 In the Box

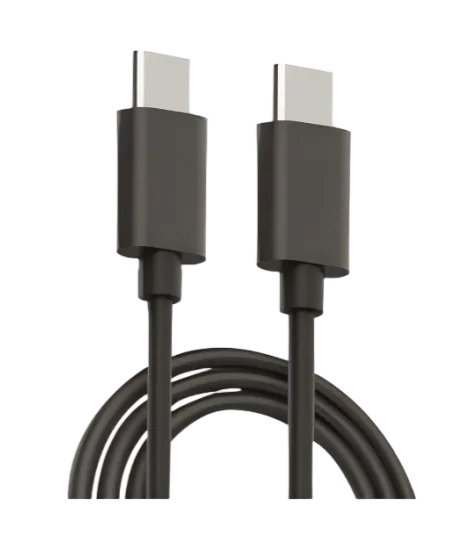
tinyZ DeviceUSB-C Cable
Document imageDocument image

3.2.21.2 Ports Info

Document image

No.Description
a4K Ultra HD Imaging Camera
bAI-Assisted Camera
cIndicator Light
d3-Microphone Array
eUSB-C Port
fUNC 1/4-20 Threaded Hole

3.2.31.3 Status Indicators

Document image

Device StatusIndicator
Normal ModeSolid Green
Tracking ModeSolid Blue
Privacy ModeLight Off
Gesture RecognitionBlue Flashes Twice
Target LostSolid Yellow
Firmware UpdateSolid Red
Device ErrorFlashing Red

3.32. Install Your Product

Mounting tinyZ

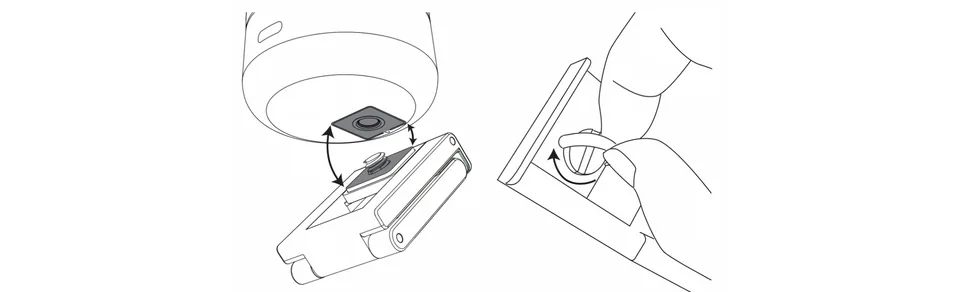
The bottom of tinyZ features a UNC 1/4"-20 threaded mount.

Before mounting, align the markings on the bottom of tinyZ with the corresponding mounting position.

Ensure that tinyZ is securely attached before connecting any cables.

Users can use a 1/4" mounting adapter to secure tinyZ to either the left or right 1/4" mounting screw on the streamZ unit. Document image 🔔 Learn more about streamZ
Visit streamZ product page on the official RGBlink website.

📢  Notes 
tinyZ physically rotates during operation. 
Ensure sufficient clearance around the camera for its full range of rotation to prevent collisions and potential damage.

Connecting the Cable

Use the supplied USB cable to connect the USB-C port on tinyZ to the USB-C port on a device such as streamZ or computer.

We recommend using a USB hub or docking station to avoid occupying a USB port on streamZ.

📢  Notes 
Using a non-standard cable may cause compatibility issues.
📢  Notes 
The camera may become slightly warm during extended operation. This is normal.

3.43. Use Your Product

Once installation and setup are complete, refer to this chapter for operating instructions.

The interfaces, images, and illustrations in this chapter are for reference only. Actual displays may vary by version. Please refer to the actual interface on your device.

3.4.13.1 Operating Mode

tinyZ supports three operating modes: Standard Mode, Tracking Mode, and Privacy Mode.

3.1.1 Standard Mode

Place tinyZ on a flat, stable surface after connecting it to a computer/streamZ.

Alternatively, align the bracket with the bottom positioning marks, then secure it in place.

Refer to the illustration below.

Document image

Then mount the camera on top of a monitor using a compatible bracket.

3.1.2 Tracking Mode

When gesture tracking is enabled, tinyZ automatically follows the subject's movements to keep the subject in frame.

Refer to chapter 3.2 Gesture Control for instructions on enabling or exiting Tracking Mode.

3.1.3 Privacy Mode

Manually tilt the gimbal downward until the indicator light turns off.

tinyZ then enters Privacy Mode.

3.4.23.2 Gesture Control

Hold each supported gesture for 2 seconds to allow the camera to recognize it.

Enable or Exit Tracking Mode

  1. Perform the gesture shown in the illustration below to enable Tracking Mode.
  2. The indicator flashes twice and then turns solid blue, indicating that Tracking Mode is enabled.
  3. To exit Tracking Mode, perform the same gesture again. The indicator returns to solid green.

Document image

Tips for gesture recognition

  • Keep the subject centered in the frame while performing gestures. Document image
  • Keep your face unobstructed during gesture recognition. Document image
  • Keep the camera upright. Do not tilt the device. Document image

3.4.33.3 Shooting Mode

tinyZ supports landscape, portrait, and ceiling-mounted orientations.

Select the appropriate mounting method according to your shooting setup.

Landscape Mode

Install the camera in its standard upright position.

Use the camera normally after completing installation. Document image

Portrait Mode

Mount the camera horizontally using a compatible external accessory to enable portrait orientation.

Ensure that the camera is securely mounted before use.

Document image

Ceiling Mount Mode

tinyZ supports upside-down mounting.

The image automatically adjusts to the inverted mounting orientation, allowing the camera to capture video when installed upside down.

Document image

3.4.43.4 streamZ + tinyZ Solution

Document image 🔔 Learn more about streamZ
Visit streamZ product page on the official RGBlink website.

3.4.1 Using tinyZ in the streamZ Web Interface

Once connected to streamZ, tinyZ is recognized as a UVC video input.

Follow these steps to add it to a live-streaming room preset.

  1. Navigate to My LIVE > Studio, go to Add Materials > Real-time Video and select UVC Input 1 or UVC Input 2 to add the tinyZ feed to the current scene.

  2. Click Apply in the upper-right corner to apply the changes.

  3. Select the UVC input assigned to tinyZ to access the FOV (Field of View) settings panel on the right.

  4. You can switch between Auto Cruise, View Adjustment, and AI tracking directly from the web interface.

🚨 Important

  • When connected to streamZ, tinyZ defaults to Auto Cruise mode.

  • To use gesture control to enable AI tracking mode, first switch to View Adjustment or select AI tracking directly in the web interface.

  • Avoid sending conflicting commands simultaneously, as this may disrupt camera operation or damage the device.

📢  Notes

tinyZ supports UVC input resolutions up to 4K\@30fps. 

Zoom In/Out via streamZ is unavailable when the input resolution exceeds 1080P\@30fps.

For more information about the FOV settings, please refer to streamZ User Manual, chapter FOV Mode

3.4.2 Operating tinyZ

After connecting tinyZ to streamZ, you can control it through the FOV settings panel in the web interface or by using gesture control.

Gesture control tips

  • Hold the gesture for 2 seconds to allow recognition.
  • Keep tinyZ upright and avoid tilting the device.
  • Keep the subject centered in the frame.
  • Do not cover your face when performing gestures.

Document image

Operating Modes

Standard Mode

tinyZ starts in Standard Mode when powered on, with the indicator solid green.

When connected to streamZ, it defaults to Auto Cruise mode.

Tracking Mode

Perform the supported gesture to enable AI Tracking.

The indicator flashes blue twice and then turns solid blue.

Perform the same gesture again to exit Tracking Mode; the indicator returns to solid green.

Privacy Mode

Manually tilt the gimbal downward until the indicator turns off. The camera stops capturing video.

Return the gimbal to its normal position to resume operation.

Privacy Mode can only be activated through physical operation, not through the web interface.

3.4.3 Recommended Use Cases

  • E-commerce and Product Live Streaming

    Use tinyZ as the host camera and an HDMI-connected camera for product demonstrations.

    Switch between the two camera angles using streamZ.

  • IRL/Solo Live Streaming

    Mount tinyZ on streamZ to automatically track the host during a live stream, enabling one-person operation without a dedicated camera operator.

  • Trade Shows and Outdoor Presentations

    Use tinyZ to track a moving presenter while mirroring presentation content from a mobile device.

    Manage both video sources through streamZ.

3.54. Revision History

VersionDateDescriptionAuthor
V1.02026-10-28First release.ZYL

3.65. Technical Support

About Us / Find Support

Xiamen RGBlink Science & Technology Co., Ltd. designs and manufactures professional video processing, switching, streaming and LED display control products for live events, broadcast, education and fixed installations.

Need help?

Choose one of the following support options:

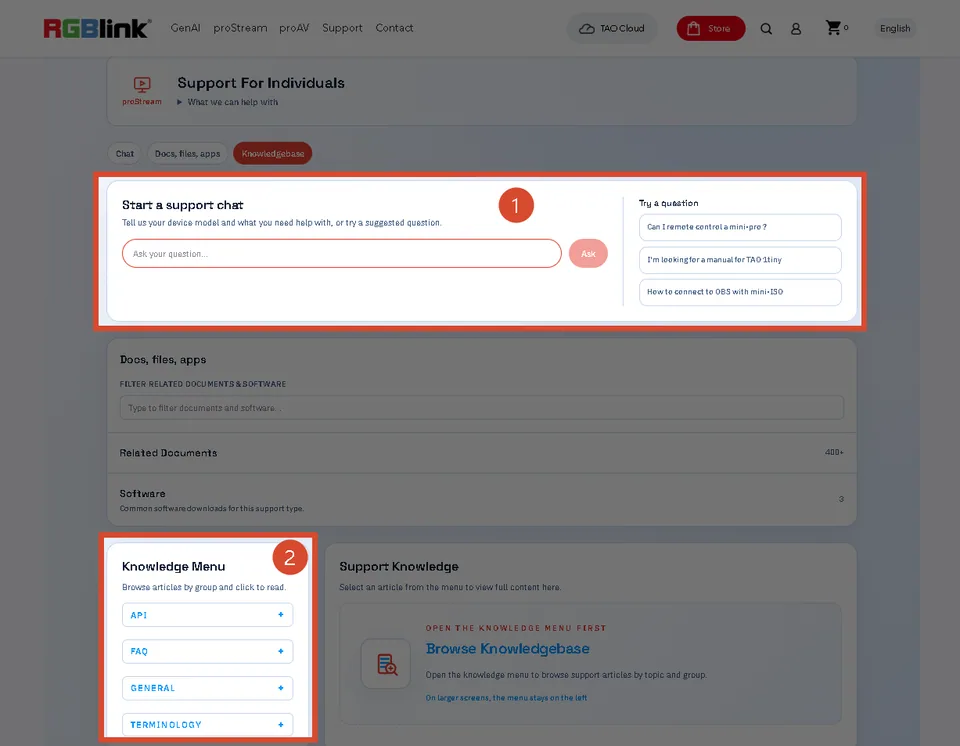
  • AI Support Search (Recommended): Visit Support > Support proStream/proAV/proEvents on the RGBlink official website and ask the RGBlink AI Bot for quick answers.
  • FAQs: Visit Support > Support proStream/proAV/proEvents on the RGBlink official website and browse Knowledge Menu > FAQ.
  • Contact Technical Support: Visit the Technical Support page of this manual or the RGBlink official website for our contact details.

Document image

RGBlink

www.rgblink.com

© Copyright Xiamen RGBlink Science & Technology Co Ltd