Online Manual
D8e User Manual

8 Menu
D8E belongs to the D8 series. Its main menu is consistent with D8 and D8 PLUS, except for interface differences.
After startup, the LCD touchscreen displays the home screen, including the main Menu, the IP address and device serial number (SN).
The main menu provides access to the following functions: Device, Settings, Load, Language, Version, and Input.
Please use the front-panel shortcut key controls to operate the main menu.
Shortcut Key Controls
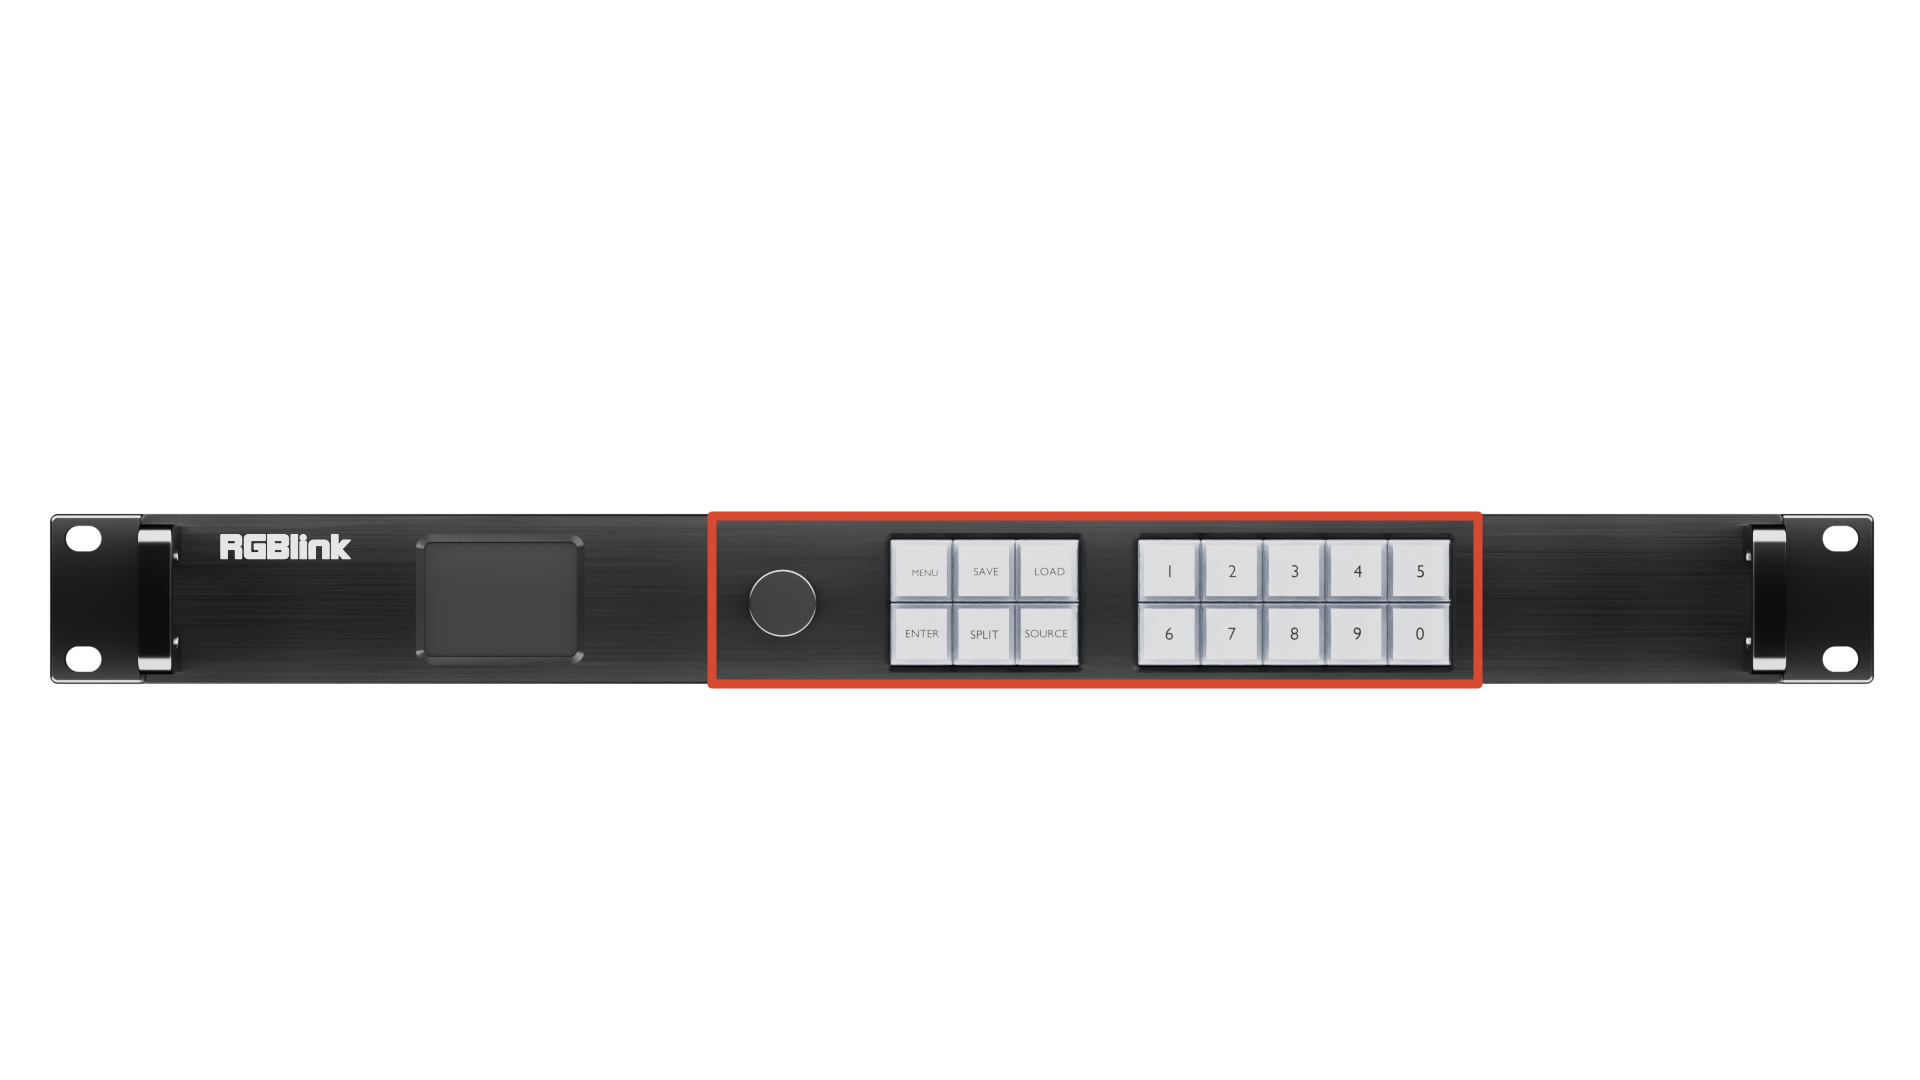
| Key | Function | |
|---|---|---|
| Knob |  | Select and confirm menu options |
| Function Buttons | 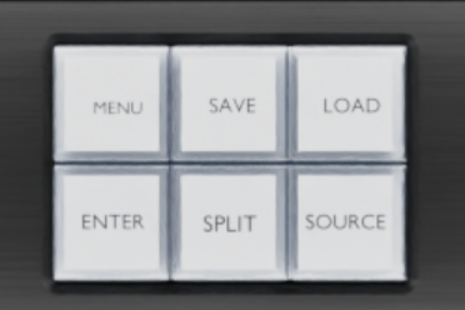 | MENU: Open the menu ENTER: Confirm SAVE: Save a scene SPLIT: Select and configure split screesn LOAD: Load a scene SOURCE: Signal source |
| Number Keys | 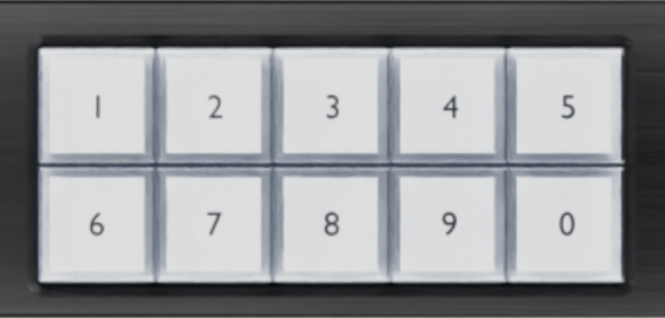 | Enter numbers |
Device
Select Device on the home screen.
- Views the current input and output status, including the video resolution of each signal.
- IP settings:
- DHCP: Disabled by default. Enable this option to automatically obtain an IP address.
- Parameter Settings: Manually configure the IP address, gateway, and subnet mask. After saving the settings, network control and upgrades can be performed.
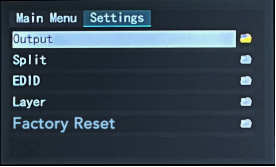
Settings
Select Settings on the home screen.
This menu provides access to output resolution, split (video wall layout), EDID management, layer settings, and factory reset.
Output
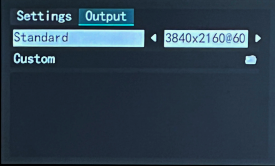
Select Settings > Output to configure the output resolution.
D8 supports both Standard and Custom resolution modes.
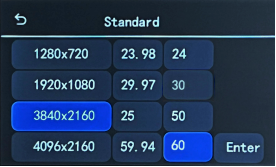
Standard Resolution Mode
- Select Standard.
- Select the desired resolution and frequency.
- Select Enter to save.
- The device returns to the previous page, and the selected resolution is displayed.
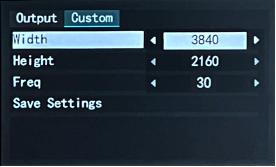
Custom Resolution Mode
- Select Custom.
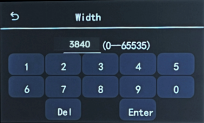
- Enter the Width, Height, and Freq (Frequency) using the numeric keypad.
- Select Save Settings to save.
- The configured resolution is displayed under Device > Output
Split
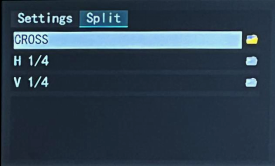
Select Settings > Split.
D8 provides three split layouts for different display configurations.
| Layout | Description | Illustration |
|---|---|---|
| Cross (Default) | Four-display 2 × 2 layout | 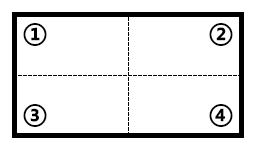 |
| H 1/4 | Four displays arranged horizontally | 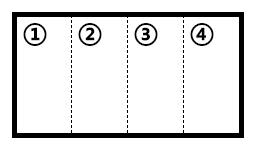 |
| V 1/4 | Four displays arranged vertically | 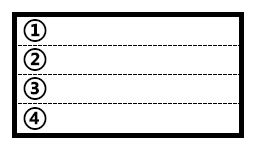 |
Cross
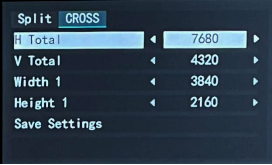
Select CROSS to configure a 2 × 2 layout.
Enter the total display width and height. D8 automatically calculates the output area for each display.
For example:
- Total Width: 7680
- Total Height: 4320
- Display Width: 3840
- Display Height: 2160
Enter the values using the numeric keypad, then Select Save Settings > Confirm.
H 1/4
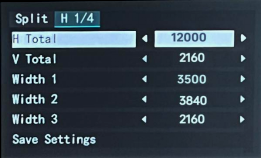
Select H 1/4.
Enter the total display width and height, then specify the width of each display.
For example:
- Total Width: 12000
- Total Height: 2160
Display widths:
- Display 1: 3500
- Display 2: 3840
- Display 3: 2160
- Display 4: 2500 (calculated automatically)
The display height is the same as the total height (2160) and does not need to be configured.
Enter the values using the numeric keypad, then Select Save Settings > Confirm.
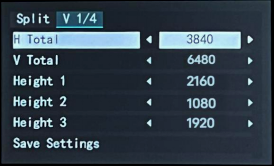
V 1/4
Select H 1/4.
Enter the total display width and height, then specify the height of each display.
For example:
- Total Width: 3840
- Total Height: 6480
Display heights:
- Display 1: 2160
- Display 2: 1080
- Display 3: 1920
- Display 4: 1320 (calculated automatically)
The display width is the same as the total width (3840) and does not need to be configured.
Enter the values using the numeric keypad, then Select Save Settings > Confirm.
EDID
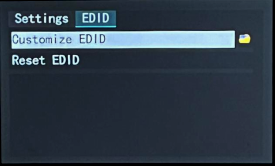
Select Settings > EDID.
EDID (Extended Display Identification Data) defines the display capabilities reported to the video source, ensuring output compatibility.
D8 supports Customize EDID and Reset EDID.
Customize EDID
Select Customize EDID.
- Enter the Width, Height, and Refresh Rate using the numeric keypad.
- Select Apply > Confirm.
- The device returns to the previous page after the settings are applied.
- After configuring the EDID on D8, configure the video source to match the same output resolution.
Using Windows system and an NVIDIA graphics card as an example:
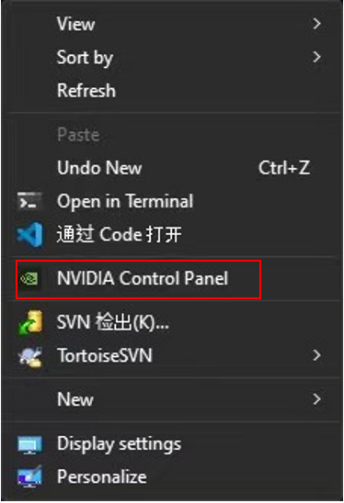
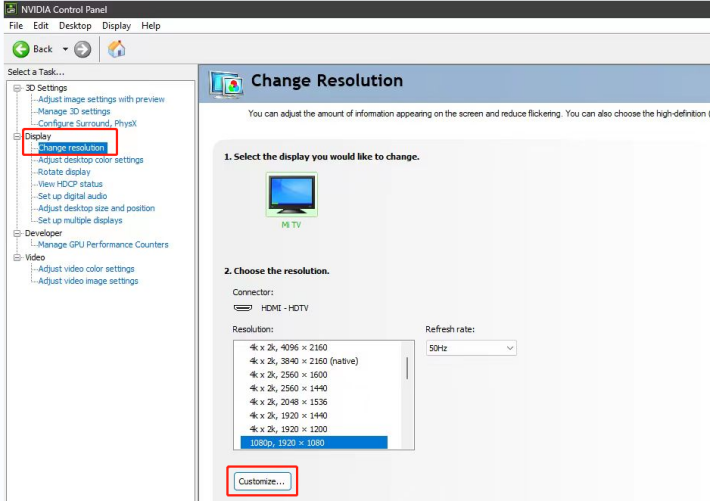
- Set the resolution on graphics card. Taking NVIDIA as an example: Right-click on the desktop, then select NVIDIA Control Panel.
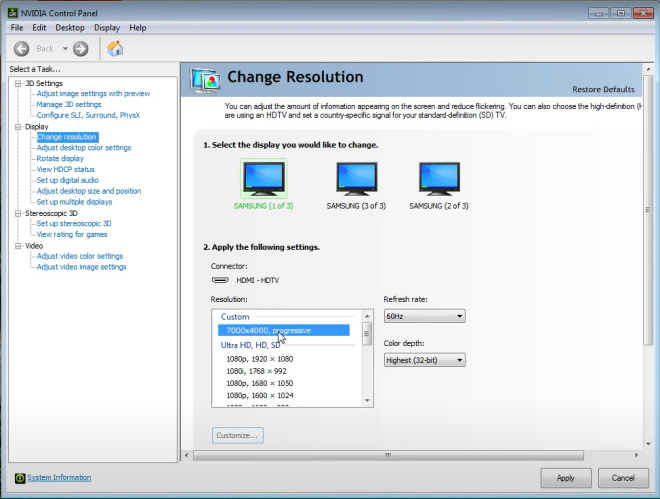
- Click Display > Change Resolution.
Firstly, check if 7000x4000@60 can be found in the drop-down list. Select this resolution directly if there is 7000x4000@60 without needs to follow Step 3 to Step 5 to customize resolution.
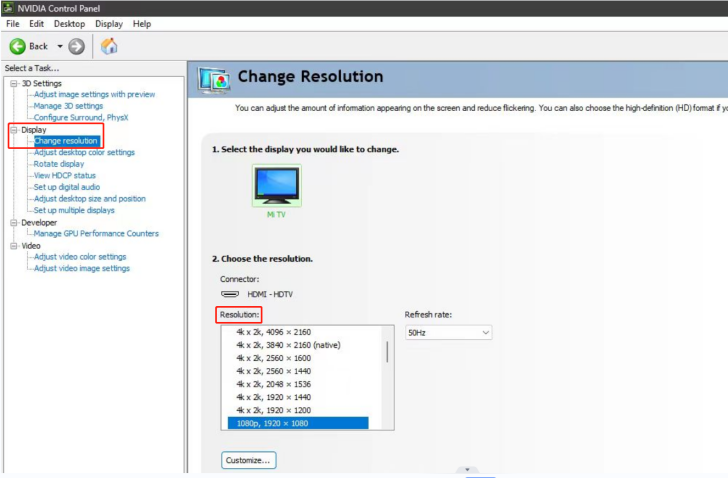
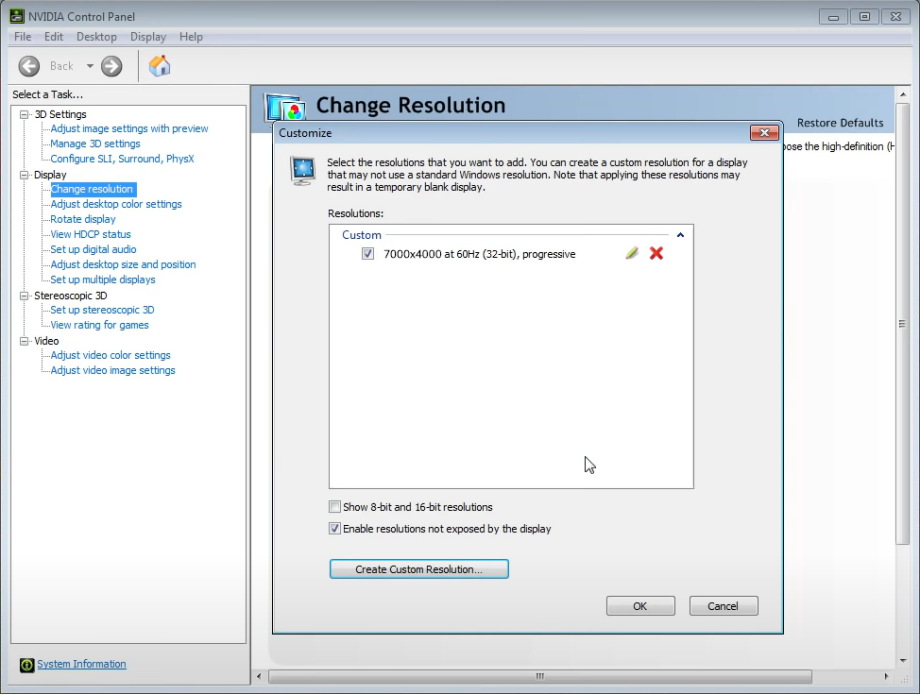
If 7000x4000@60 cannot be found, please click Customize and then follow Step 3 to Step 5 for resolution setting.
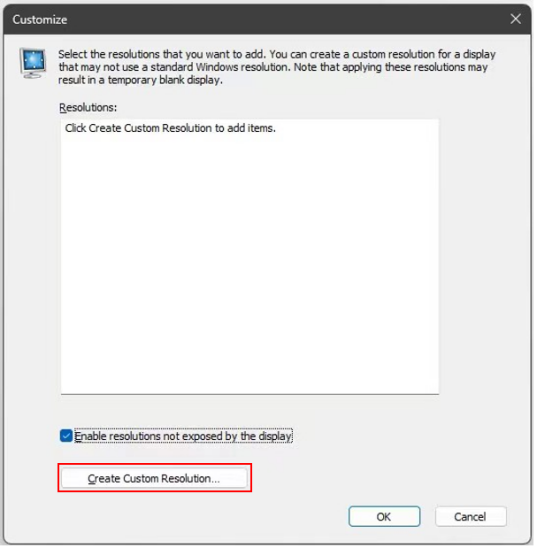
- Click Create Custom Resolution.
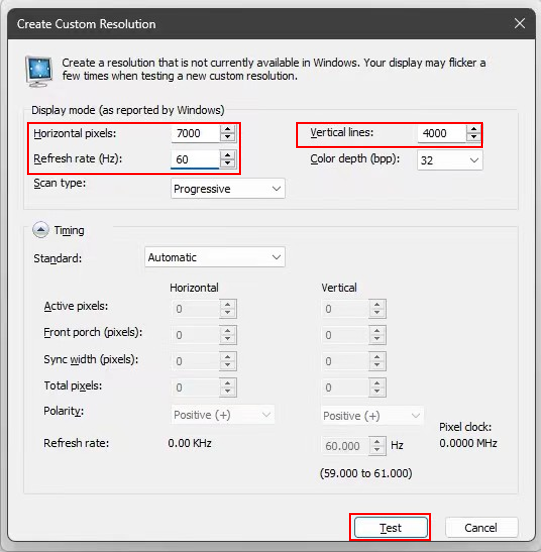
- Customize resolution:Enter 7000 in the Horizontal pixels , 4000 in the Vertical lines and 60 in the Refresh rate . Enter the custom resolution values, then click Test . Select Yes in the pop-up to apply the custom resolution.
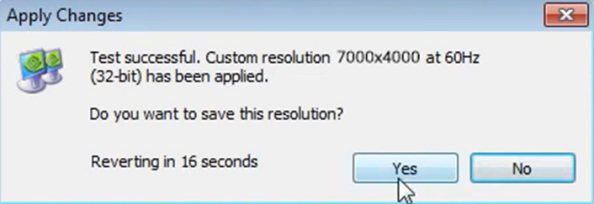
- Then the set resolution will be displayed in Custom . Click OK and check the resolution in Change Resolution interface.
Reset EDID
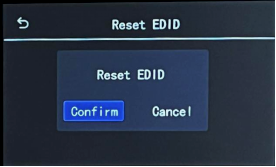
Select Reset EDID, then Select Confirm.
📢  Notes

Resetting EDID restores the default settings. This action cannot be undone.
Layer
Select Settings > Layer.
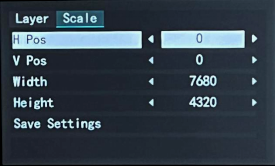
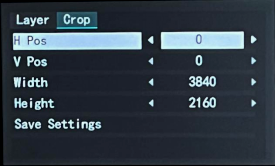
D8E supports layer Scaling and Cropping.
- Select Scale or Crop.
- Enter the Horizontal Position, Vertical Position, Width, and Height using the numeric keypad.
- Select Save Settings > Confrim.
The device returns to the previous page after the settings are saved.
Factory Reset
Select Settings > Factory Reset.
This function restores D8 to its factory default settings.
📢  Notes

Performing a factory reset restores the parameters and resolutions to their default values. EDID settings are not affected.
Load Presets
Select Load on the home screen.
D8 supports up to 16 saved banks.
📢  Important

Banks must be created and saved in XPOSE before they can be loaded from D8.
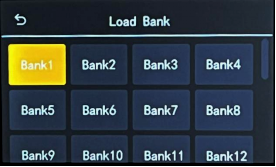
Bank status:
- Green: Saved
- Yellow: Selected
- No background: Empty
To load a bank:
- Select the desired bank.
- When the confirmation message appears, Select Confirm.
Language
Select English on the home screen.
Select English or 简体中文. The interface switches to the selected language immediately.
Version
Select Version on the home screen.
This page displays the firmware versions of the panel and main board.
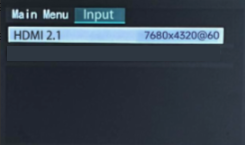
Input
Select Input on the home screen.
This page displays all input ports and their current resolutions.
Select an input source to switch the active input.
The connected display updates automatically to show the selected source.
If no signal is connected, "NO" is displayed on the page.