Online Manual
mini-max User Manual

2 Install Your Product
💡 To Know RGBlink Portable Monitor
A mounting slot for the RGBlink Portable Monitor is located on the top of the mini-max front panel. The expansion display provides additional monitoring space and improves operational efficiency.The RGBlink Portable Monitor features a full-function USB-C interface that supports both power delivery and audio/video transmission. It also includes a Mini HDMI port for connecting external displays, cameras, and other compatible devices.For information about purchasing the expansion display and related accessories, please contact your sales representative.
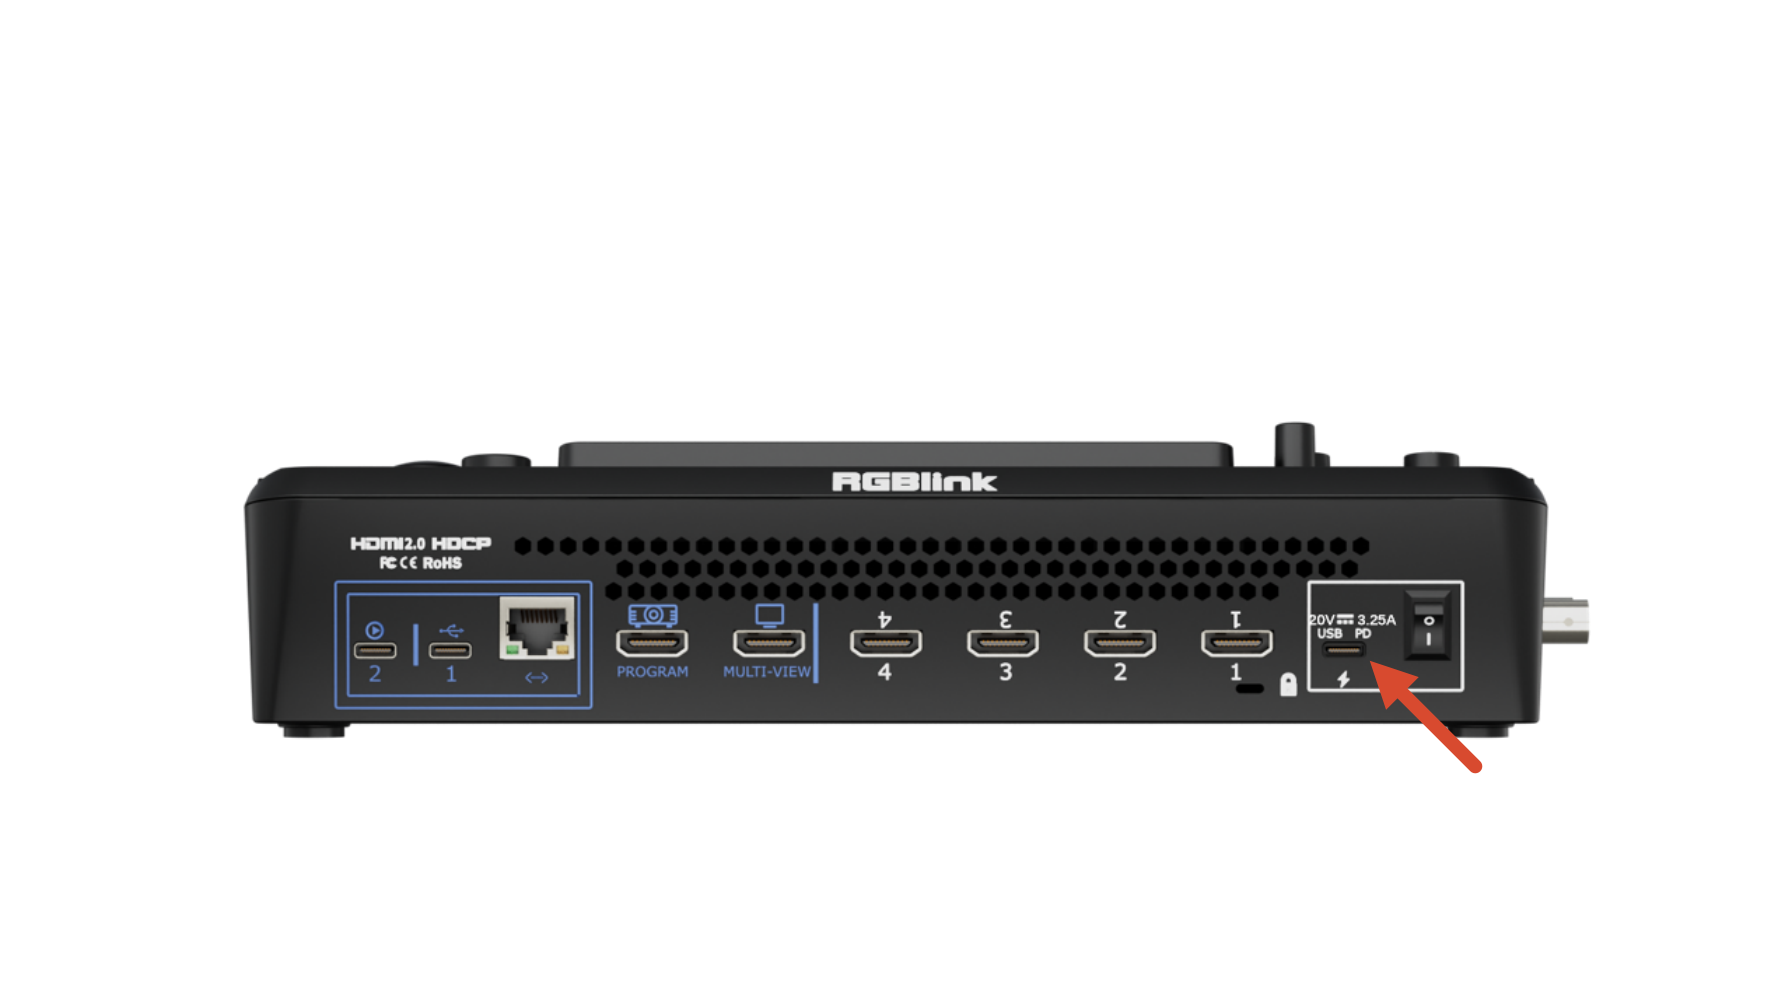
2.1 Connecting Power
RGBlink mini-max package includes a PD power adapter and power cable.
Before connecting the power supply, make sure the power standard in your country or region is supported.
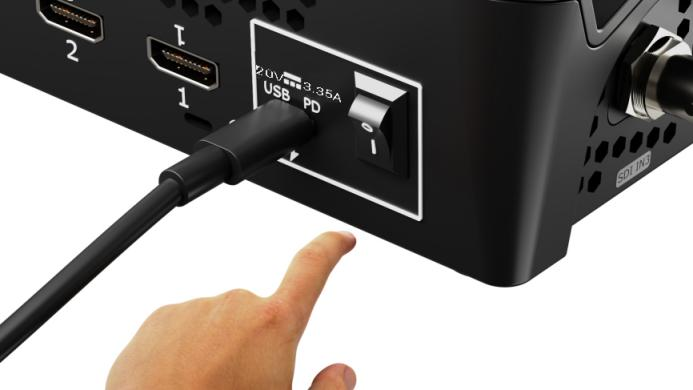
Firmly connect the power cable to ensure stable power delivery to the device.
📢  Important

It is recommended to use the power adapter included with the package.
If another adapter must be used, make sure it meets the following requirements:

- Supports the PD fast charging protocol
- Uses a USB-C power port with reversible plug orientation
- Provides a minimum output power of 60 W

If the power adapter has two ports, use only the USB-C port for powering mini!
2.2 Powering on mini-max
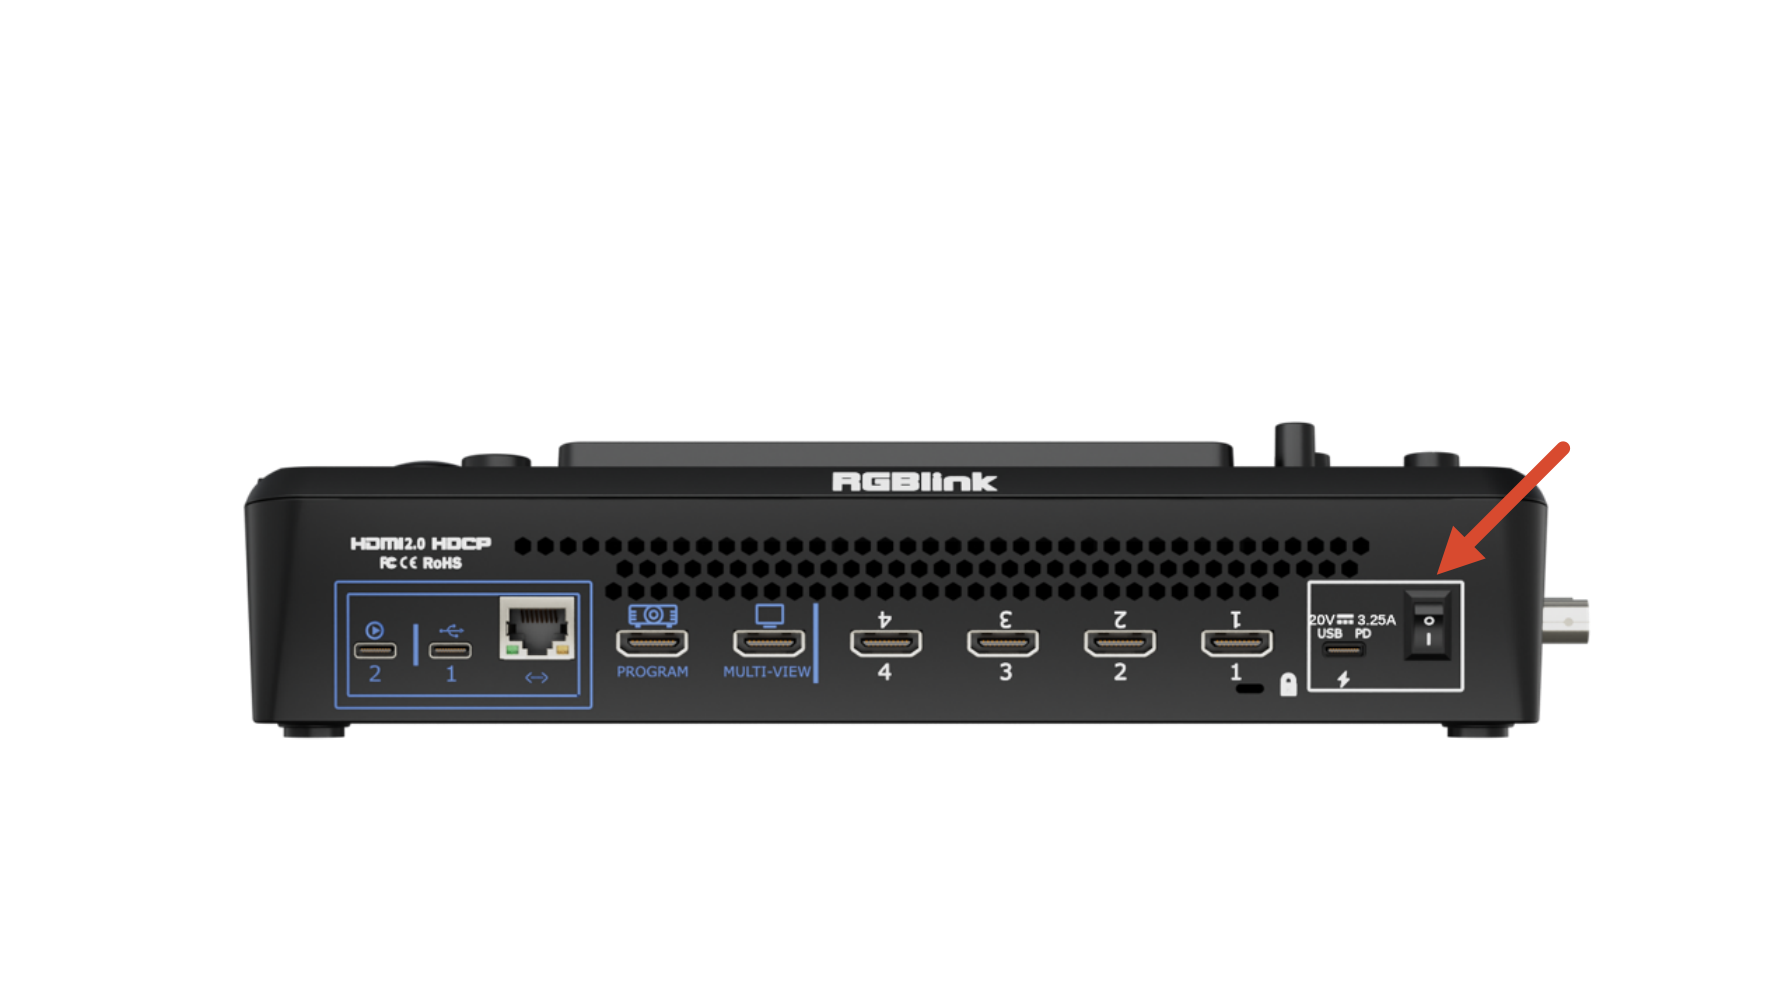
Press the rocker power switch downward to power on the rear panel.
 | 👉 |  |
|---|
After startup, the full-color display will show the mini-max logo before entering the main operating interface.
2.3 Connecting Router
It is recommended to connect mini-max to a network before use so that the device can be updated to the latest system version when available.
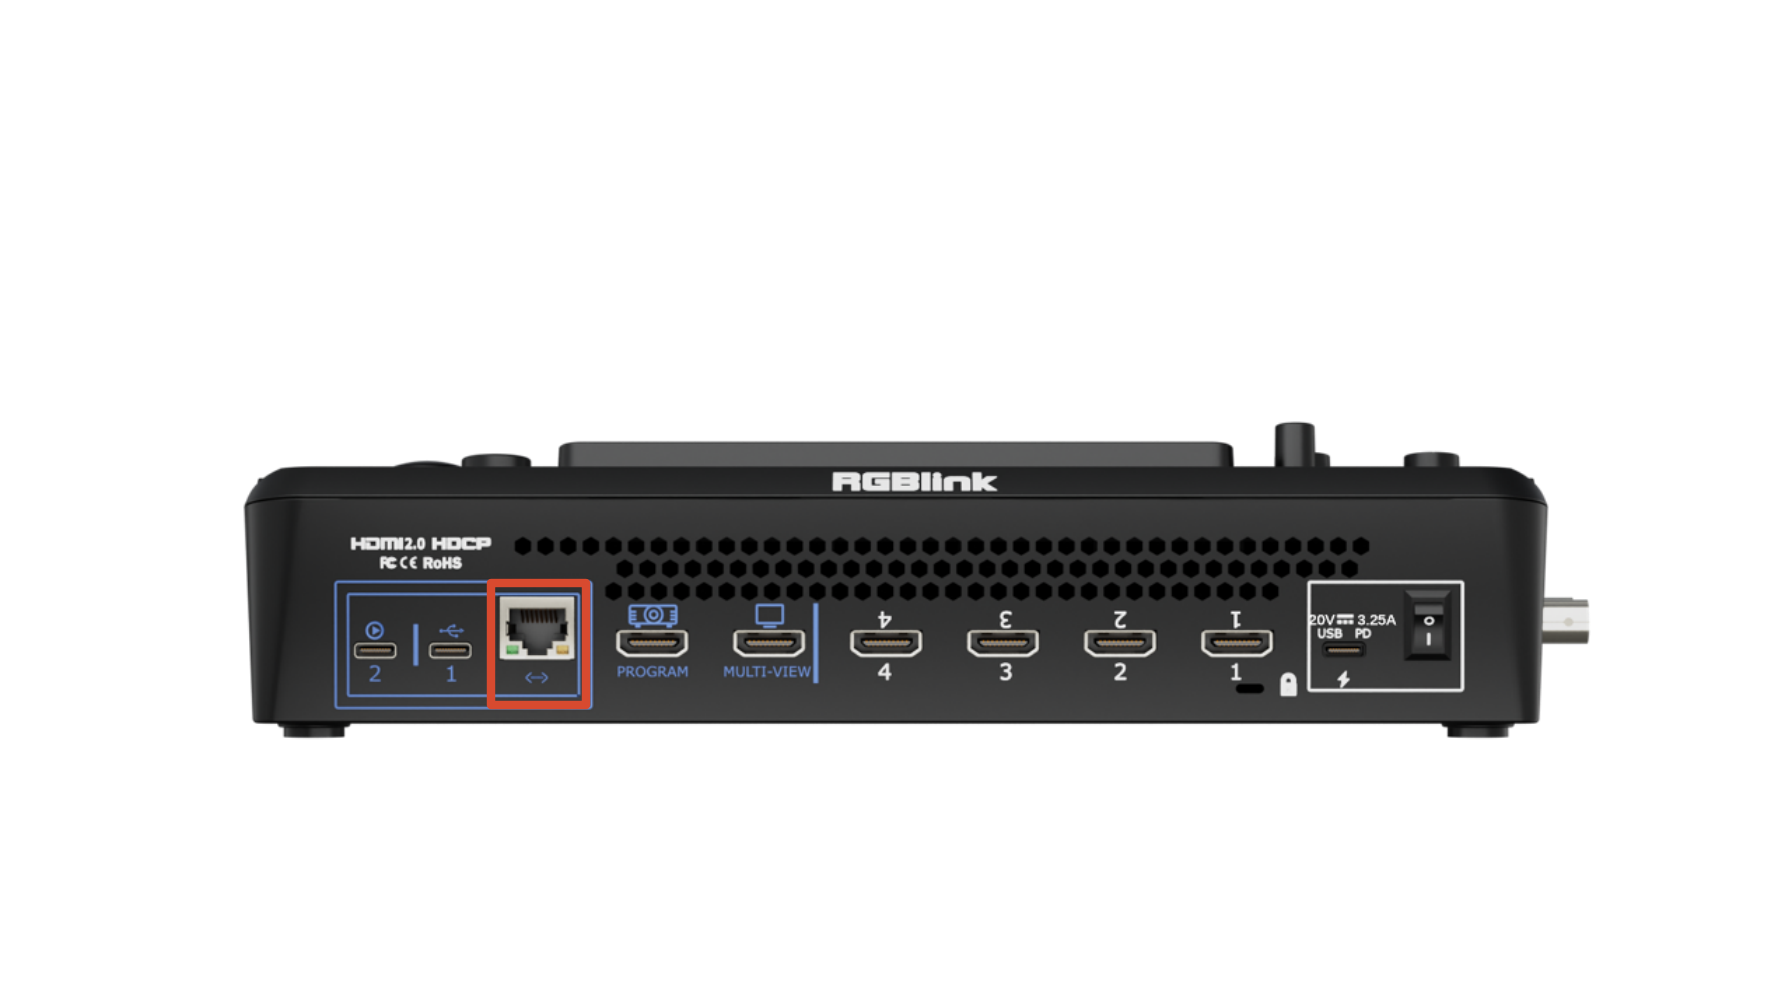
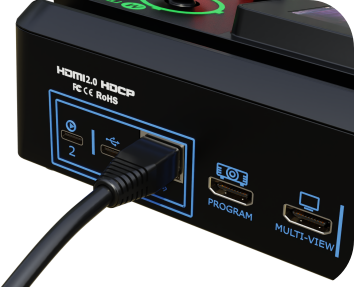
- Connect the Ethernet port of mini-max to a router using a CAT6 Ethernet cable.
 | 👉 |  |
|---|
- Select either DHCP or Static IP mode according to your network environment.
- DHCP Mode
- Press MENU to open the menu.
- Go to SETTINGS > Network.
- Enable DHCP. The device will automatically obtain an IP address.
- Static IP Mode
- Press MENU to open the menu.
- Go to SETTINGS > Network.
- Disable DHCP.
- Use ENTER knob to edit the IP address.
- Press ENTER to save the settings.
- DHCP Mode
📢  Important

mini-max and the router must be on the same network segment (subnet) to communicate properly.
2.4 Connecting HDMI/SDI Signal Sources
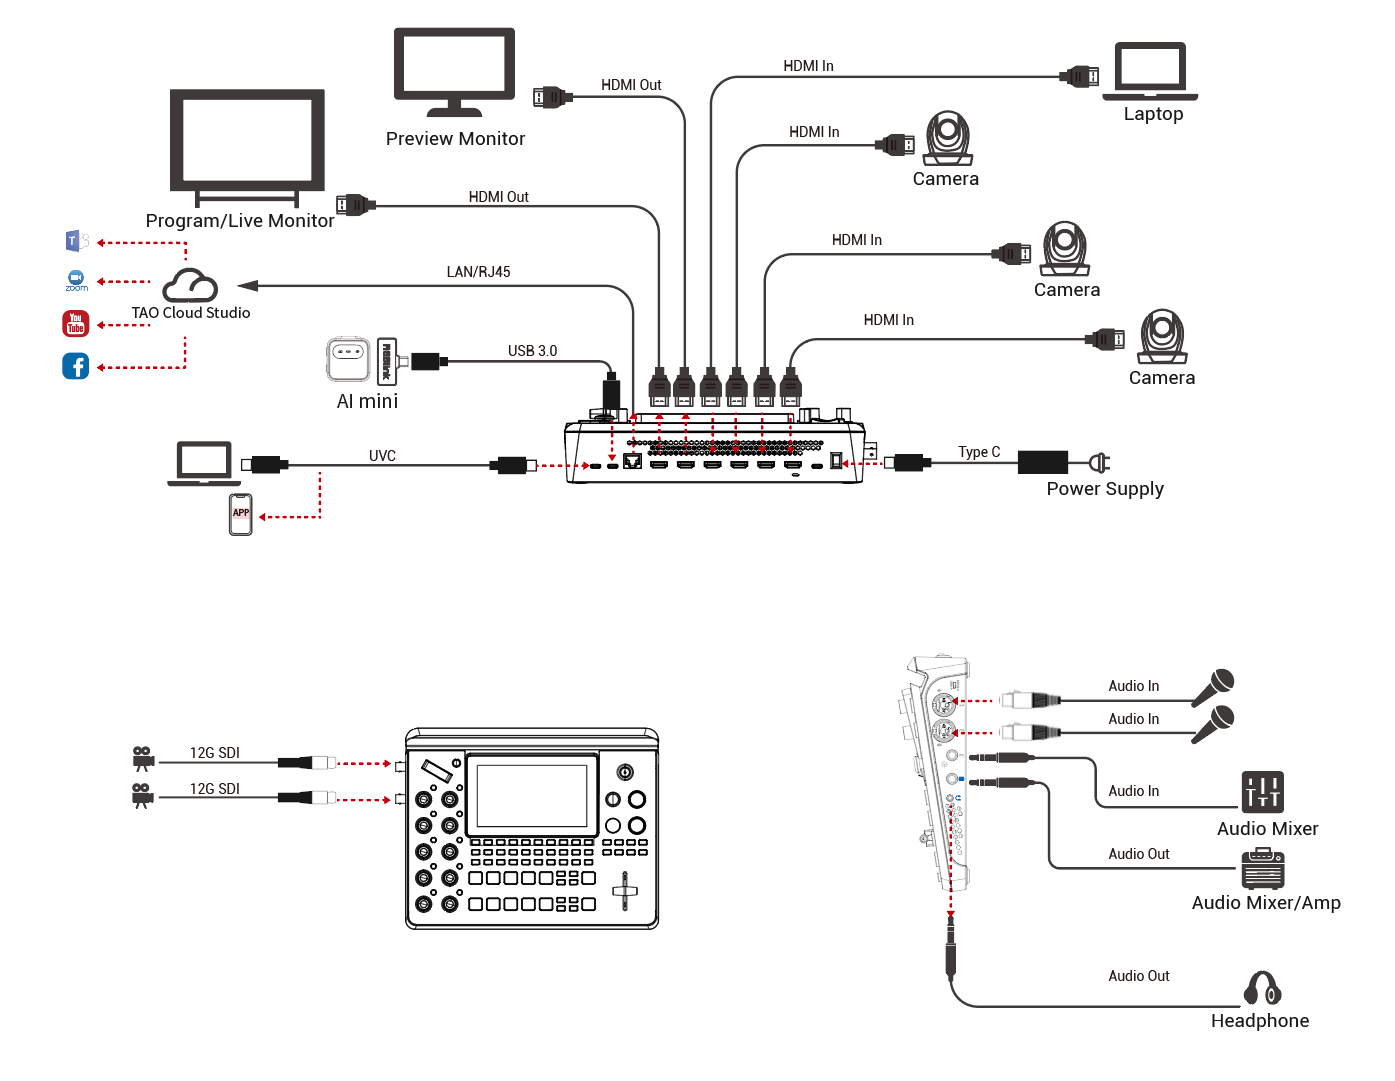
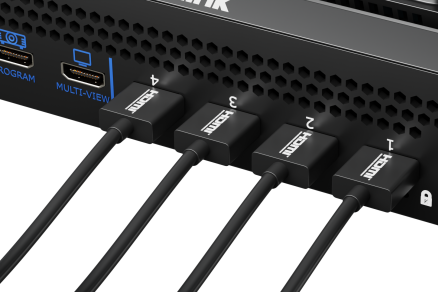
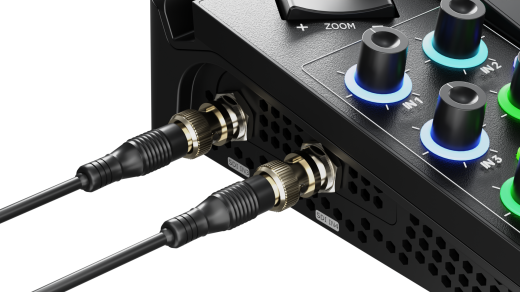
mini-max provides four HDMI inputs and two 12G-SDI inputs, supporting video input resolutions up to 4K60 with automatic deinterlacing.
Cameras, computers, and other devices equipped with HDMI or SDI output interfaces can be connected to mini-max as video input sources.
 |  |
|---|
The built-in 5.5-inch display automatically detects and previews connected video sources after startup. An external monitor may also be connected via HDMI output for source monitoring or multiview operation.
📢  Notes
HDMI and SDI cables are not included and must be purchased separately.
Some cameras use Mini HDMI connectors. If required, purchase a Mini HDMI-to-HDMI cable separately.
2.5 Connecting Monitoring Devices
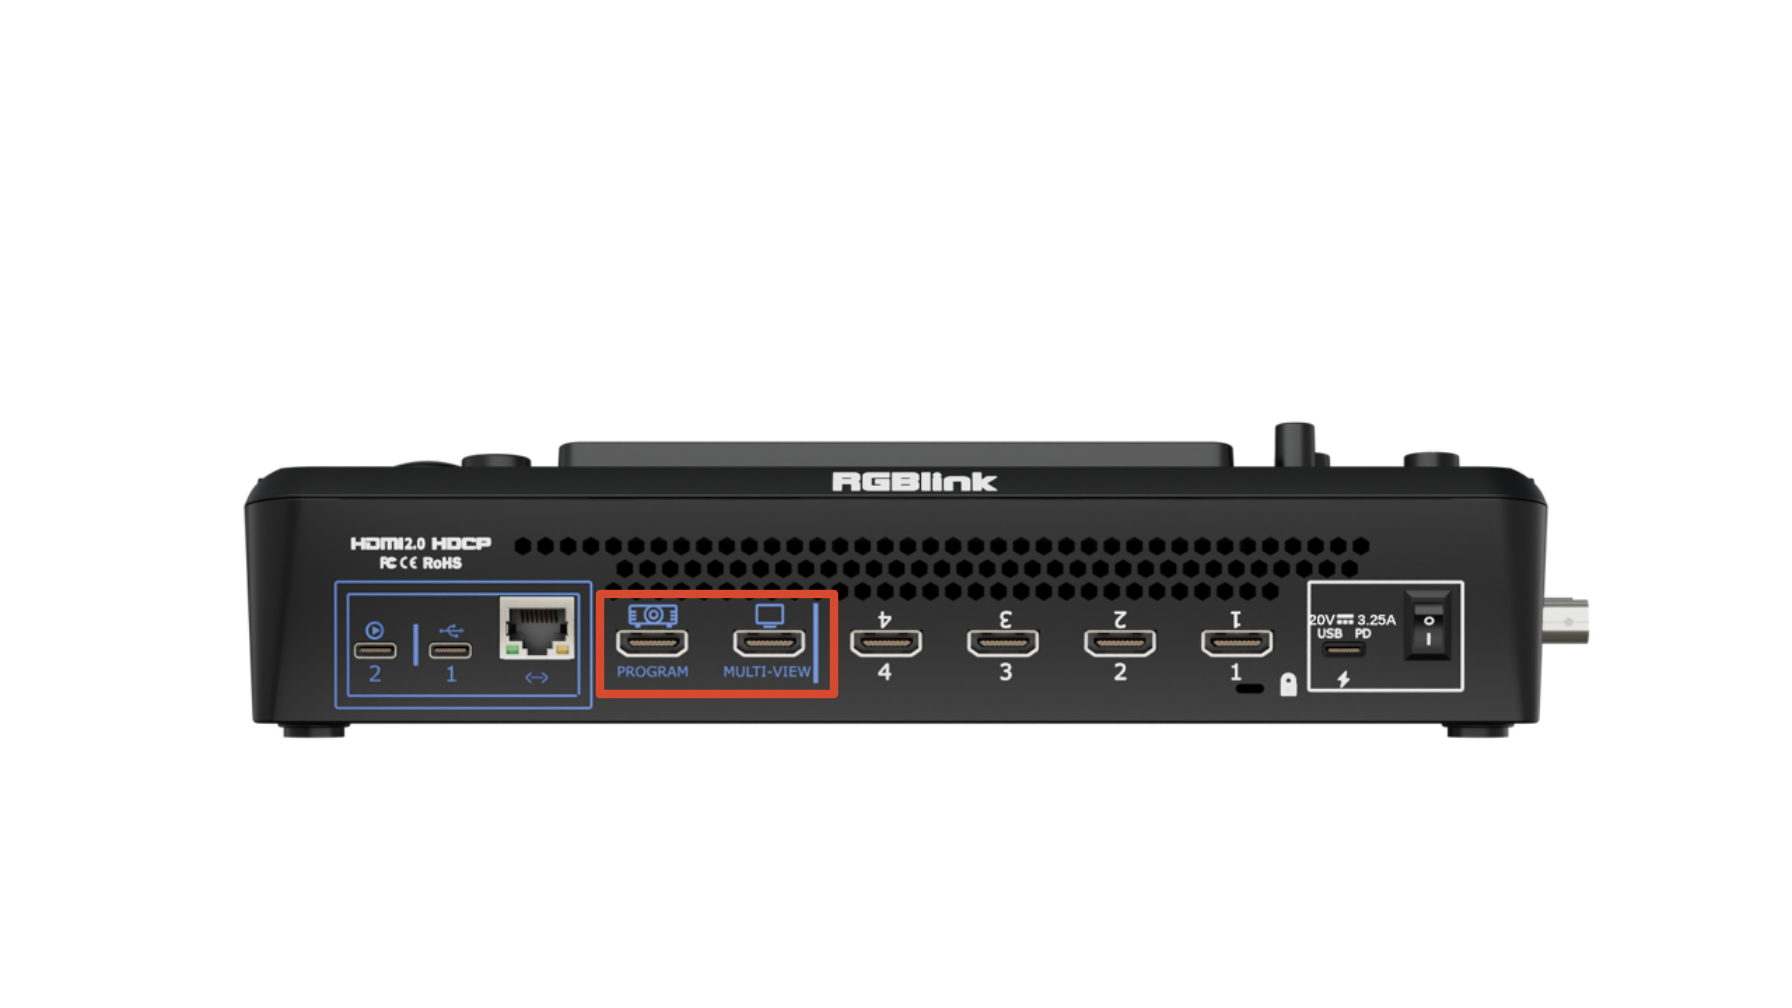
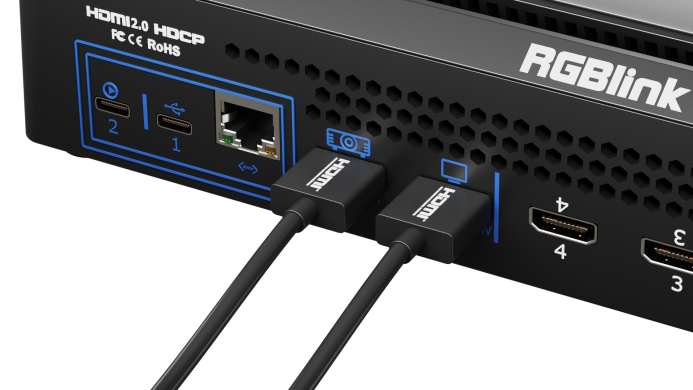
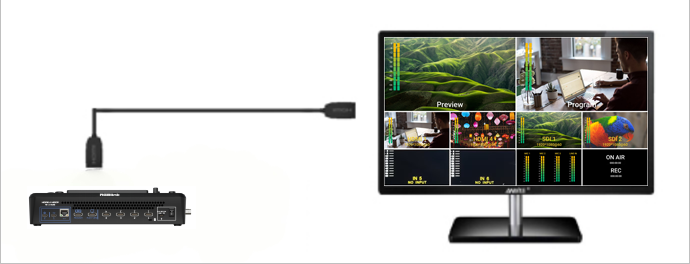
mini-max provides MULTI-VIEW and PROGRAM output ports, allowing simultaneous connection to monitors for production and monitoring. For output configuration details, see 3.4 Output.
 | 👉 |  |
|---|
- MULTI-VIEW: Connects to a monitor. Outputs the multiview monitoring screen by default.
- PROGRAM: Connects to a projector, LED display, television, or other display device. Outputs the program feed by default.
2.6 Connecting Microphones and External Monitoring Devices
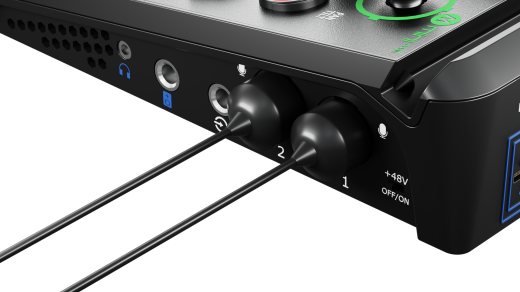
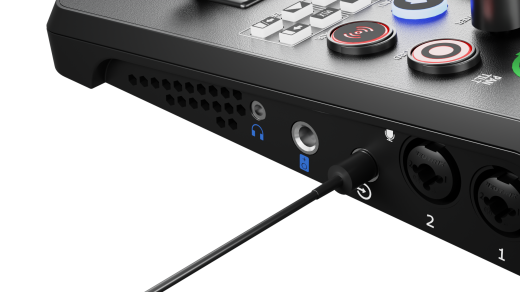
mini-max provides three external audio input ports and two audio output ports on the right-side panel for microphone connection and real-time monitoring, supporting live streaming and audio mixing workflows.
2.6.1 Audio Inputs
 |  |
|---|
- Line In
The Line In connector uses a 6.35 mm TRS jack and supports connection to computers, smartphones,tablets, audio mixers and other audio devices.
- MIC Input
The MIC input uses a combo XLR/TRS connector and supports 48V phantom power.
It can be connected directly to powered or passive microphones.
-
When connecting dynamic microphones, wireless microphone receivers, or other audio devices, phantom power must remain disabled.
-
Enable phantom power only when using a condenser microphone that requires 48V power.
- Connecting a Microphone
- Make sure 48V phantom power is turned off.
- Turn the MIC level down to minimum.
- Connect the XLR cable securely to the microphone and the device.
- Enable 48V phantom power.
- Gradually raise the MIC level to the desired volume.
- Disconnecting a Microphone
- Turn the MIC level down to minimum.
- Disable 48V phantom power.
- Wait approximately 5–10 seconds for any residual voltage to dissipate.
- Disconnect the XLR cable and remove the microphone.
- Connecting a Microphone
🚨  Warning

Do not connect or disconnect microphones or XLR cables while 48V phantom power is enabled, as this may damage the device or the connected microphone.
2.6.2 Audio Outputs
- Line Out: 6.35 mm main audio output.
- Headphone Output: 3.5 mm headphone monitoring output for real-time audio monitoring.
2.6.3 Embedded Audio
mini-max supports embedded audio carried over HDMI and SDI signals. The AFV button on the front panel enables AFV, allowing audio sources to switch automatically with the selected video source.
📢  Notes

1. To prevent speaker damage or loud pops
- Connect audio cables before powering on speakers.
- Power off speakers before disconnecting audio cables.
2. Wireless microphone connection
- MIC supports connecting wireless microphone 3.5mm TRS cables via a 3.5mm female to 6.35mm male mono adapter.
- Line-in supports connecting wireless microphone 3.5mm TRS cables via a 3.5mm female to 6.35mm male stereo adapter.
3. Audio signal limitations
- Balanced signals are supported only on MIC inputs.
- Stereo input signals are supported only through the Line In interface.
2.7 UVC Capture Output/Input
mini-max provides two USB 3.0 ports for streaming and local recording.
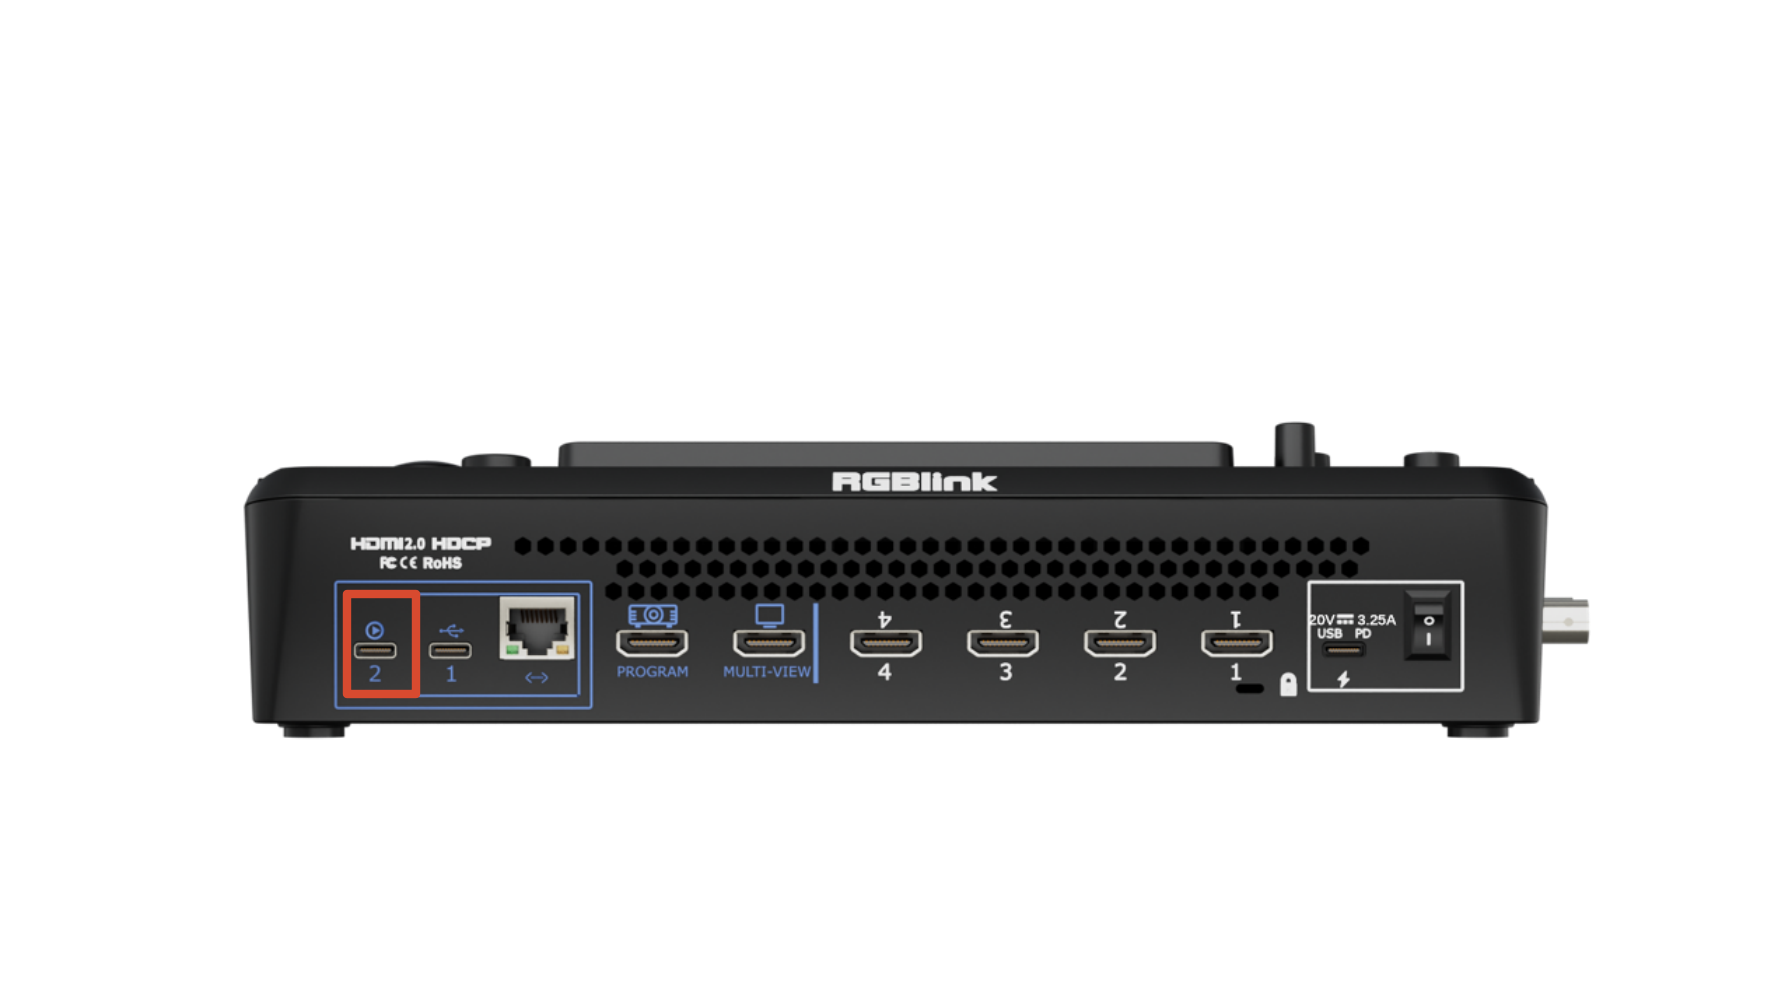
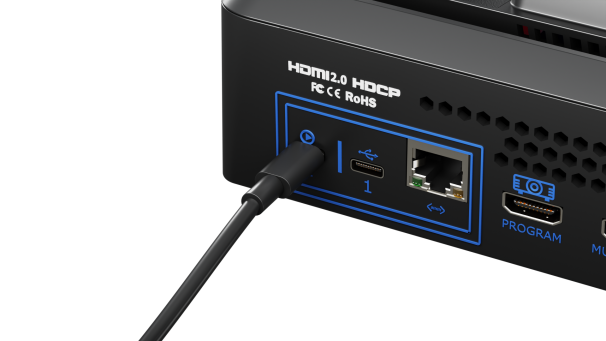
2.7.1 UVC Output (USB-C 2)
When connected to a computer via USB, mini-max is recognized as a standard USB webcam.
The device can then be selected as a video source in applications such as OBS Studio, Zoom and other compatible streaming platforms.
 | 👉 |  |
|---|
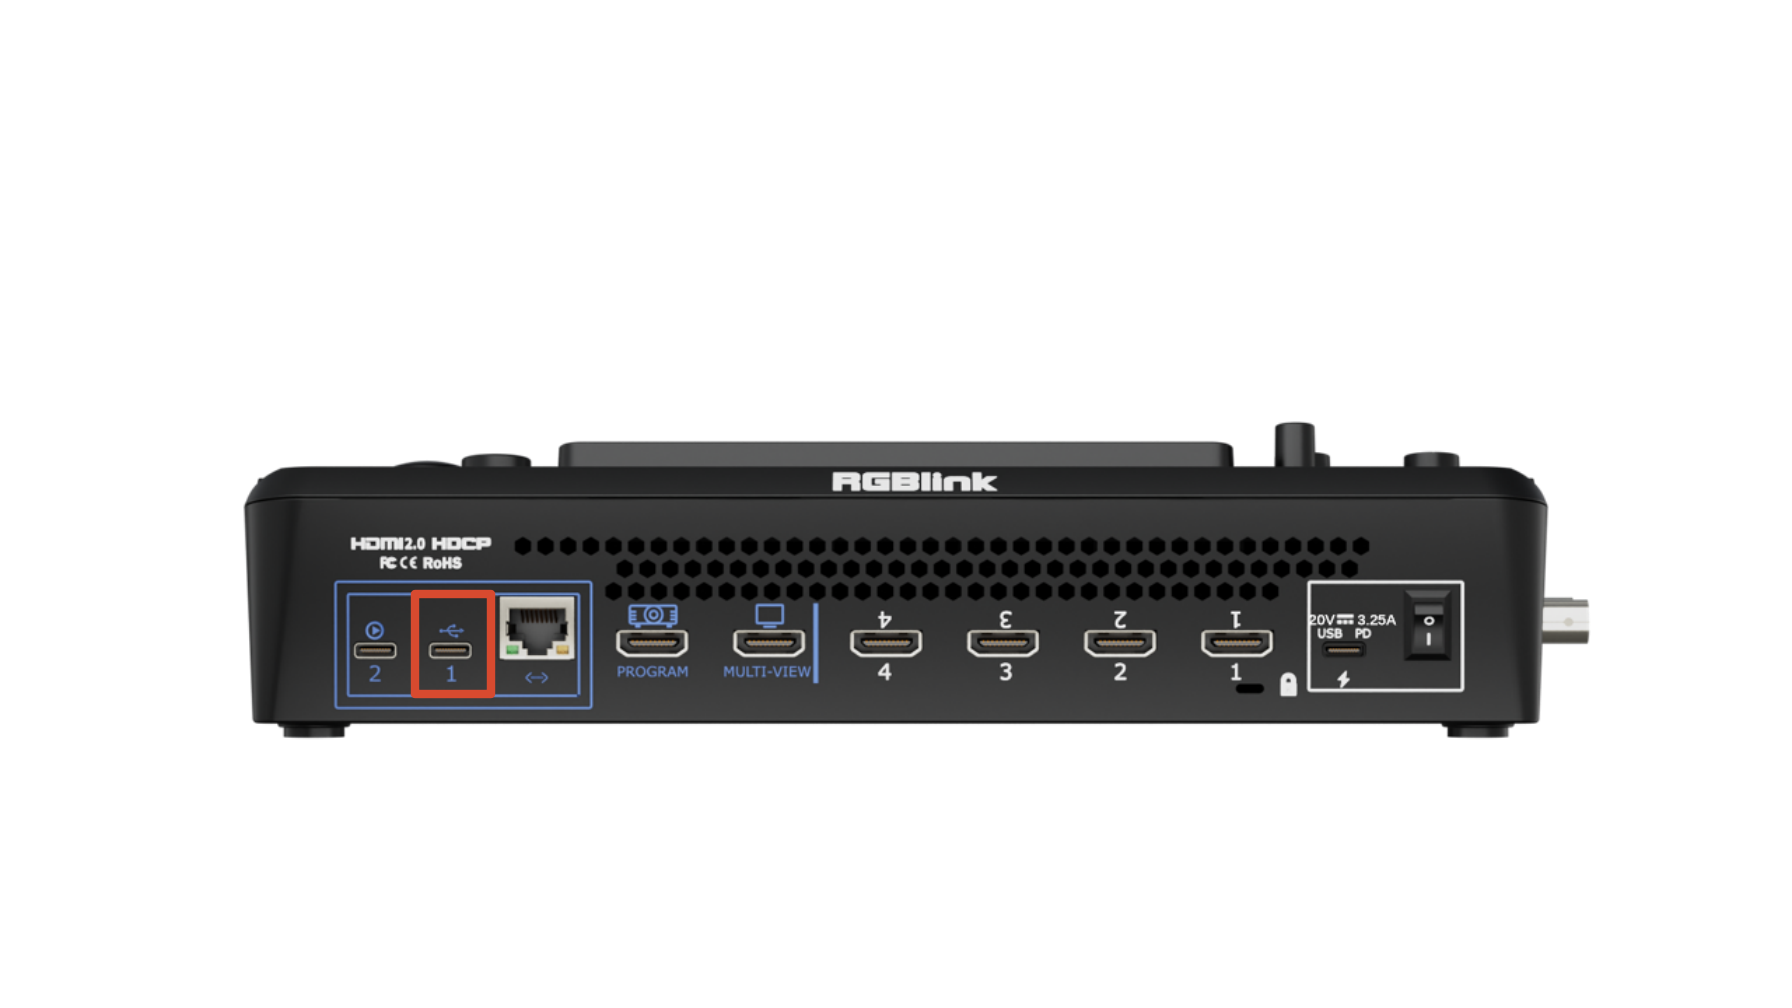
2.7.2 UVC Input (USB-C 1)
Connect a UVC-compatible camera to USB-C 1. The video source will be available as an input and displayed in the IN5 or IN6 view.
📢  Notes

UVC input supports only UVC cameras using the H.264/H.265 video encoding format. MJPEG encoded video streams are not supported.

Due to differences in UVC protocol implementation among manufacturers, mini-max may not be compatible with all UVC cameras. For the latest list of compatible devices, please contact RGBlink Technical Support.
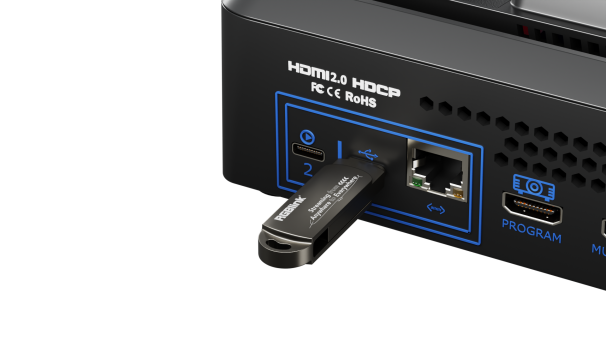
2.7.3 Recording and Media Import (USB-C 1)
Users can connect USB flash drives or SSDs for recording.
An SSD is recommended for multi-channel recording.
 | 👉 |  |
|---|
📢  Notes
- USB 3.0 flash drives are recommended for optimal recording performance.
- SSDs are recommended for external storage. Verify whether additional power is required before use.
- The OTG cable used for recording supports file transfer only and cannot be used for live streaming.
- Simultaneous multi-platform streaming, or using UVC output while recording, may increase CPU utilization and result in dropped frames or video stuttering.
- Internal USB-C data transmission operates over USB 3.1.