Online Manual
Q16pro-Gen2-manual

3.1.3 Connecting Devices
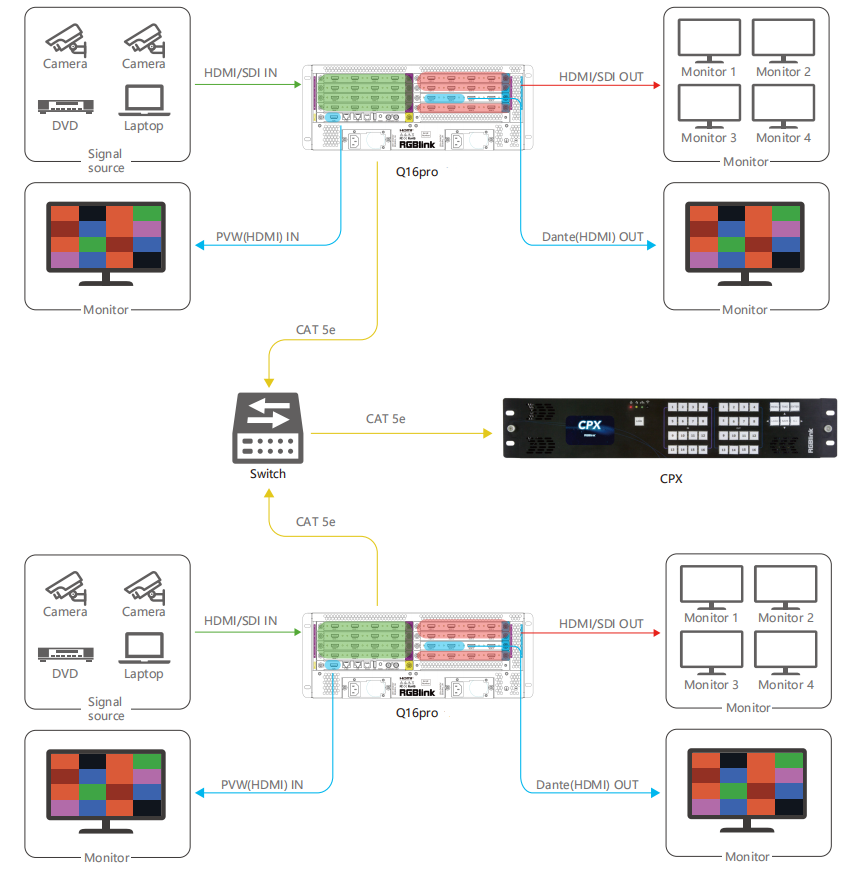
Q16pro Gen2 supports HDMI, SDI and other optional input and output modules.
Connect the devices
Connect the required input and output devices before configuring CPX.
- Connect the input source, such as a camera or computer, to the corresponding input port on Q16pro Gen2 with the appropriate cable.
- Connect the output device, such as a monitor, to the corresponding output port on Q16pro Gen2 with the appropriate cable.
- Connect Q16pro Gen2 to a power outlet using the standard AC power cord.
- Connect CPX to a power outlet using the standard 12V power adapter.
- Power on CPX and Q16pro Gen2.
Configure network communication
- If the IP addresses of CPX and Q16pro Gen2 have not been modified, connect them directly with a network cable.
- If the IP addresses are not in the same LAN, set the IP address of CPX to the same LAN as Q16pro Gen2. IP setting path: MENU > Search > Network Communications > Local IP
- After CPX and Q16pro Gen2 establish network communication, "Connected" appears in the upper-left corner of the screen.
Select Q16pro Gen2
- Press the MENU button to open the menu.
- Select Search > Select Device.
- Select Q16pro Gen2.
 📢  Notes

Connect multiple devices to CPX through a switch to control multiple devices simultaneously.