Online Manual
Ystreamer

2 Install Your Product
📢  Notes

Connect all cables before powering on the device.
Connecting Video Sources
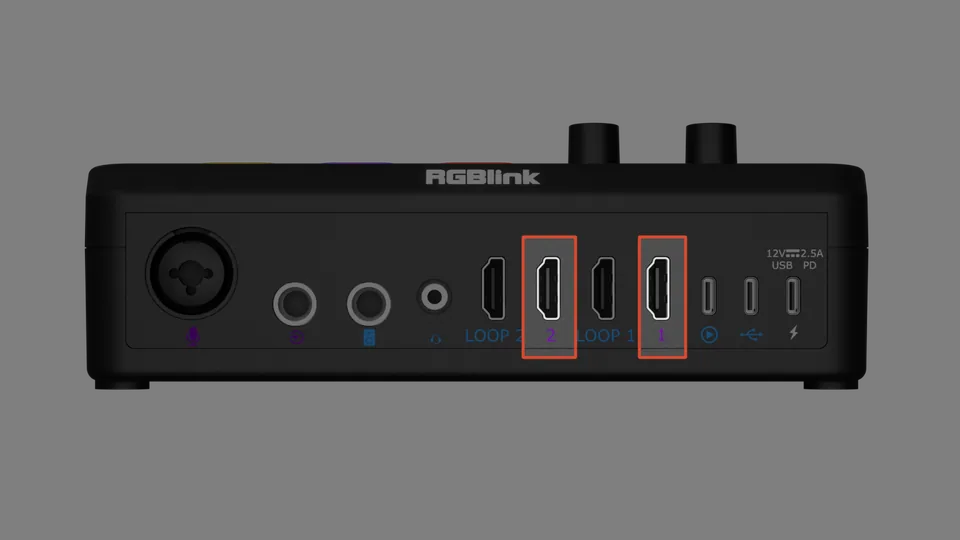
Connect your video sources to the HDMI 1 and HDMI 2 inputs on the rear panel using HDMI 2.0 cables.
Supported sources include PCs, 4K cameras, PTZ cameras, and other HDMI devices.
If no HDMI signal is detected, the capture output displays a NO SIGNAL test screen.
📢  Notes

Use certified HDMI 2.0 cables (18 Gbps).

A single 4K@60 signal requires approximately 14.4 Gbps of bandwidth. Low-quality cables may cause image artifacts, frame drops, or signal loss.
Connecting Video Monitors
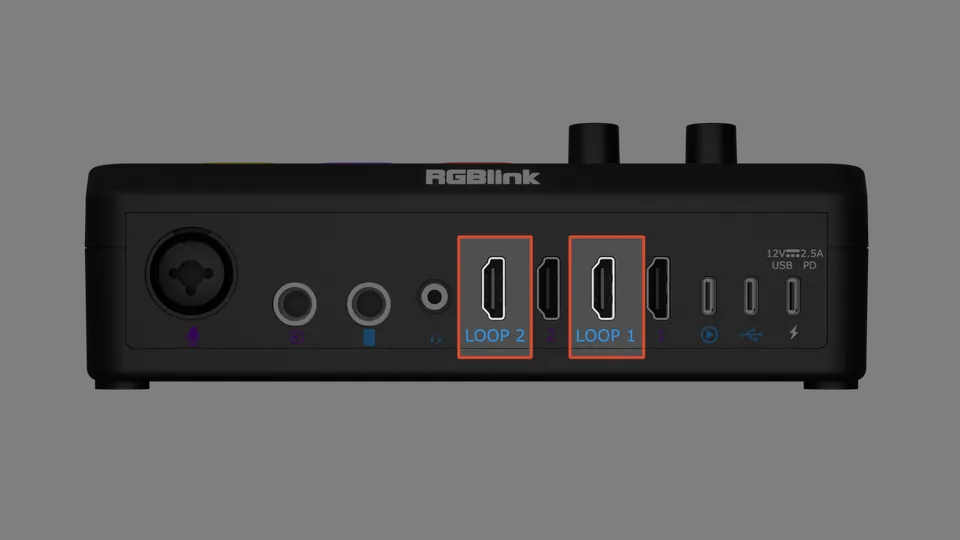
The HDMI Loop outputs provide a direct pass-through of the original HDMI signals for local monitoring.
- Connect LOOP 1 to a monitor to view the HDMI 1 source.
- Connect LOOP 2 to a monitor to view the HDMI 2 source.
📢  Notes

HDMI Loop output is available only after the computer successfully recognizes the UVC device.
Connecting Microphones and Other Devices
🚨 Warining

Before enabling 48 V phantom power, make sure the connected microphone supports phantom power.
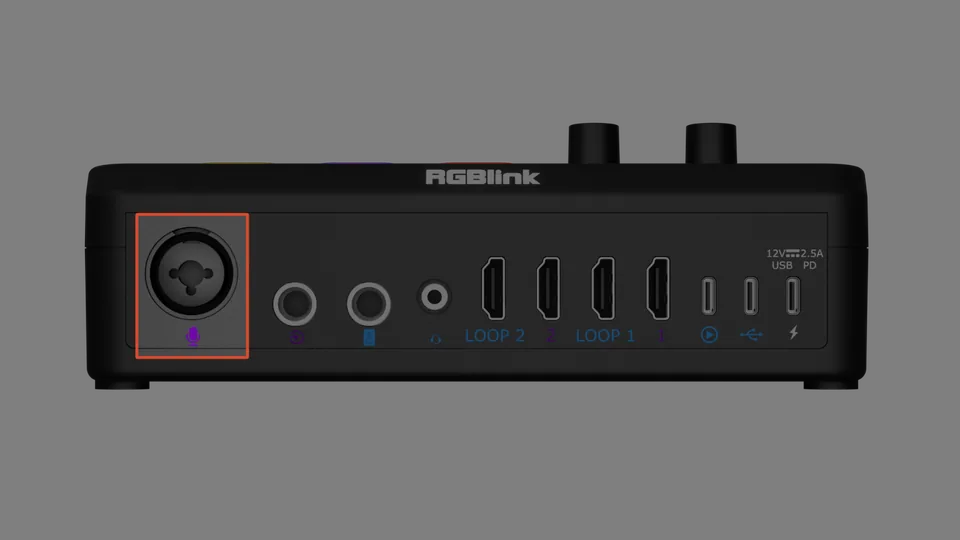
Condenser Microphone (48 V Phantom Power Required)
- Connect the microphone to the XLR Combo input using an XLR cable.
- Press and hold the +48V button on the right panel for 3 seconds.
- Wait until the 48 V indicator turns red.
- Confirm the microphone is working properly.
Dynamic Microphone
- Connect the microphone to the XLR Combo input using an XLR cable.
- Do not enable 48 V phantom power.
Instrument (Electric Guitar / Bass)
- Connect the instrument to the 6.35 mm TS jack of the XLR Combo input using a 6.35 mm TS cable.
- Phantom power is not required.
External Audio Device (Line-in)
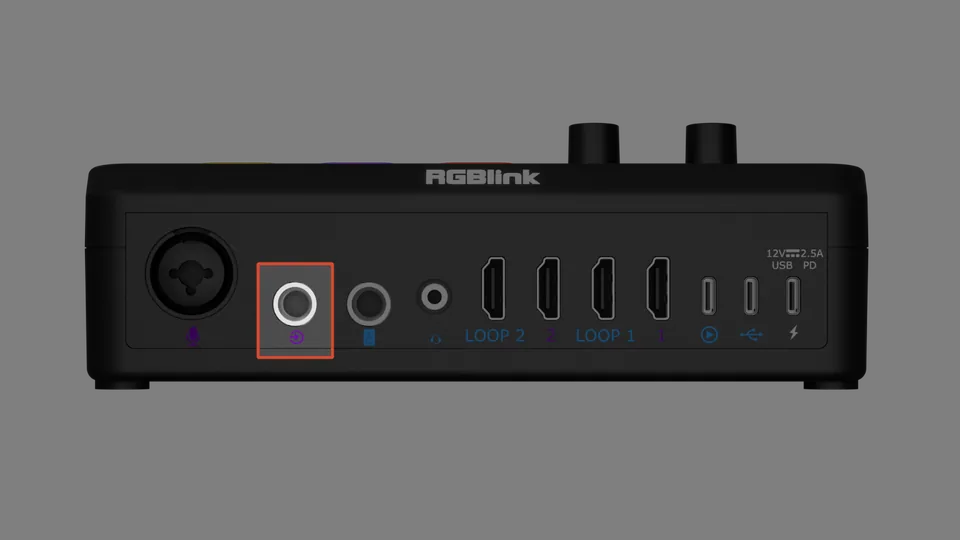
Connect the headphone or line output of a phone, tablet, or other audio device to the Line-in port using a 6.35 mm TRS cable.
📢  Tips

Some Line-out devices may introduce background noise. An audio isolator is recommended to reduce interference.
Wireless Microphone Receiver (USB Audio)
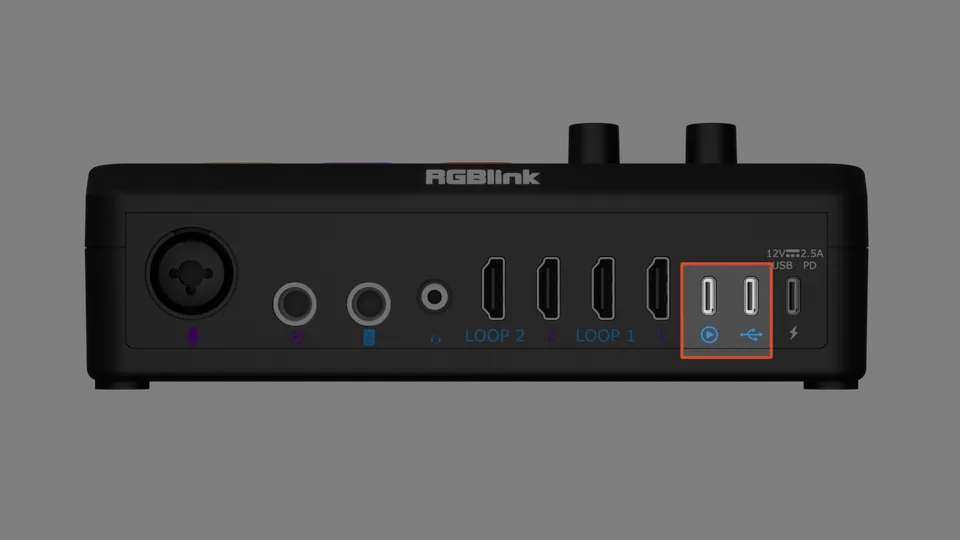
Connect the USB receiver (such as a wireless lavalier receiver) to the UAC or UVC/UAC port on the rear panel.
Headset
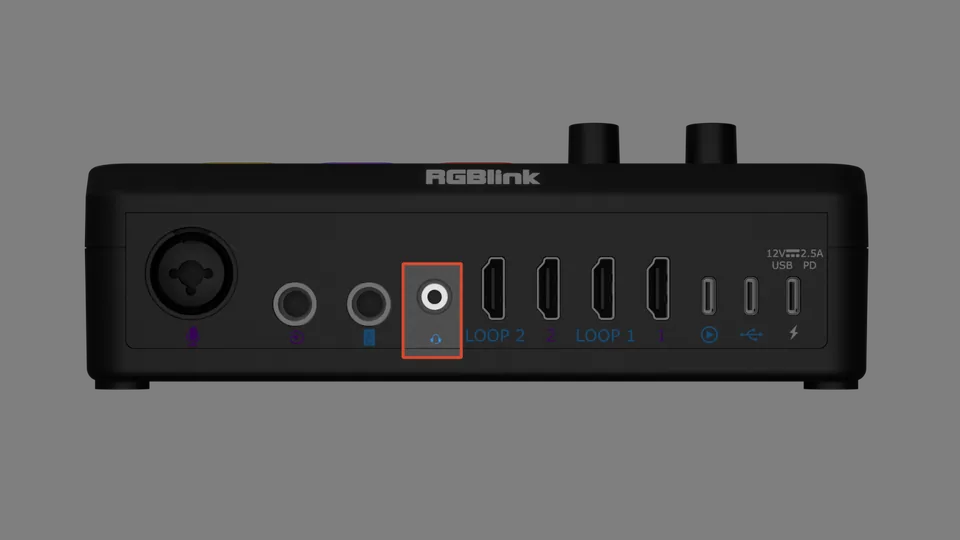
Connect a 3.5 mm TRRS headset to the TRRS port for simultaneous audio input and monitoring.
Connecting Audio Monitoring Devices
Powered Speakers
🚨 Warning

Turn off the speakers before connecting them. Connect the 6.35 mm TRS cable first, then power the speakers on to avoid speaker damage caused by power-on transients.
Monitoring Headphones
Connect headphones using either:
- a 6.35 mm TRS plug, or
- a 3.5 mm TRRS plug.
Connecting Computers (UVC)
🚨 Warning

Connect the UVC port directly to the computer. Do not use a USB hub or other intermediary devices.

Otherwise, the device may not be detected or may operate as a USB 2.0 device.
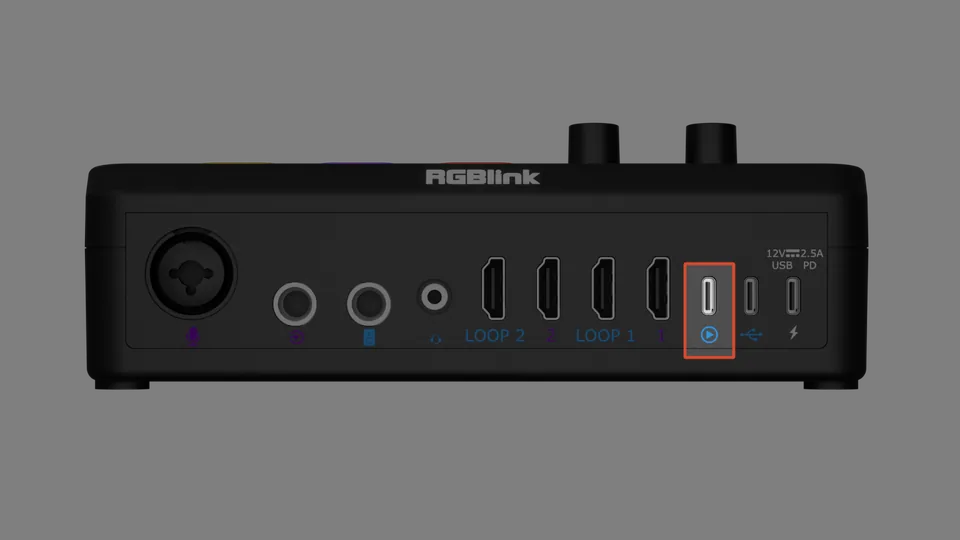
Make sure your computer meets the Computer Configuration Requirements (Please check this chapter in Quick Start).
- Connect the UVC Output port to a USB 3.0 (or later) port on the computer using a USB-A to USB-C cable or a full-featured USB-C cable.
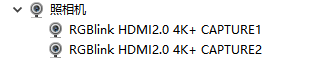
- Once connected,
RGBlink HDMI2.0 4K+ CAPTURE1/2appears in Device Manager (Windows) or System Information (macOS). No driver installation is required.
📢  Notes

USB 2.0 does not provide sufficient bandwidth for dual 4K video streams. Use a USB 3.0 port whenever possible. If your computer only has USB-C ports, use a **full-featured USB-C cable**, not a charging-only cable.
Connecting Power
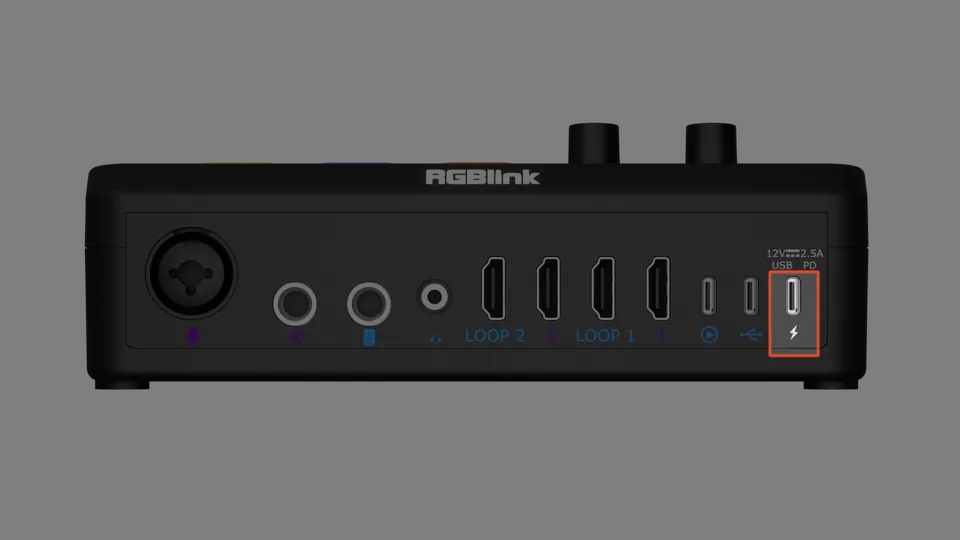
- Connect the supplied USB-C power cable to the USB-C Power port.
- Connect the other end to the supplied PD power adapter, then plug the adapter into an AC outlet.
- The device powers on automatically. No power switch is required.
- The front-panel LED light bar illuminates in approximately 5 seconds, indicating the device is ready.
📢  Notes

The button panel may take up to 20 seconds to light up. Use the front-panel LED light bar to confirm that the device has started successfully.