Online Manual
mini-iso-manual

3.2 Input
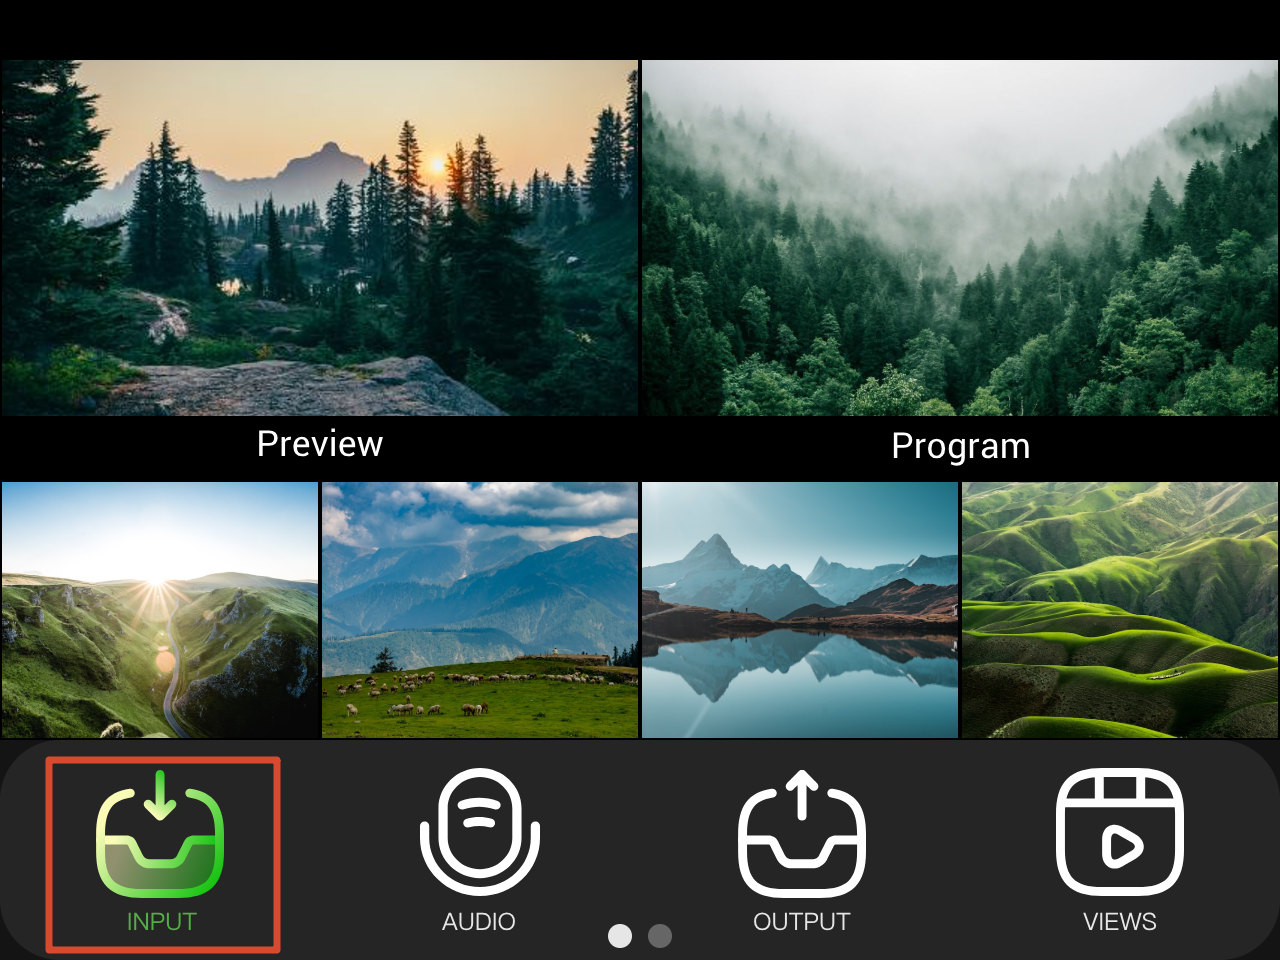
INPUT settings are used to assign signal sources to IN 1-5, including HDMI 1-4, SDI 1-4, NDI and UVC sources.
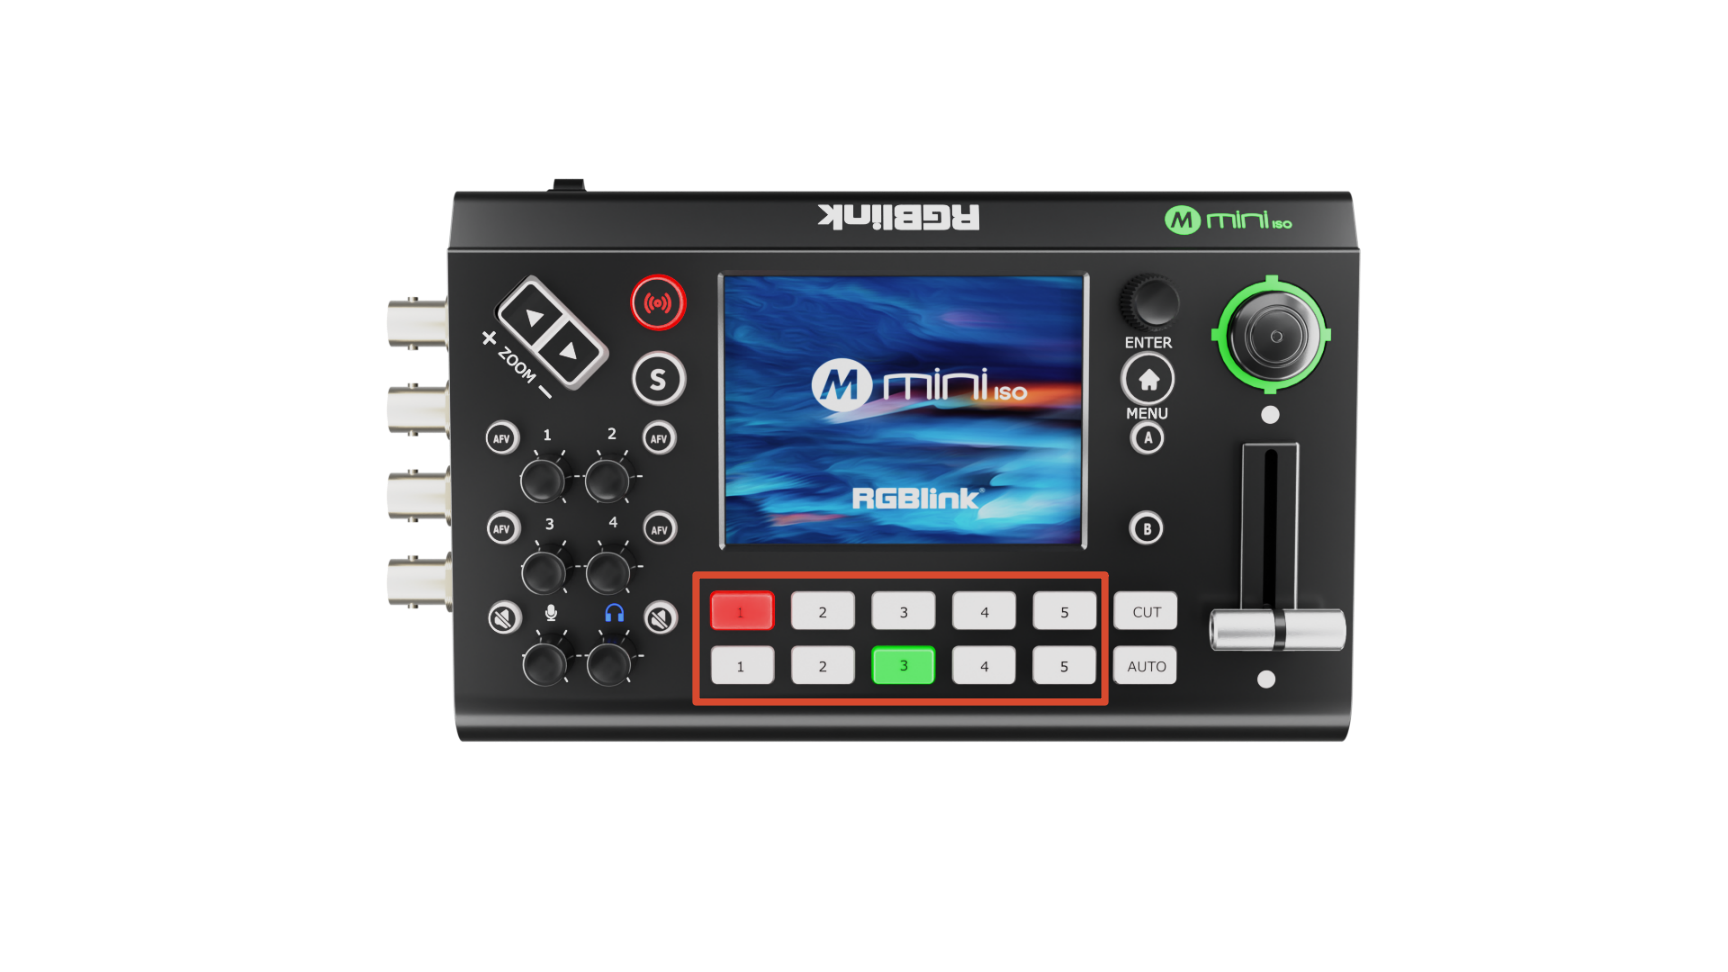
IN 1-5 correspond to the buttons on the front panel (as highlighted in the box) .
After a souce is connected, the button indicator displays the corresponding status.
| Indicator Status | Description |
|---|---|
| Solid Green | The signal is currently displayed in PREVIEW. |
| Solid Blue | The signal is being editing. |
| Solid Red | The signal is currently displayed in PROGRAM. |
| Off | No signal is detected. Or the signal format is not supported. |
3.2.1 IN1-4
IN1-4 are assigned to HDMI and SDI input sources.
After connecting a source as described in section 2. Install Your Product, the corresponding input is displayed in the HDMI/SDI monitoring area on the main interface.
| Input | Source |
|---|---|
| IN 1 | HDMI 1 or SDI 1 |
| IN 2 | HDMI 2 or SDI 2 |
| IN 3 | HDMI 3 or SDI 3 |
| IN 4 | HDMI 4 or SDI 4 |
Confuguring Steps
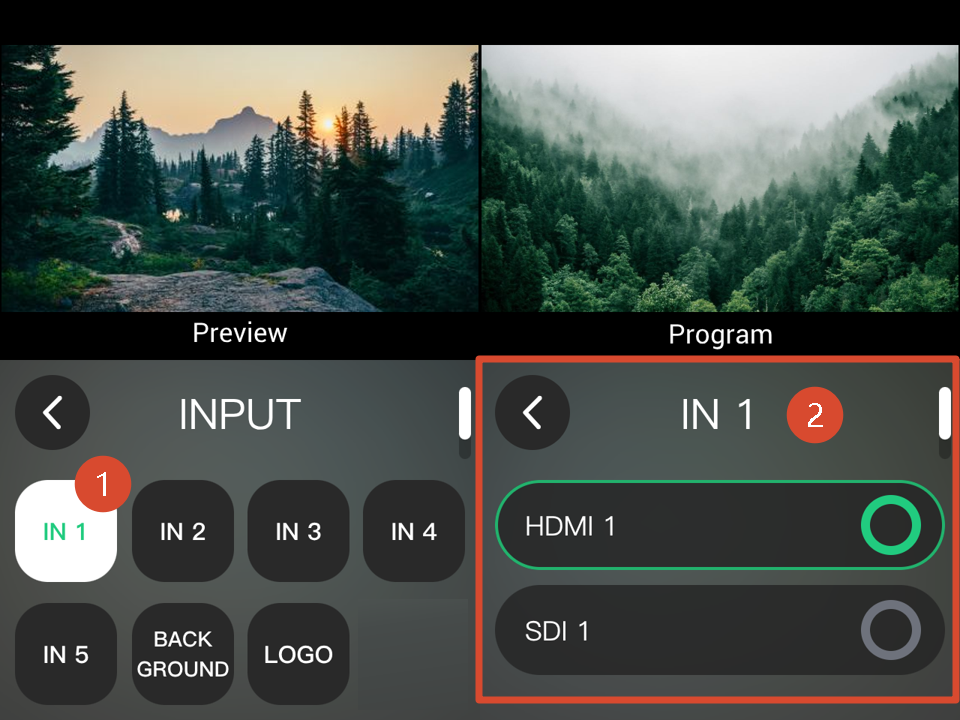
The following example shows how to configure IN1:
- Press MENU to open the menu.
- Select INPUT.
- Select IN 1.
- Select the signal source.
3.2.2 IN5
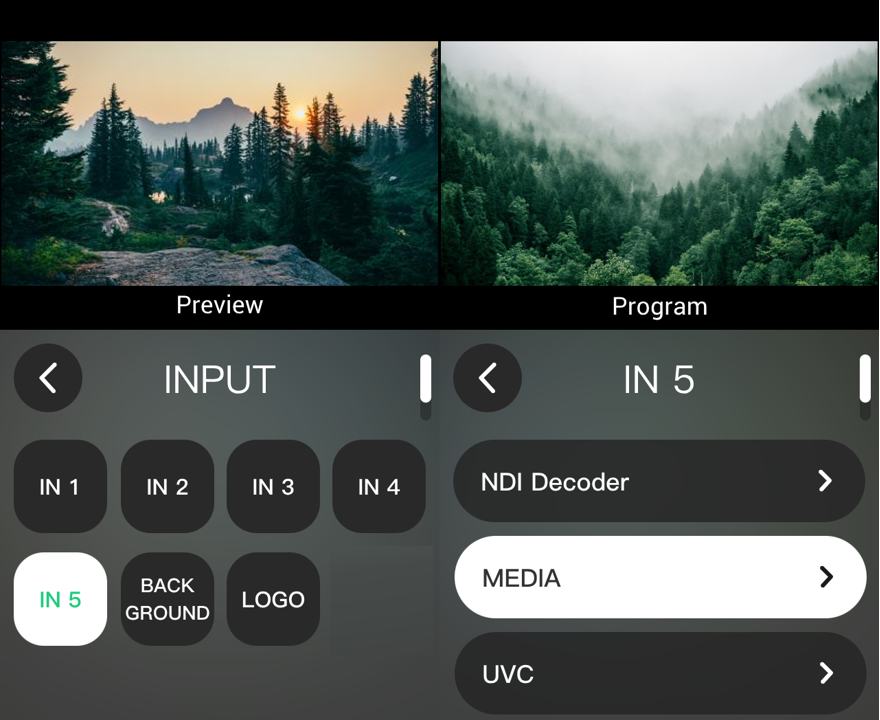
IN5 supports UVC cameras, NDI decoding, and local media files.
Select a USB video source, NDI source, or local media file according to your application. The selected source is displayed in the IN 5 preview area on the main interface.
UVC
- Connect the USB camera to the UVC port.
- Select IN5 and set the input type to UVC.
- Click the arrow on the right to open settings and enable or disable the camera.
NDI Decoder
NDI decoding requires TAO Cloud binding and authorization.
- Bind the device according to section 3.12 TAO Cloud.
- Go to My Collection > Device and select the device.
- In Setting > NDI Authorization, enter an email address to receive the authorization code, then click Authorization.
- Enter a valid NDI authorization code in the pop-up window and click NDI Enable to activate NDI decoding.
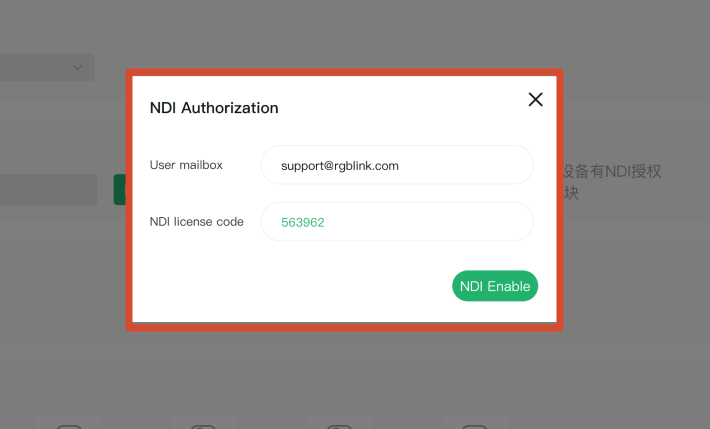
On the INPUT page:
- Ensure mini-ISO and the NDI source are connected to the same LAN.
- Select IN5 and set the input type to NDI Decoder.
- Click the arrow on the right, then tap Enable.
- Click Refresh.
- Select the target NDI source from the device list.
MEDIA
Save video files to an external USB drive:
- Create the folder:
mini-iso>Video - Save video files to the
Videofolder. - Connect the USB drive to the device RECORD port.
On the INPUT page:
- Select IN5 and set the input type to MEDIA.
- Click the arrow on the right to open settings.
- Select videos and configure playback options, including fast forward, rewind, and pause.
📢  Notes

Media files support MP4 format only, with resolutions up to 2K.
3.2.3 Background and Logo
Displays backgrounds and logos when no input signal is available or when media overlay is required.
Import Media
Using TAO Cloud
After binding the device (see section 3.12 TAO Cloud, go to the device management page.
In Basic Function > Content Management, select a scene and click + to import backgrounds, logos, and other media.
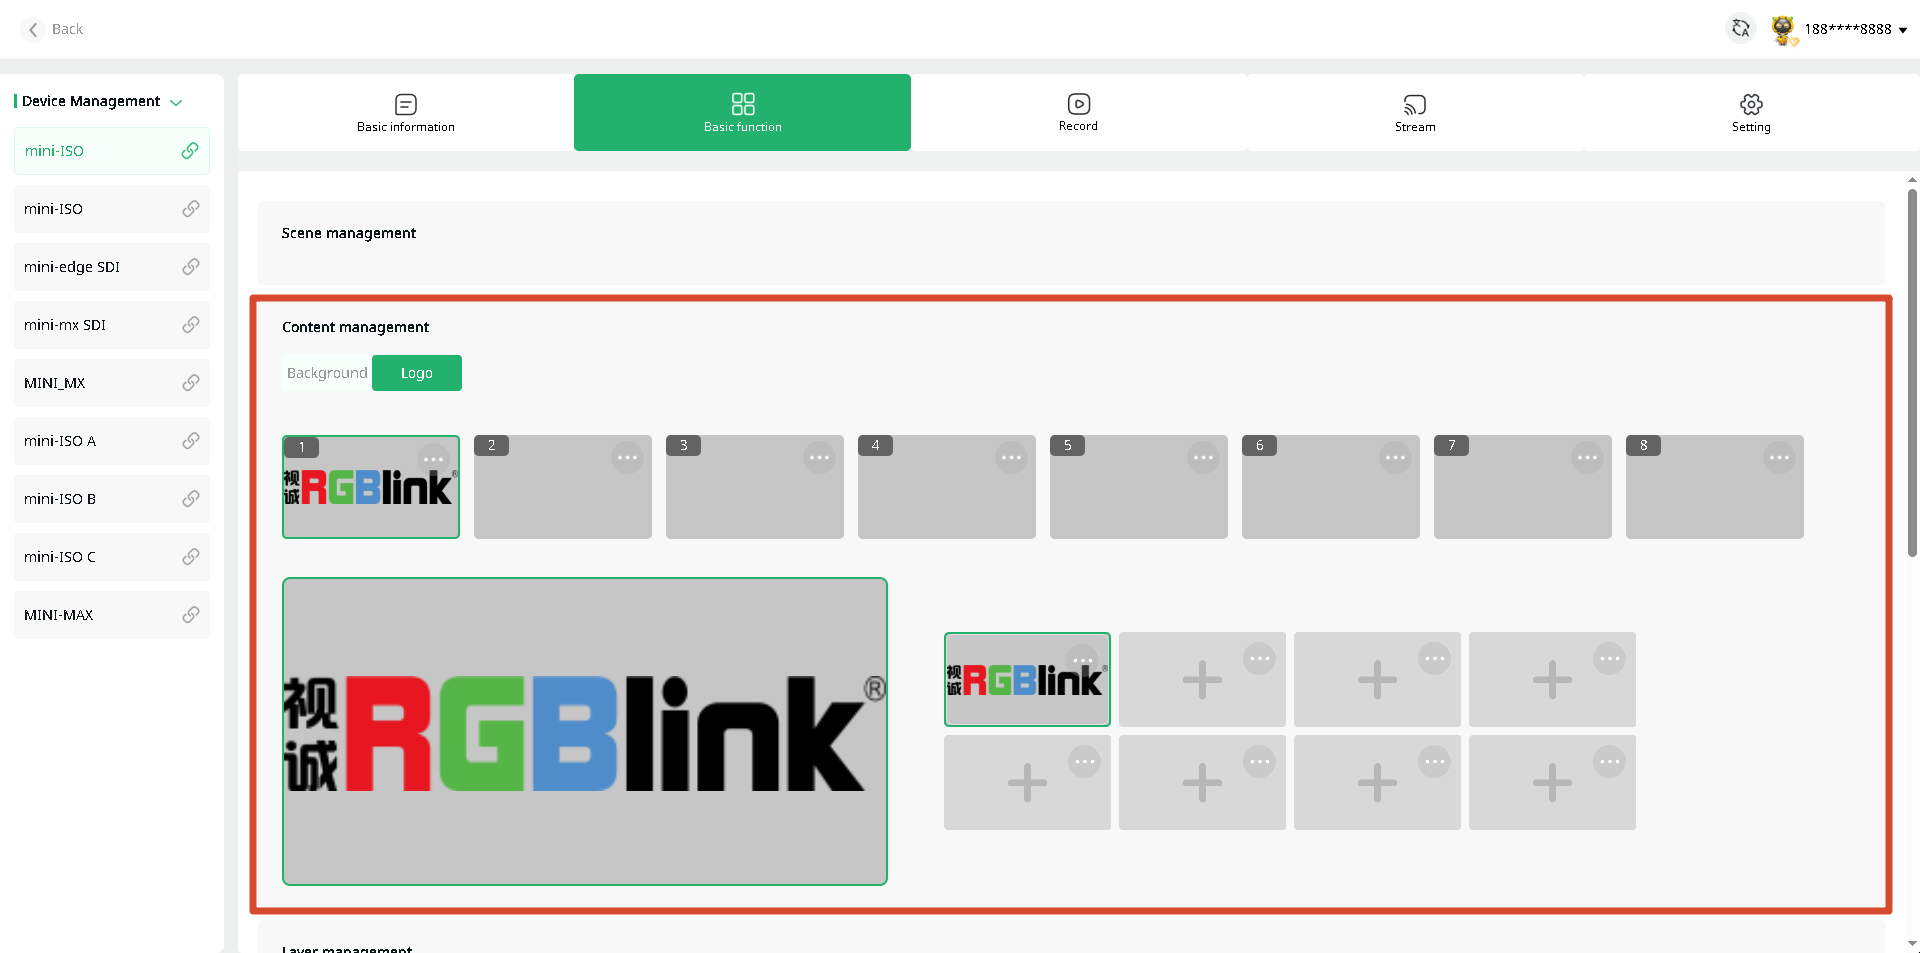
Using Web App
Add backgrounds, logos, and other media using the Web App.
- Add Backgrounds
- Enter the Web App page.
- Select the Background icon to open background settings.
- View uploaded backgrounds. Click + to upload a new background image.
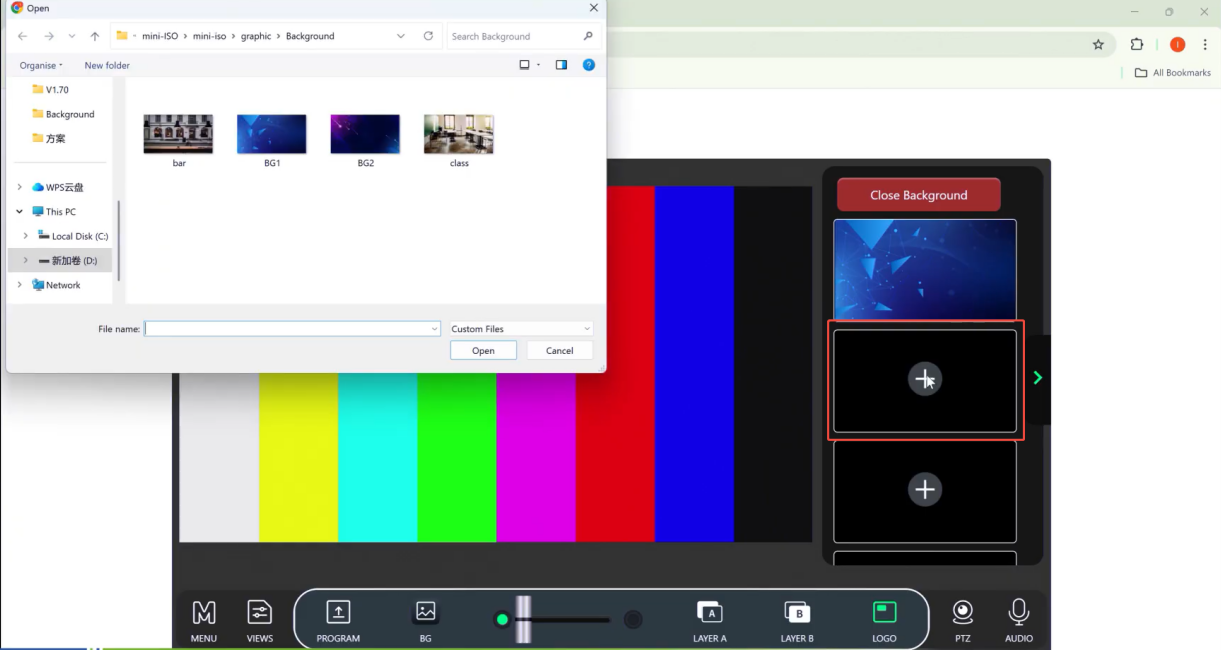
- Return to the input selection interface, select Background, and enable it.
- Select and apply a background from the style list.
- Add Logos
- Add and apply logos in the same way as backgrounds. Select LOGO in the Web App, upload a logo, then select it on the device.
- Adjust the logo position using the right-side settings panel or the front panel five-direction joystick.
📢  Notes
The Logo document must be a PNG image with transparency and a maximum resolution of 1920 × 1080 pixels.
Confuguring Steps
- Go to INPUT and enable the BACKGROUND/LOGO function.
- Tap Style Select to open the media library, then select a media file.
- Adjust the logo position using the coordinates and arrow buttons in Position, or the front panel five-direction joystick.