Online Manual
mini-iso-manual

3.3 Output
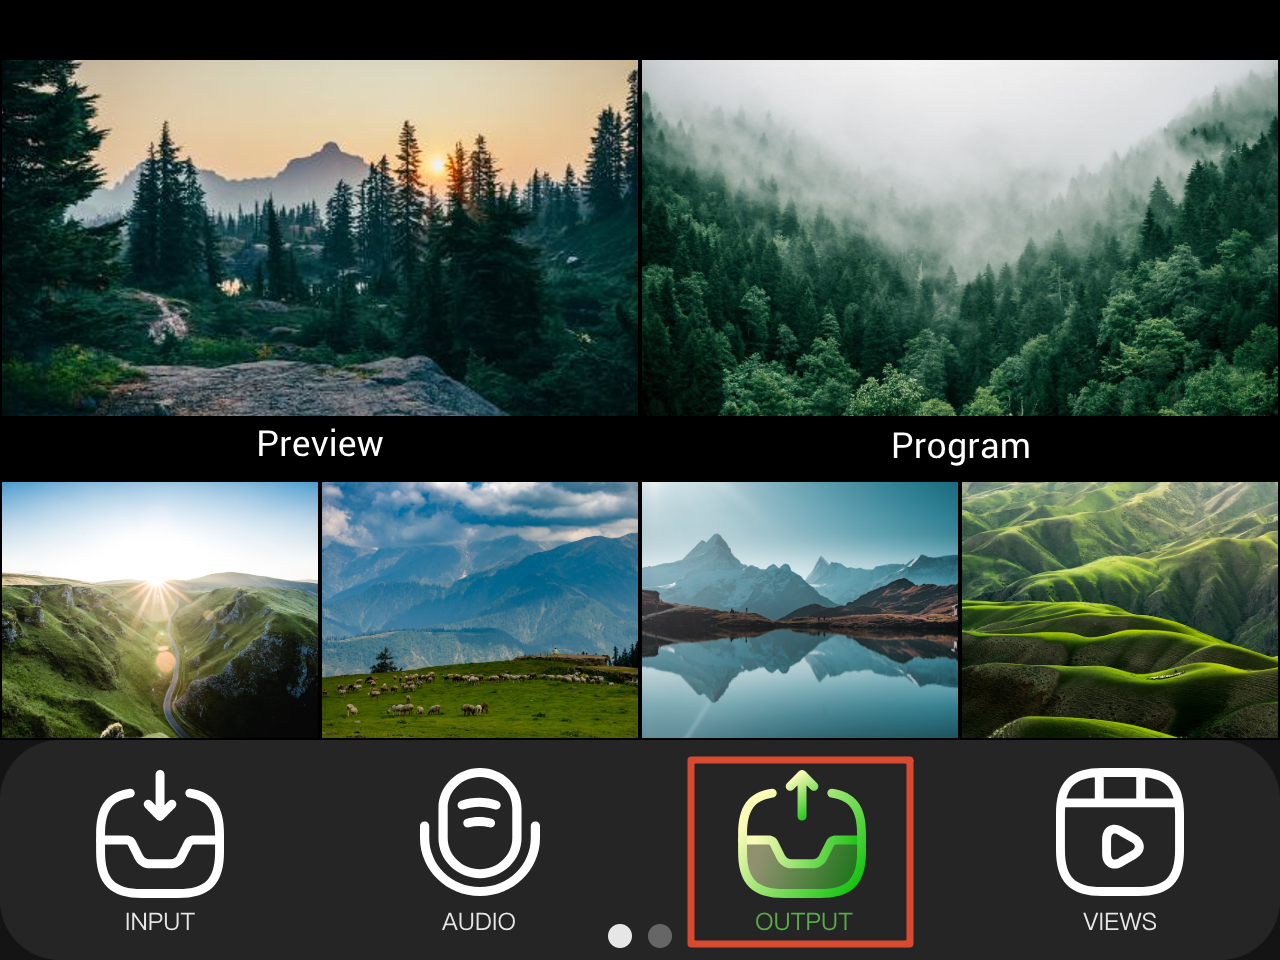
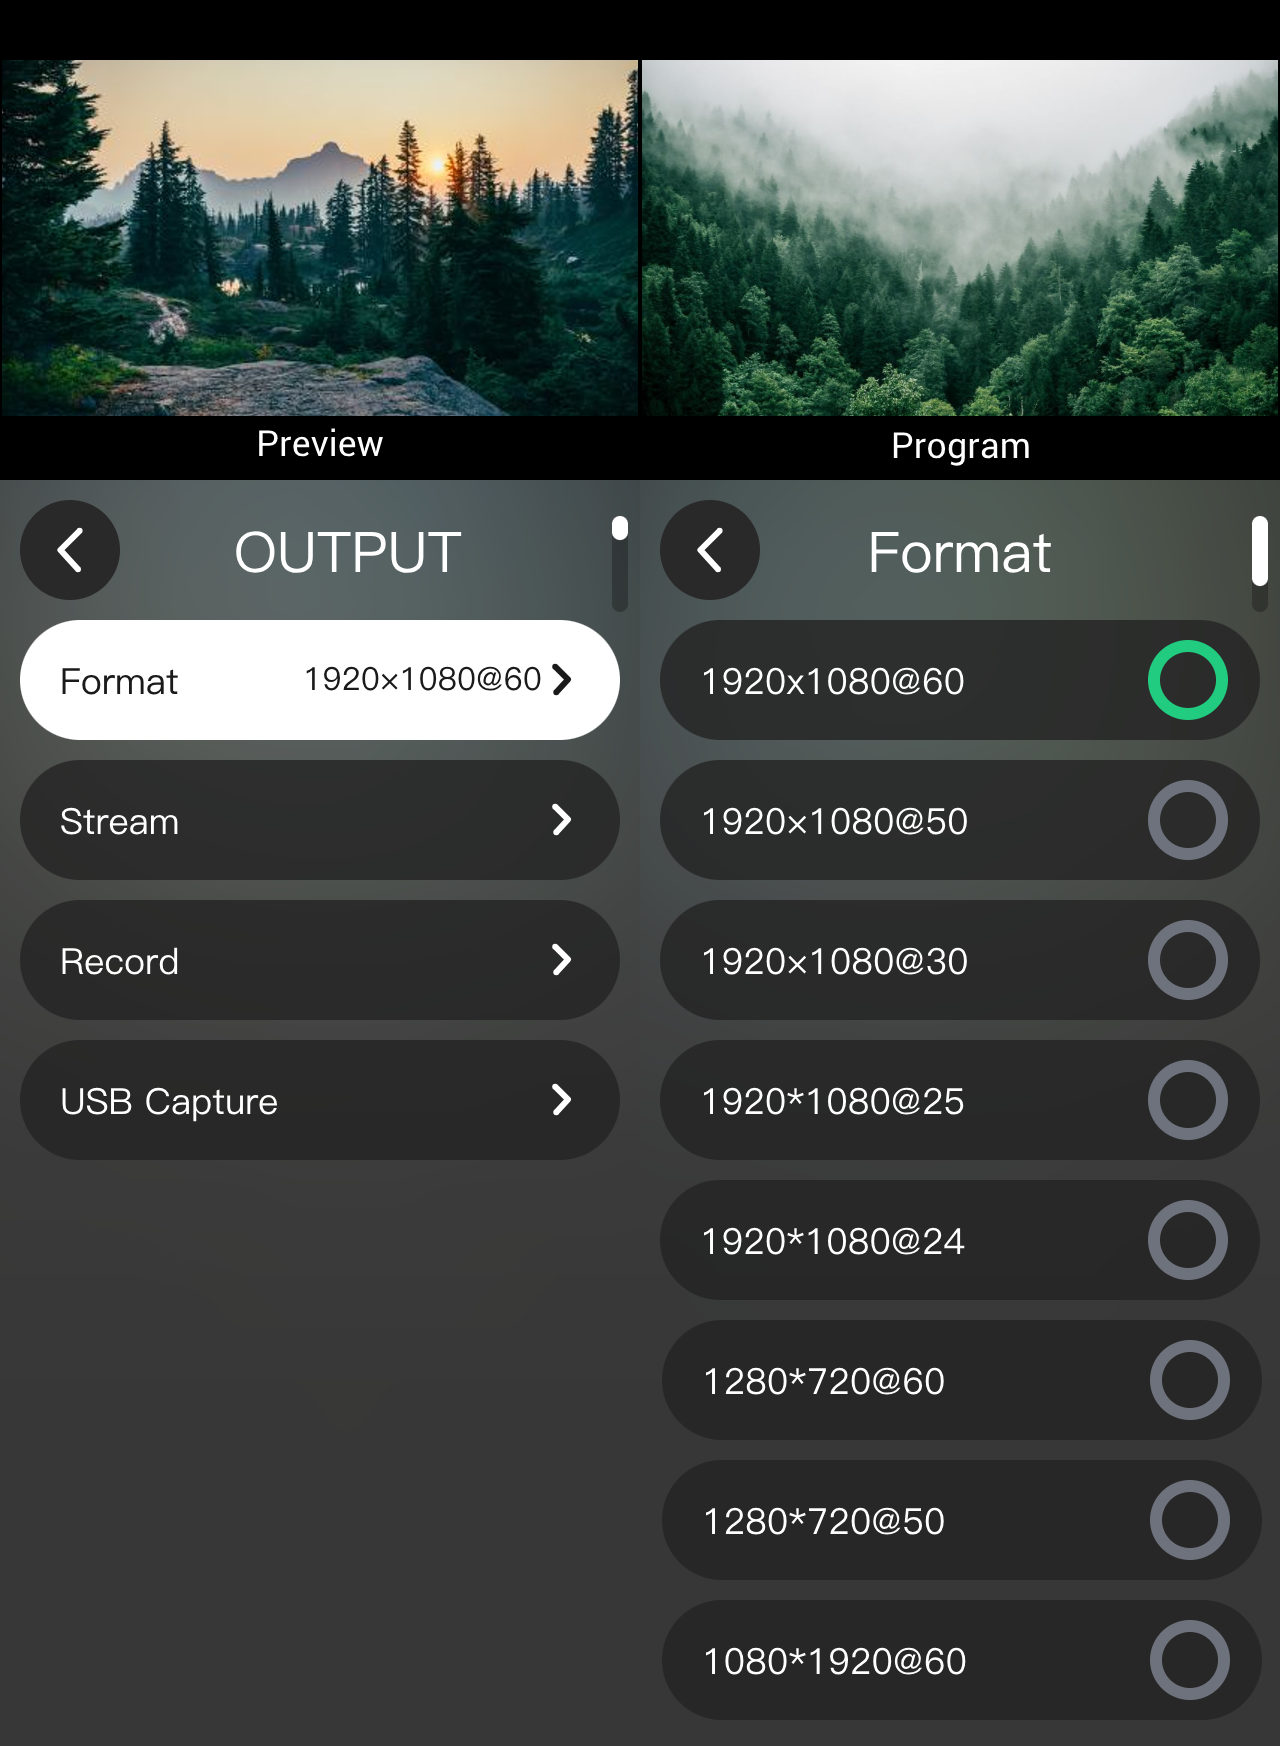
Tap OUTPUT in the main menu to enter output setting page.
 | 👉 |  |
|---|
3.3.1 Format
Tap Format and choose resolution from the list.
3.3.2 NDI Encoder
The NDI encoder function converts mini-ISO program output into an NDI signal, which can be selected from the input source list in software such as vMix for program production.
Before fitst time use, the function require TAO Cloud binding and authorization. See section 3.2.1 IN 5, NDI Decoder for more details.
The following uses vMix as an example:
- On the device, go to Stream and enable the NDI Encoder switch.
- Open vMix. On the operation page, go to **Input Select **> NDI / Desktop Capture and select the NDI signal from mini-ISO.
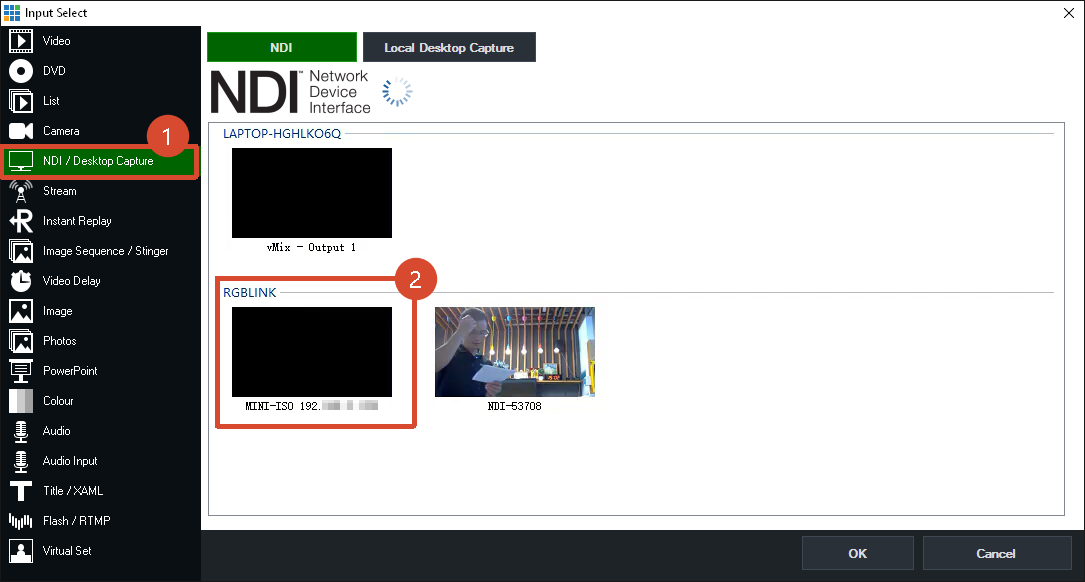
- Use the signal in vMix for production.
3.3.3 Stream
Choose Stream to enter the setting page where users can choose bitrate (Mbps), mode, enable/disable NDI encoder, and check TAO Cloud push stream addresses.
mini-ISO supports the following streaming methods:
- Streaming on Device
- TAO Cloud Multi-Platform Stream
- USB Port Capture and Output
- ……
Choose the method that best fits your production workflow.
Network Connection
Before using the streaming function, make sure mini is connected to the network. Connect the device to a router or network switch using an Ethernet cable.
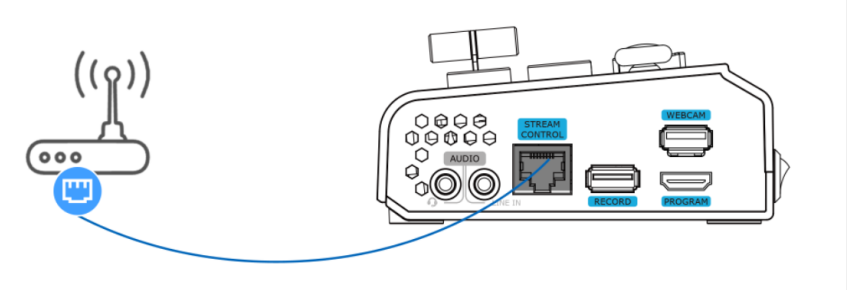
RGBlink CAT6 Ethernet cables are recommended. Product code: 940-0001-00-11-0
Obtaining the Stream URL and Stream Key
🚨  Risk Warning

Do not share your stream key with anyone or display it during a live stream. Doing so may result in unauthorized account access, stream hijacking, or other potential risks and losses.

If your stream key is exposed:

-  Immediately reset the stream key on the corresponding platform.
-  Stop the current live stream.
-  Restart streaming using the new stream key.
View Streaming to Live Platforms to check how to get stream key from other platforms.
3.3.4 Streaming on Device
mini-ISO supports live streaming without a computer or mobile device.
Up to 4 destinations can be streamed simultaneously from a single device.
TAO Cloud Bindding and Streaming
Check section 3.12 TAO Cloud for details.
Streaming Settings
mini-ISO supports RTMP (s) streaming protocol. You can set the bitrate and switch between horizontal and vertical modes on the Stream page.
Bitrate
A higher bitrate provides better streaming quality. If network bandwidth is insufficient, lower the bitrate as needed to ensure a stable stream.
Mode
The device supports both horizontal and vertical streaming. Switch between the two modes according to the requirements of the streaming platform.
Starting a Stream
- Streaming can be started using either of the following methods:
- Enable the streaming switch on the Stream page.
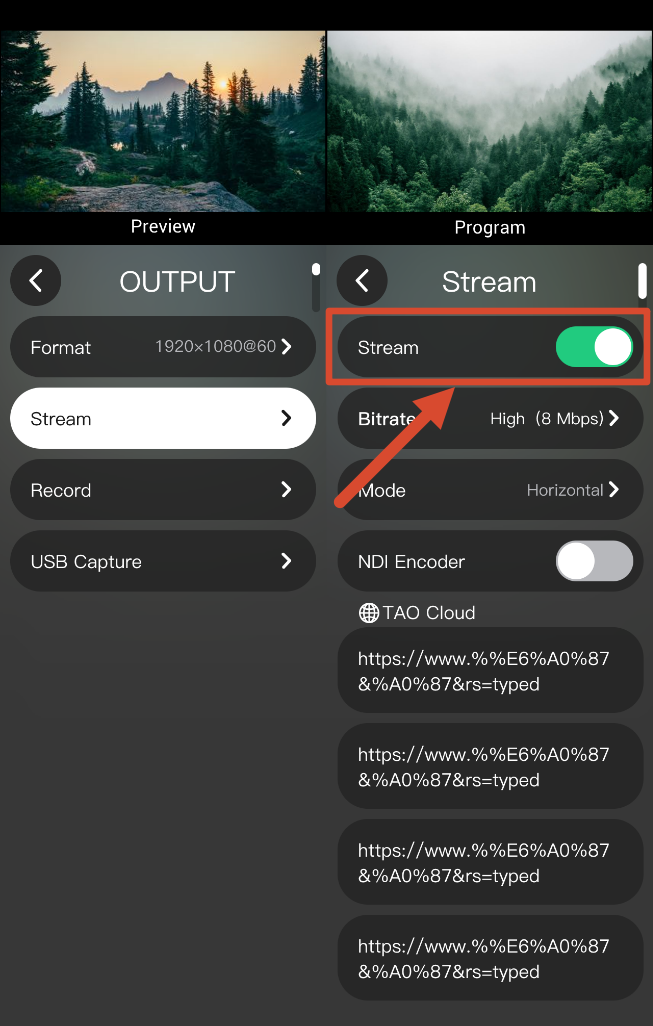
- Press the ON AIR button on the front panel.
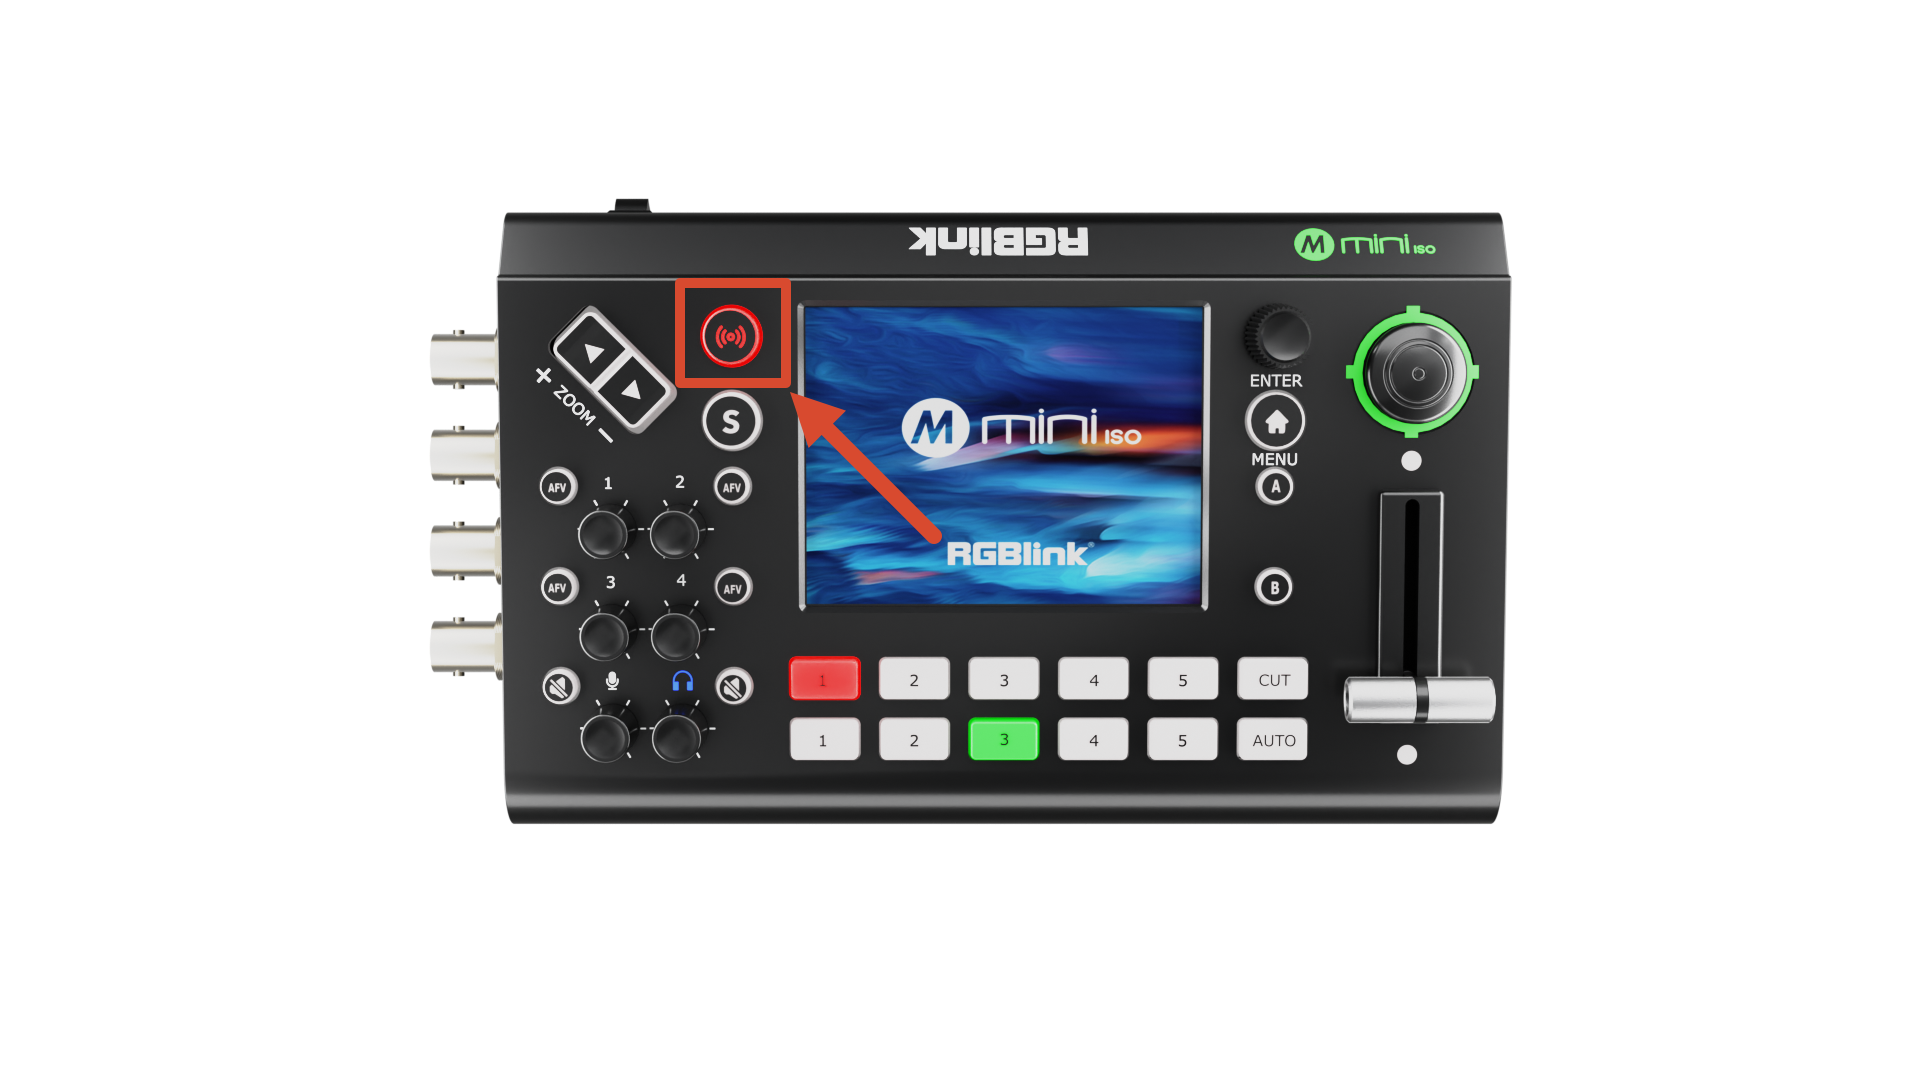
- During streaming, individual platforms can be enabled or disabled independently.
3.3.5 TAO Cloud Multi-Platform Stream
3.3.6 USB Port Capture and Output
mini-ISO can also be connected to a computer through USB and used as a video source for third-party streaming software such as OBS Studio.
The following examples use OBS Studio for demonstration.
- Download OBS from: OBS Studio. Install the software and update it to the latest version before use.
- Open OBS, add a Video Capture Device.
- Select
RGBlink USB3.0 Capture, and select YUY2 for the Video Format.
Audio Settings
If no audio is detected during streaming:
- Confirm the audio source on the device is configured correctly (Set Default).
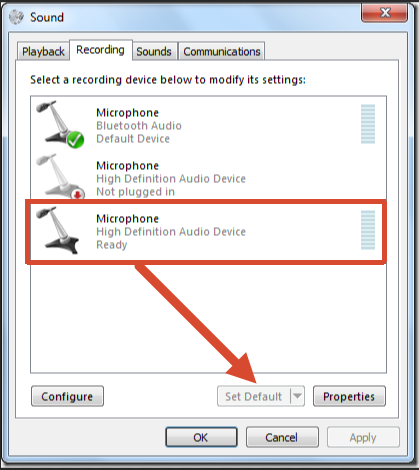
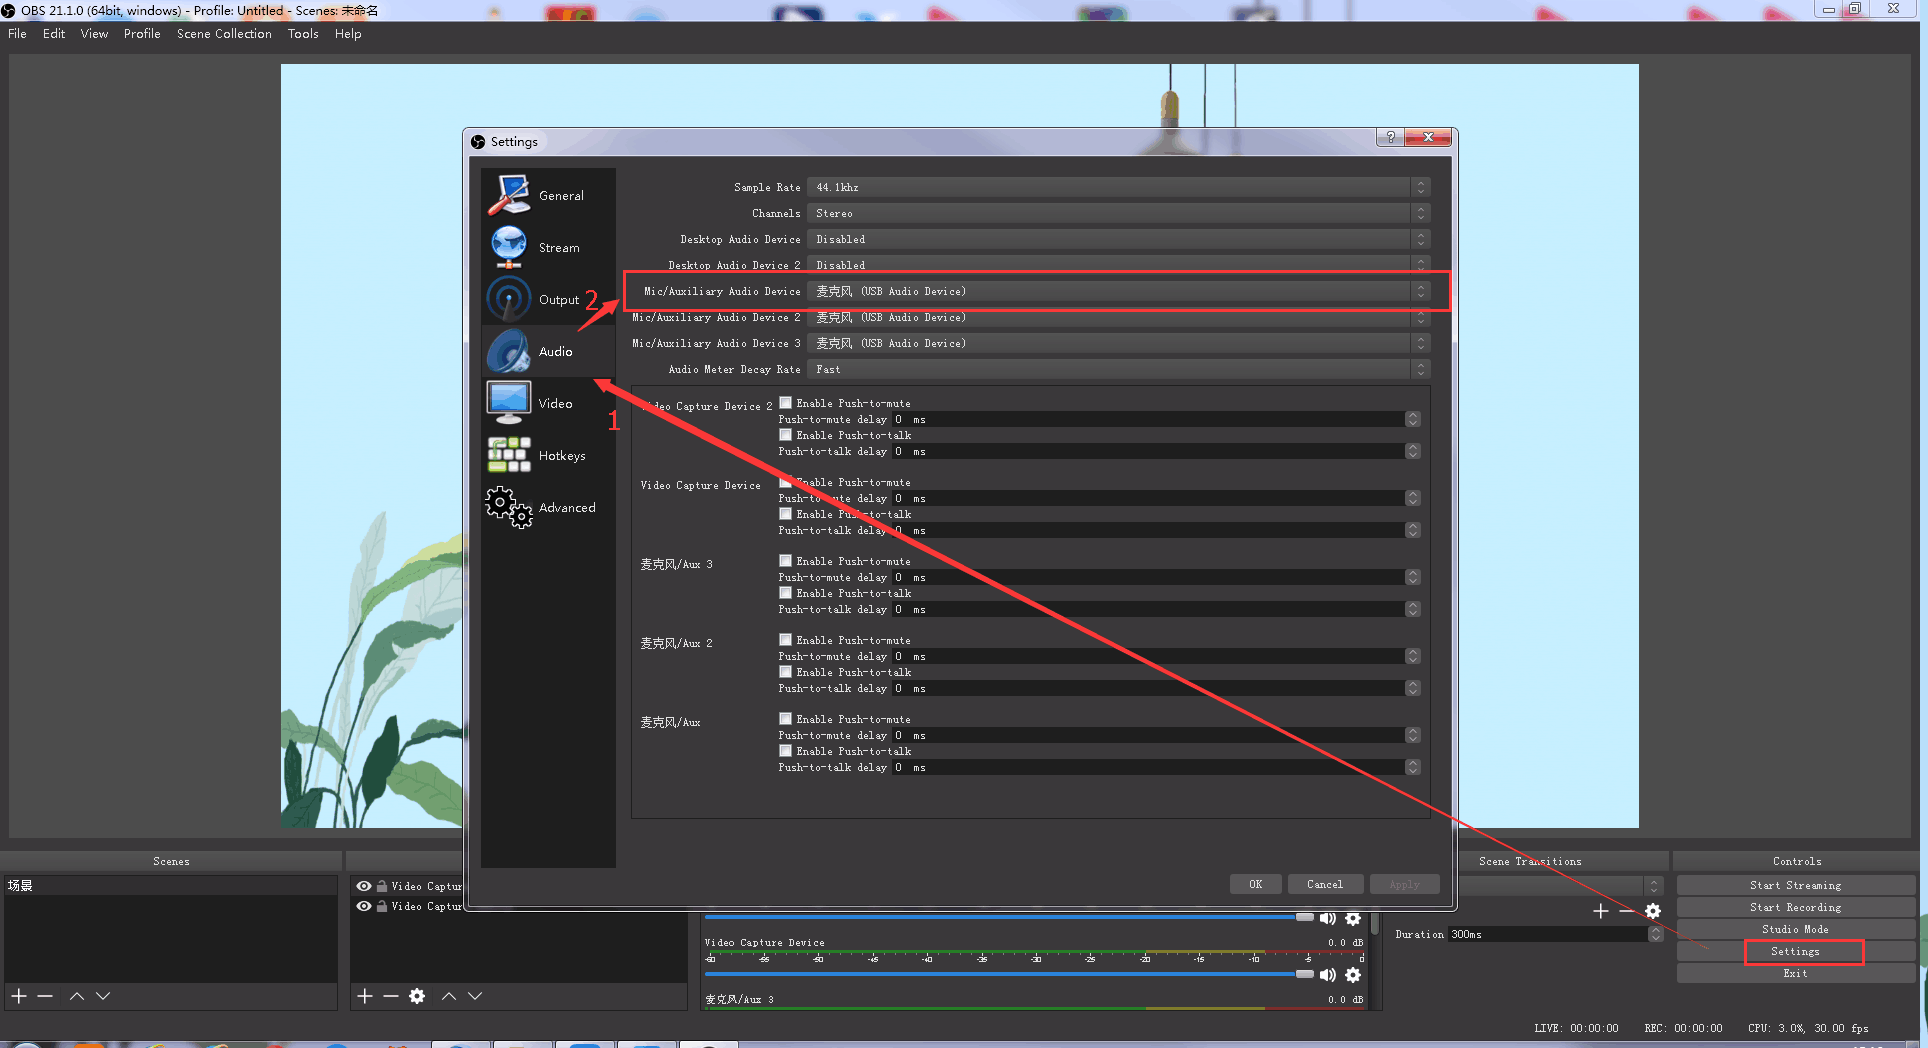
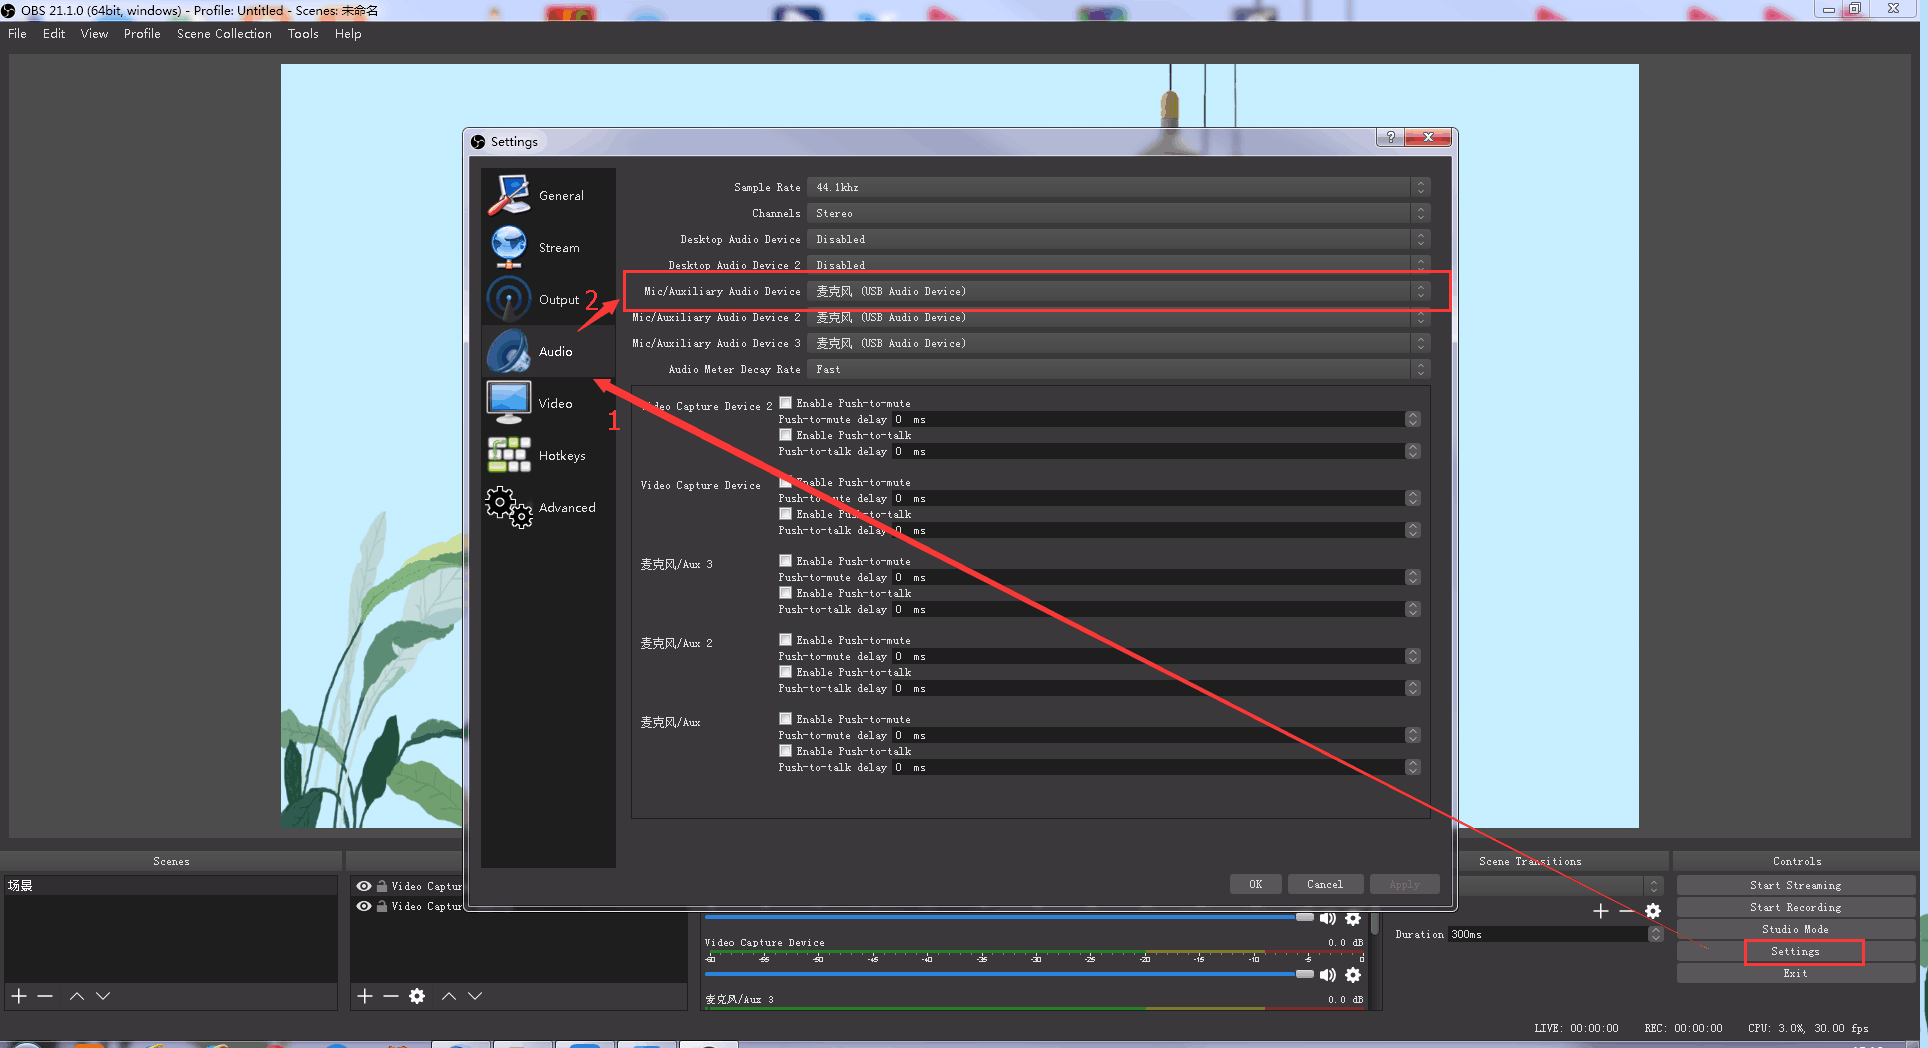
- In OBS, go to Settings > Audio. Select the correct device Mic/Auxiliary Audio Device.
Synchronize Video with External Audio
If the video source does not contain embedded audio and external audio is used separately, synchronize the audio and video using the following steps.
- Go to Settings > Audio > Mic/Auxiliary Audio Device and select the audio source.
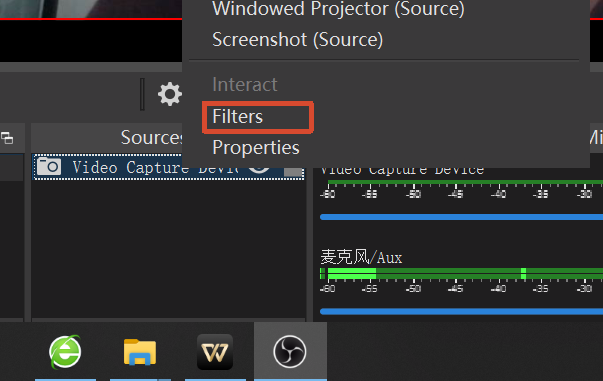
- In the Sources panel, right-click Video Capture Device, then select Filters.
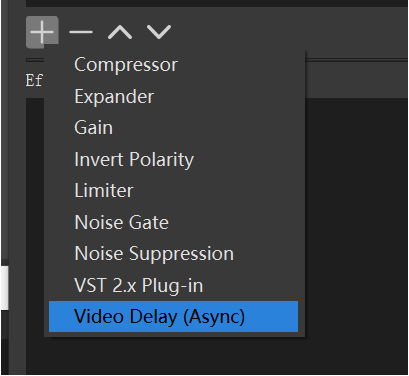
- Under Audio/Video Filters, click + and select Video Delay (Async).
- Enter a filter name if needed, then click OK.
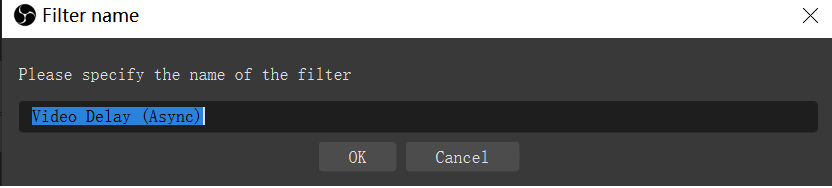
- synchronous.Enter the delay value in milliseconds (ms).
Adjust the value until the audio and video are synchronized.

Streaming Settings
- Obtain the RTMP URL and Stream Key from the streaming platform.
- Copy the RTMP URL and Stream Key.
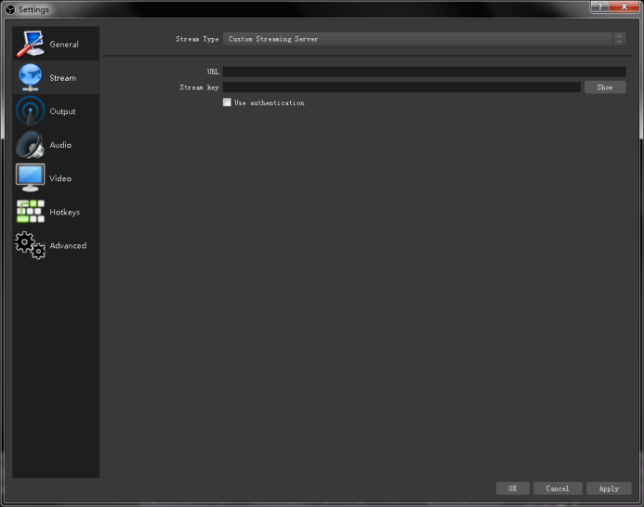
- In OBS, go to Settings > Stream.
- Select the streaming type:
- Streaming Service
- Custom Streaming Server
If the platform is listed under Service, select it directly.
If using a custom server:
- Enter the RTMP URL in Server/URL
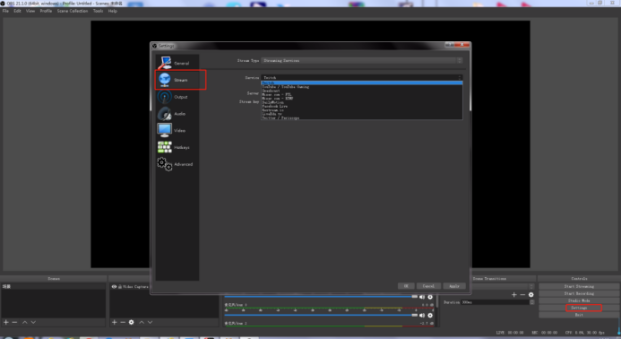
- Enter the Stream Key in Stream Key
- Click Start Streaming.
- Return to the streaming platform and confirm the live stream is active