Online Manual
mini User Manual

2.2 USB Port Capture and Output
📢 **Notes**
The screenshots in this document may differ from the current software version.
Actual interface layout and wording may vary, but the operation flow remains the same.
Please refer to the version currently in use.
```The
USB port labeled [WEBCAM] supports USB video capture.
Users can capture video from mini to a computer and stream through third-party software such as OBS to platforms including:
- Facebook
- YouTube
- Zoom
- Twitter/X
- Other streaming platforms
#### OBS Streaming
mini is compatible with various third-party streaming applications. We recommend using OBS.
Download OBS from: [OBS Studio](https://obsproject.com/download?utm_source=chatgpt.com)
Install the software and update it to the latest version before use.
##### Add Video Capture Device
1. Click the [+] icon in the Sources panel.
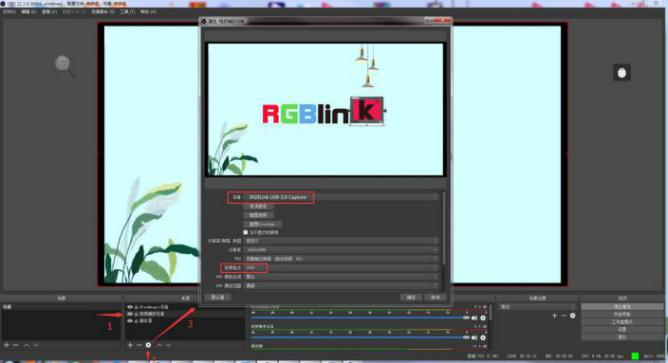
2. Select [Video Capture Device].
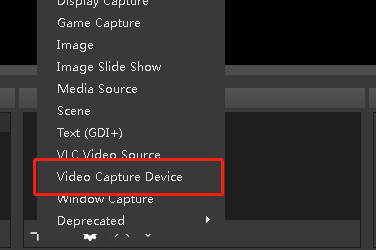
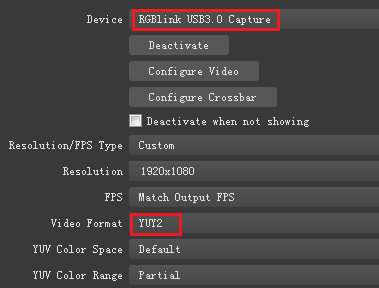
3. Select [RGBlink USB 3.0 Capture] as the capture device.
4. Set [Video Format] > [YUY2].
```tips
**📢 Notes **
If the YUY2 format is unavailable, check the USB connection:
- Ensure the device is connected to a USB 3.0 port
- Use a USB 3.0 cable
- USB 3.0 ports are typically blue, while USB 2.0 ports are usually black
Audio Settings
If no audio is detected during streaming:
- Confirm the audio source on the device is configured correctly (Set Default).
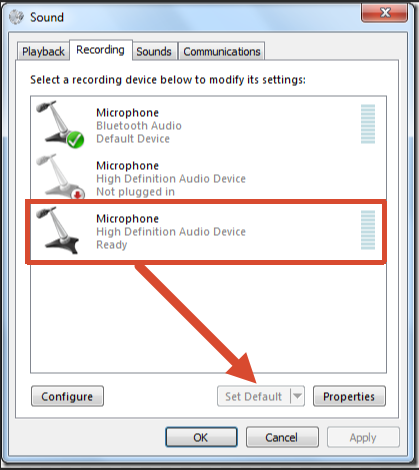
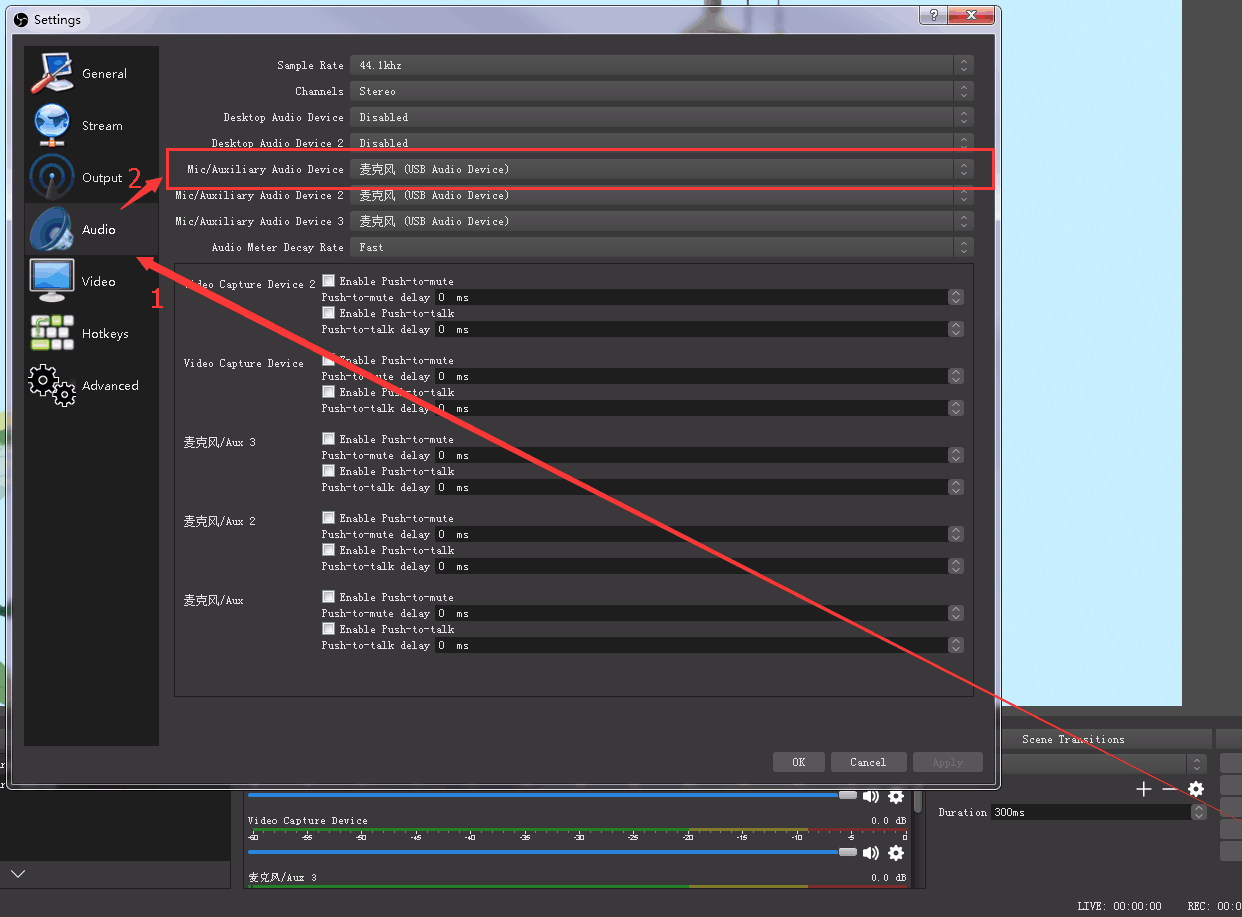
- In OBS, go to [Settings] > [Audio]. Select the correct device [Mic/Auxiliary Audio Device].
Synchronize Video with External Audio
If the video source does not contain embedded audio and external audio is used separately, synchronize the audio and video using the following steps.
- Go to [Settings] > [Audio] > [Mic/Auxiliary Audio Device] and select the audio source.
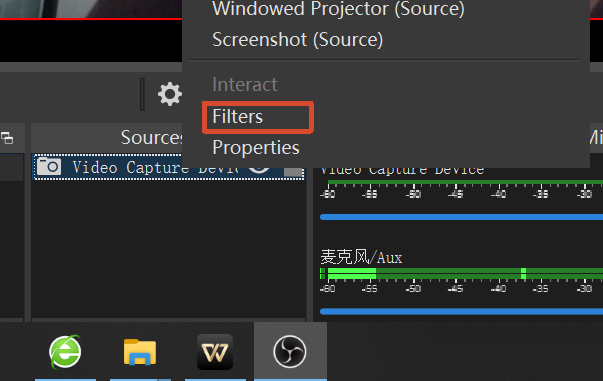
- In the Sources panel, right-click [Video Capture Device], then select [Filters].
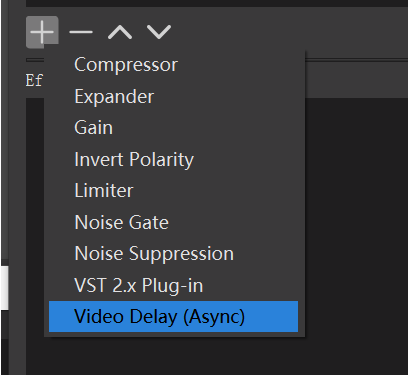
- Under [Audio/Video Filters], click [+] and select [Video Delay (Async)].
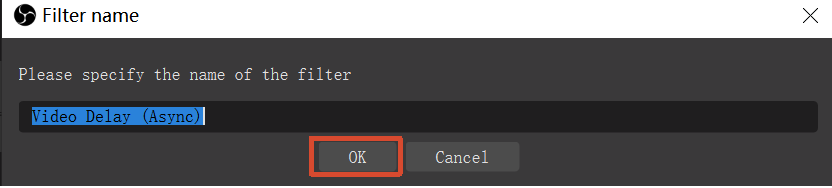
- Enter a filter name if needed, then click [OK].
- Enter the delay value in milliseconds (ms).
Adjust the value until the audio and video are synchronized.

Streaming Settings
- Obtain the RTMP URL and Stream Key from the streaming platform.
- Copy the RTMP URL and Stream Key.
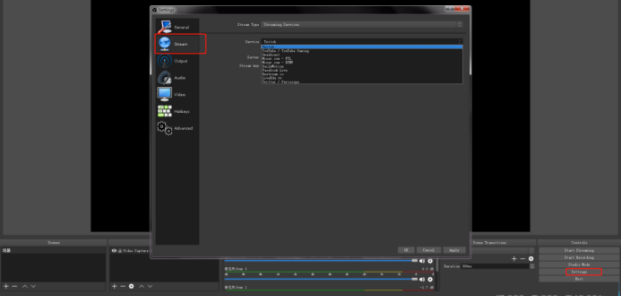
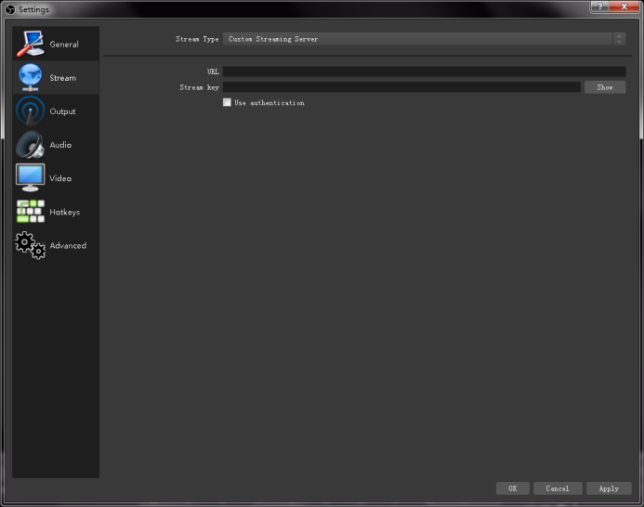
- In OBS, go to [Settings] > [Stream].
- Select the streaming type:
- [Streaming Service]
- [Custom Streaming Server]
If the platform is listed under [Service], select it directly.
If using a custom server:
- Enter the RTMP URL in [Server]/[URL]
- Enter the Stream Key in [Stream Key]
- Click [Start Streaming].
- Return to the streaming platform and confirm the live stream is active.
vMix Streaming
 📢**  Notes**

vMix cannot automatically detect the output resolution of mini.
Each time the output resolution of mini is changed, the video preview in vMix may freeze. Re-select [RGBlink USB3.0 Capture] and manually set the current output resolution of mini to restore normal video display.
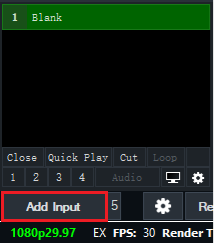
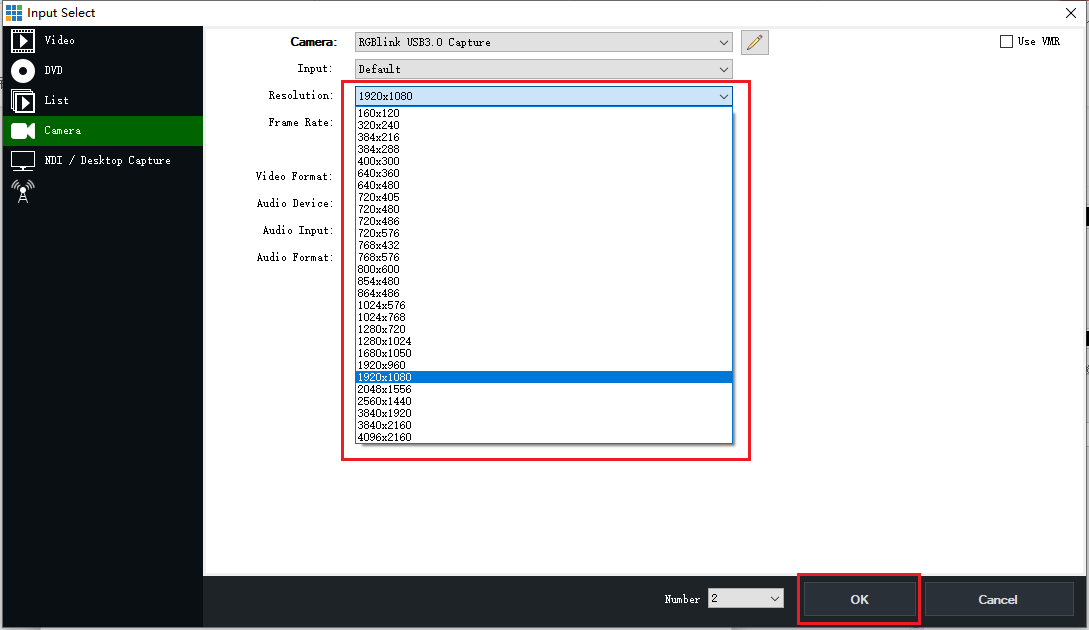
- Click an empty input area, then click [Add Input].
- Select [Camera] > [Camera] > [RGBlink USB3.0 Capture].
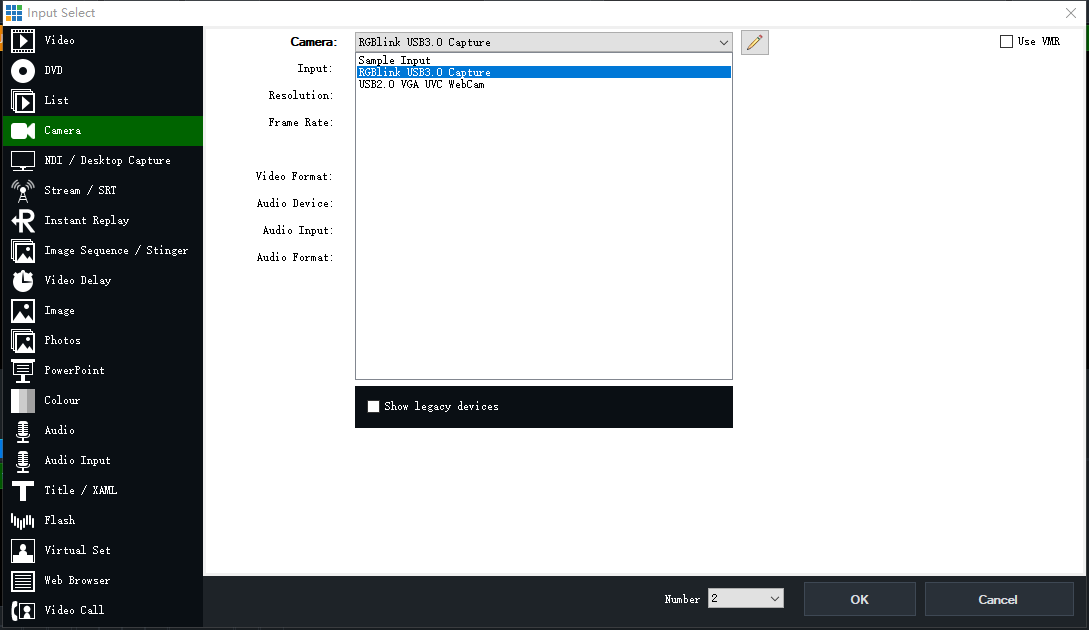
- Select the same resolution as the mini output resolution, then click [OK].
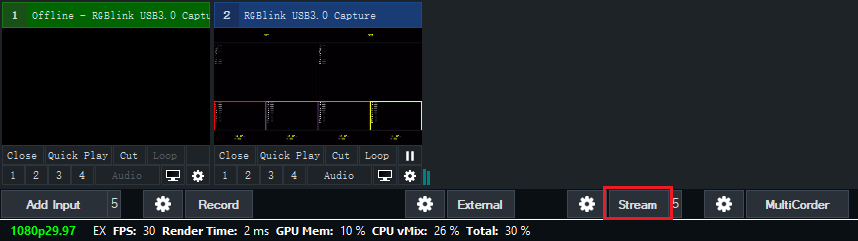
- Click the stream settings button.
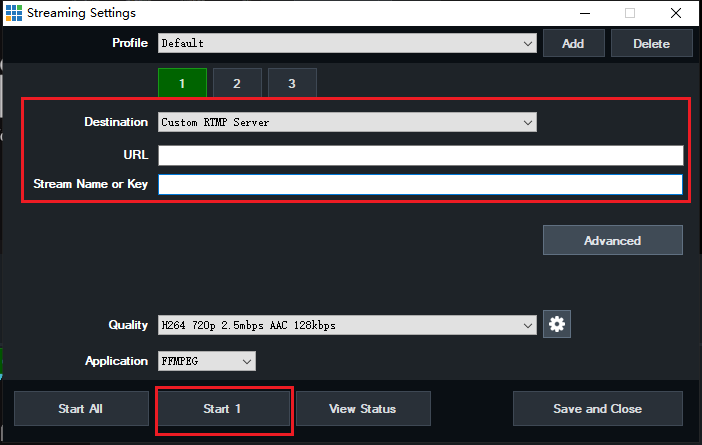
- Enter the streaming URL and Stream Key.
- Click [Start 1] to begin streaming.
Facebook Streaming
Refer to the actual Facebook Live interface for streaming setup.
Official Guide link: https://www.facebook.com/business/help/165076674943644?id=1123223941353904
Zoom Streaming
Refer to the actual Zoom interface for streaming setup.
Official Guide link: https://support.zoom.com/hc/en/article?id=zm_kb&sysparm_article=KB0064210