Online Manual
mini-edge SDI User Manual

1.2 Front Panel
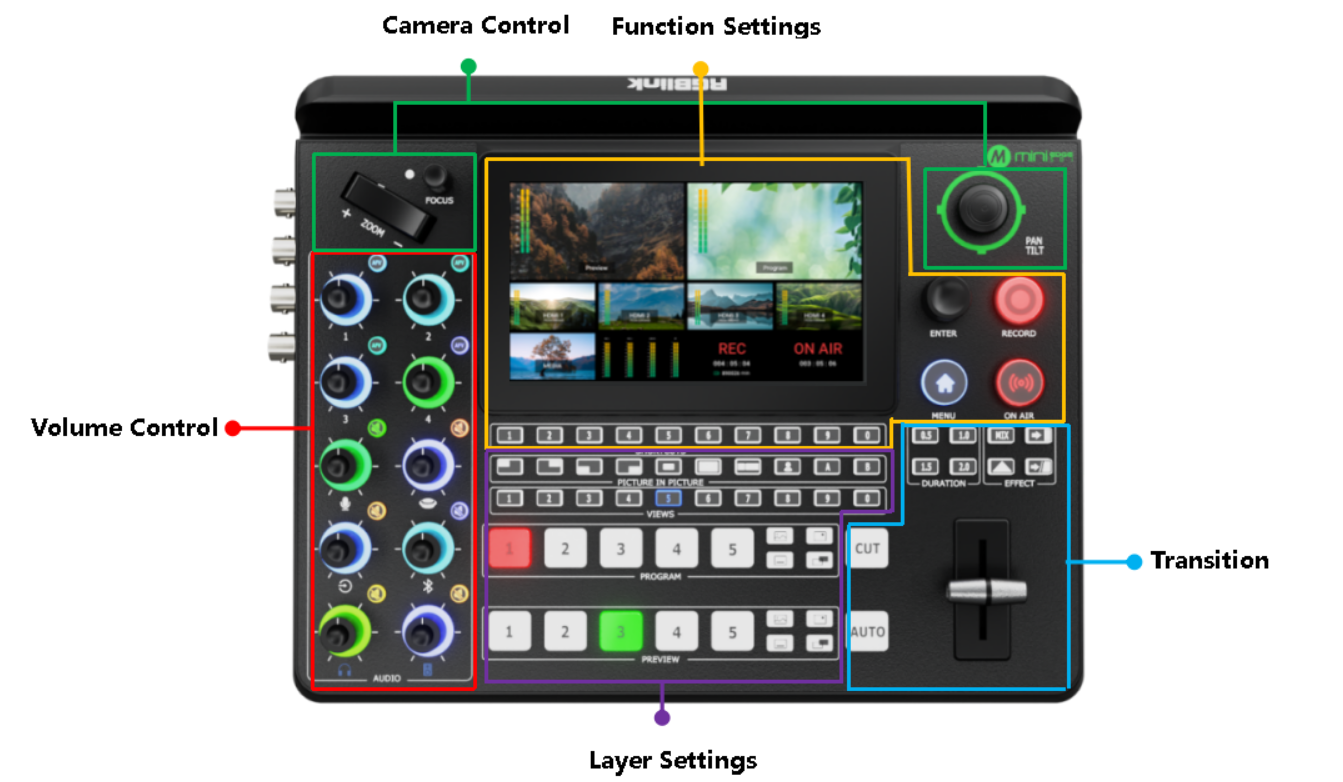
| Area | Description |
|---|---|
| Function Settings | ● 5.5" HD Screen ● SHORTCUT/Number Button ● MENU/EXIT/LOCK Button ● Menu Browsing/Confirm Button (ENTER) ● RECORD Button ● ON AIR Button |
| Camera Control | ● FOCUS Button with Indicator ● Toggle ● 5-Direction Joystick |
| Volume Control | ● Volume Control Knob ● AFV Button ● Mute Button |
| Transition | ● Transition Effect Selection Button (EFFECTS) ● Transition Duration Selection Button (DURATION) ● T-Bar ● CUT Button ● AUTO Button |
| Layer Settings | ● Layout Selection Button (PICTURE-IN-PICTURE) ● Chroma Key ● Layer A/B Button ● Preset Loading Button (VIEWS) ● PROGRAM Source Row ● PROGRAM Layer Button ● PROGRAM FTB Button ● PREVIEW Source Row ● PREVIEW Layer Button ● PREVIEW Clear Button |
1.2.1 Function Settings
| Area | Description |
|---|---|
 | 5.5" HD Screen For showing input, output, recording and live streaming status, and displaying the menu content. |
 | SHORTCUTS/Number Button ● Button Definition ○ Shortcuts Button ○ Number Button ● Button Color Description ○ Button Unlit: no shortcuts saved. ○ Button Lit White: shortcuts saved. ○ Button Lit Blue: act as a number button ● Button Operation ○ Short Press: to distribute shortcuts. ○ Interface with Input Box: to input numerical values. |
 | MENU/EXIT/LOCK Button ● Button Definition ○ MENU Button ○ EXIT Button ○ LOCK Button |
 | MENU Browsing/Confirm Button ● Button Definition ○ MENU Browsing Button ○ Confirm Button |
 | RECORD Button ● External Hard Disc Status Display ○ Recording OFF: 1) unlit if no hard disc connected; 2) lit white with disc space more than 300M. ○ Recording ON:button blinks red if space is less than 300M. ● Press to Enable/Disable Recording ○ Press to start the recording. Button lit red to indicate normal recording process. ○ Press button again to stop the recording. The Button blinks red to indicate the video-saving process. |
 | ON AIR Button ● Network Status Display ○ Streaming OFF: button lit white for normal communication ○ Streaming ON:1) button blinks red to show failed streaming but normal communication; 2) button blinks white to show failed streaming and communication; 3) button blinks yellow to show successful streaming with unmatched upstream bitrate; 4) button turns green to show successful streaming with matched upstream bitrate. ● Press to Enable/Disable Streaming ○ Press to start streaming: 1) button lit green to indicate a successful streaming; 2) button blinks red to remind the user to configure the streaming address. ○ Press once again to stop streaming: 1) button turns red to indicate the video-saving process; 2) button goes dark if streaming is completed. |
1.2.2 Camera Control
| Area | Description |
|---|---|
 | FOCUS Button with Indicator ● Focus Status Display ○ Manual Focus: indicator unlit. ○ Auto Focus: indicator lit blue. ● FOCUS Button ○ Rotate the button for manual focus. ○ Press the button for auto focus. |
 | Toggle ● Size adjustment for Layer A and Layer B. ● Zoom in/out for PTZ control. |
 | 5-Direction Joystick ● Move the joystick up, down, left and right ○ to adjuzt position for layer. ○ to set pan, tilt and zoom for a PTZ camera. ● Short Press ○ to enter PTZ Control Interface. |
1.2.3 Volume Control
| Area | Description |
|---|---|
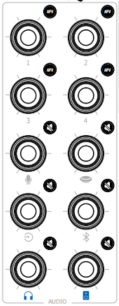 | Volume Control Knob ● Knob Number 1~4: volume control of HDMI/SDI embedded audio. ● Other Six Knobs: volume control of MIC, USB Input, Line-in, Bluetooth, Headphone Out and Program Out. |
 | AFV Button ● Button Color Description ○ Button Unlit: AFV off. ○ Button Lit White: AFV on. ● Button Operation ○ Short Press: enable/disable AFV. ○ Long Press: to enter AUDIO. |
 | Mute Button ● Button Color Description ○ Button Unlit: MUTE off. ○ Button Lit Red: MUTE on. ● Button Operation ○ Short Press: enable/disable MUTE . ○ Long Press: to enter AUDIO. |
1.2.4 Transition
| Area | Description |
|---|---|
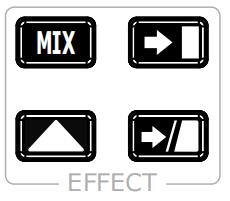 | Transition Effect Selection Button ● Default: MIX, fade in/out. For more transition effects, tap the [EFFECTS] on the MENU to select. ● Button Lit White: a transition effect selected. |
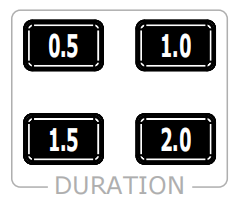 | Transition Duration Selection Button ●Default: 1.0 second. ●Button Lit White: a transition duration selected. |
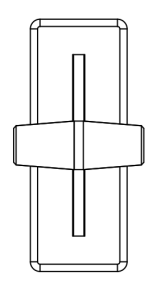 | T-Bar PVW and PGM views can be transitioned by pushing T-bar. |
 | CUT Button Press to fast switch between PVW and PGM views with no transition effect. |
 | AUTO Button ● Button Operation ○ Press to automatically transition PVW and PGM views according to the selected duration and transition effect. ● Button Color Description ○ Button Blinks Red: transition is being applied. ○ Button Goes Dark: transition completed. |
1.2.5 Layer Settings
| Area | Description |
|---|---|
| Layer A/B Button ● Button Unlit: layer OFF or not be placed on PVW. ● Short Press ○ Press the Button Unlit: the button turns blue to indicate an enabled and selected state, which allows the user to use the toggle and joystick for size and position adjustment. ○ Press the Button Lit Blue: to disable the selected layer and the button turns dark. ○ Press another layer button except the Layer A/B button: the button pressed turns blue and the Layer A/B button changes from blue to green. ● Long Press: to enter LAYOUT. |
| Layout Selection Button ● Short Press: to set the layout for the selected layer, and the button turns green. ● Long Press: to enter CROP/SCALE. |
| Chroma Key ● Short Press: to enable or disable Chroma Key (layer B is set by default). ● Long Press: to enter the Chroma Key interface. |
| Preset Loading Button ● Button Color Description ○ Button Unlit: no view contained. ○ Button Lit Green: view contained. ○ Button Lit Red: view being loaded. ● Button Operation ○ Long Press: to save the current view or not. ○ Short Press the Button Lit Green: to place the view on Preview, after which this button turns red. ○ If you switch to another view, the button of the loaded view changes from red to green. |
| PROGRAM Source Row ● Button Definition ○ Button 1-4: 1-4 HDMI/SDI inputs. ○ Button 5: UVC/NDI/MEDIA Source. |