Online Manual
mini-edge SDI User Manual

3.2 Adding Layers
mini-edge SDI supports layered video composition.
Layer A and Layer B can be added independently and configured with custom layouts, position, scaling, and crop settings.
3.2.1 Adding Layer A
Select Layer A
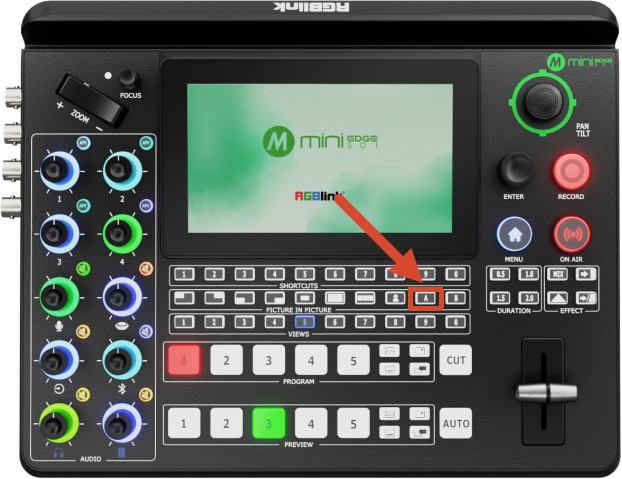
Press A on the front panel to select Layer A and enter edit mode.
Selecting Layer A automatically enables its visibility.
Select a Video Source
A source can be:
- Previewed in the PVW window
- Assigned directly to the PGM output window
Where:
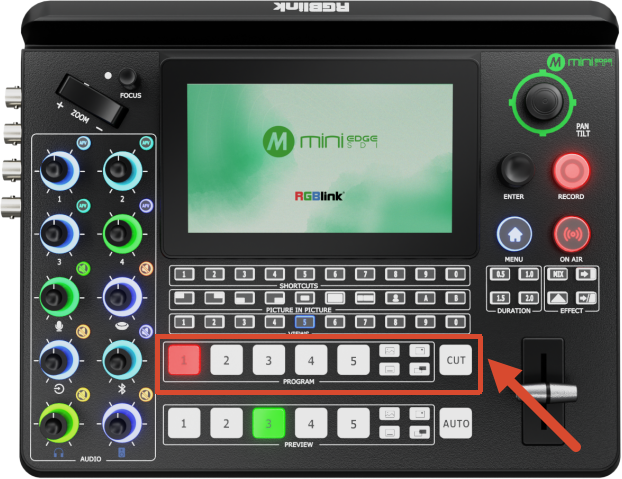
- The PROGRAM row buttons (1–5) select sources for program output. A solid red indicator shows the source currently assigned to PGM.
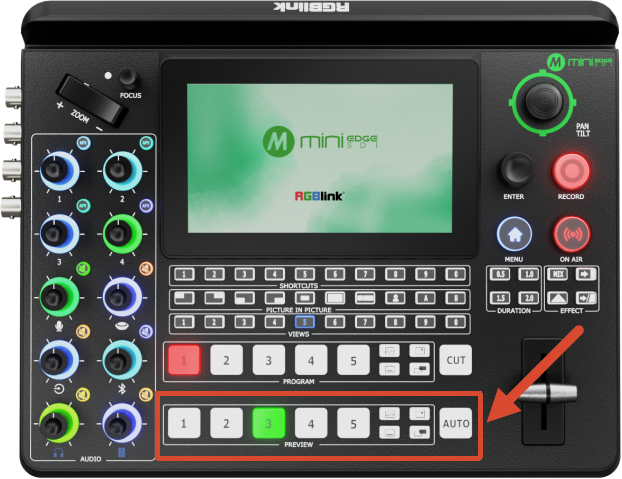
- The PREVIEW row buttons (1–5) select sources for preview. A solid green indicator shows the source currently assigned to PVW.
Adjust Layer Position and Size
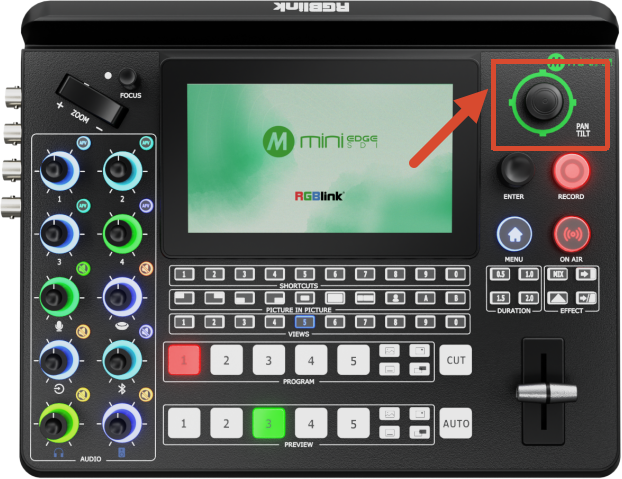
After selecting Layer A from the Main Interface:
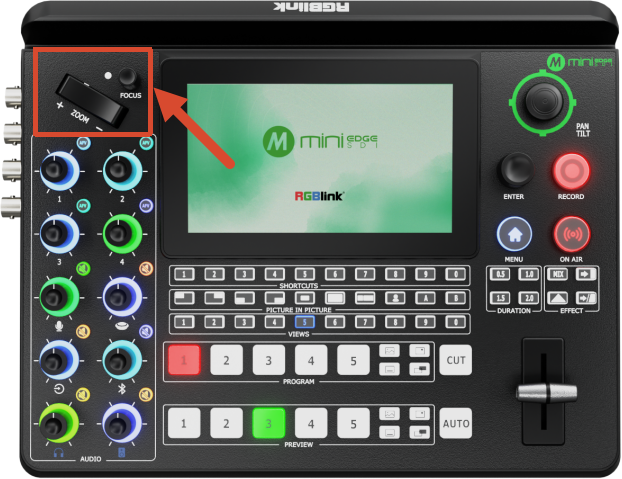
- Use the front-panel toggle to adjust layer scaling.
- Use the 5-Direction Joystick to adjust horizontal and vertical position.
Configure Layout
mini-edge SDI provides multiple layout presets.
Layouts can be configured using either of the following methods.
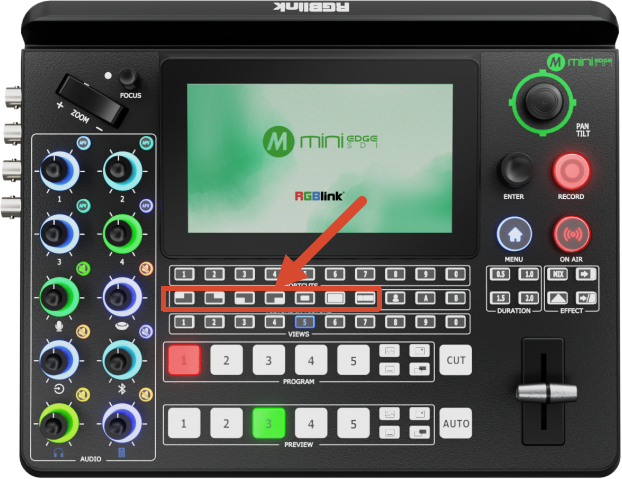
Method 1: Front-Panel Shortcut Buttons
Press the desired layout button in the PiP section to switch layouts.
Method 2: Menu Configuration
- Press MENU to enter the menu screen.
- Select LAYOUT.
- Press ENTER to open the layout selection page.
- Rotate ENTER to highlight the desired layout.
- Press ENTER to confirm.
- Layer A will be displayed according to the selected layout.
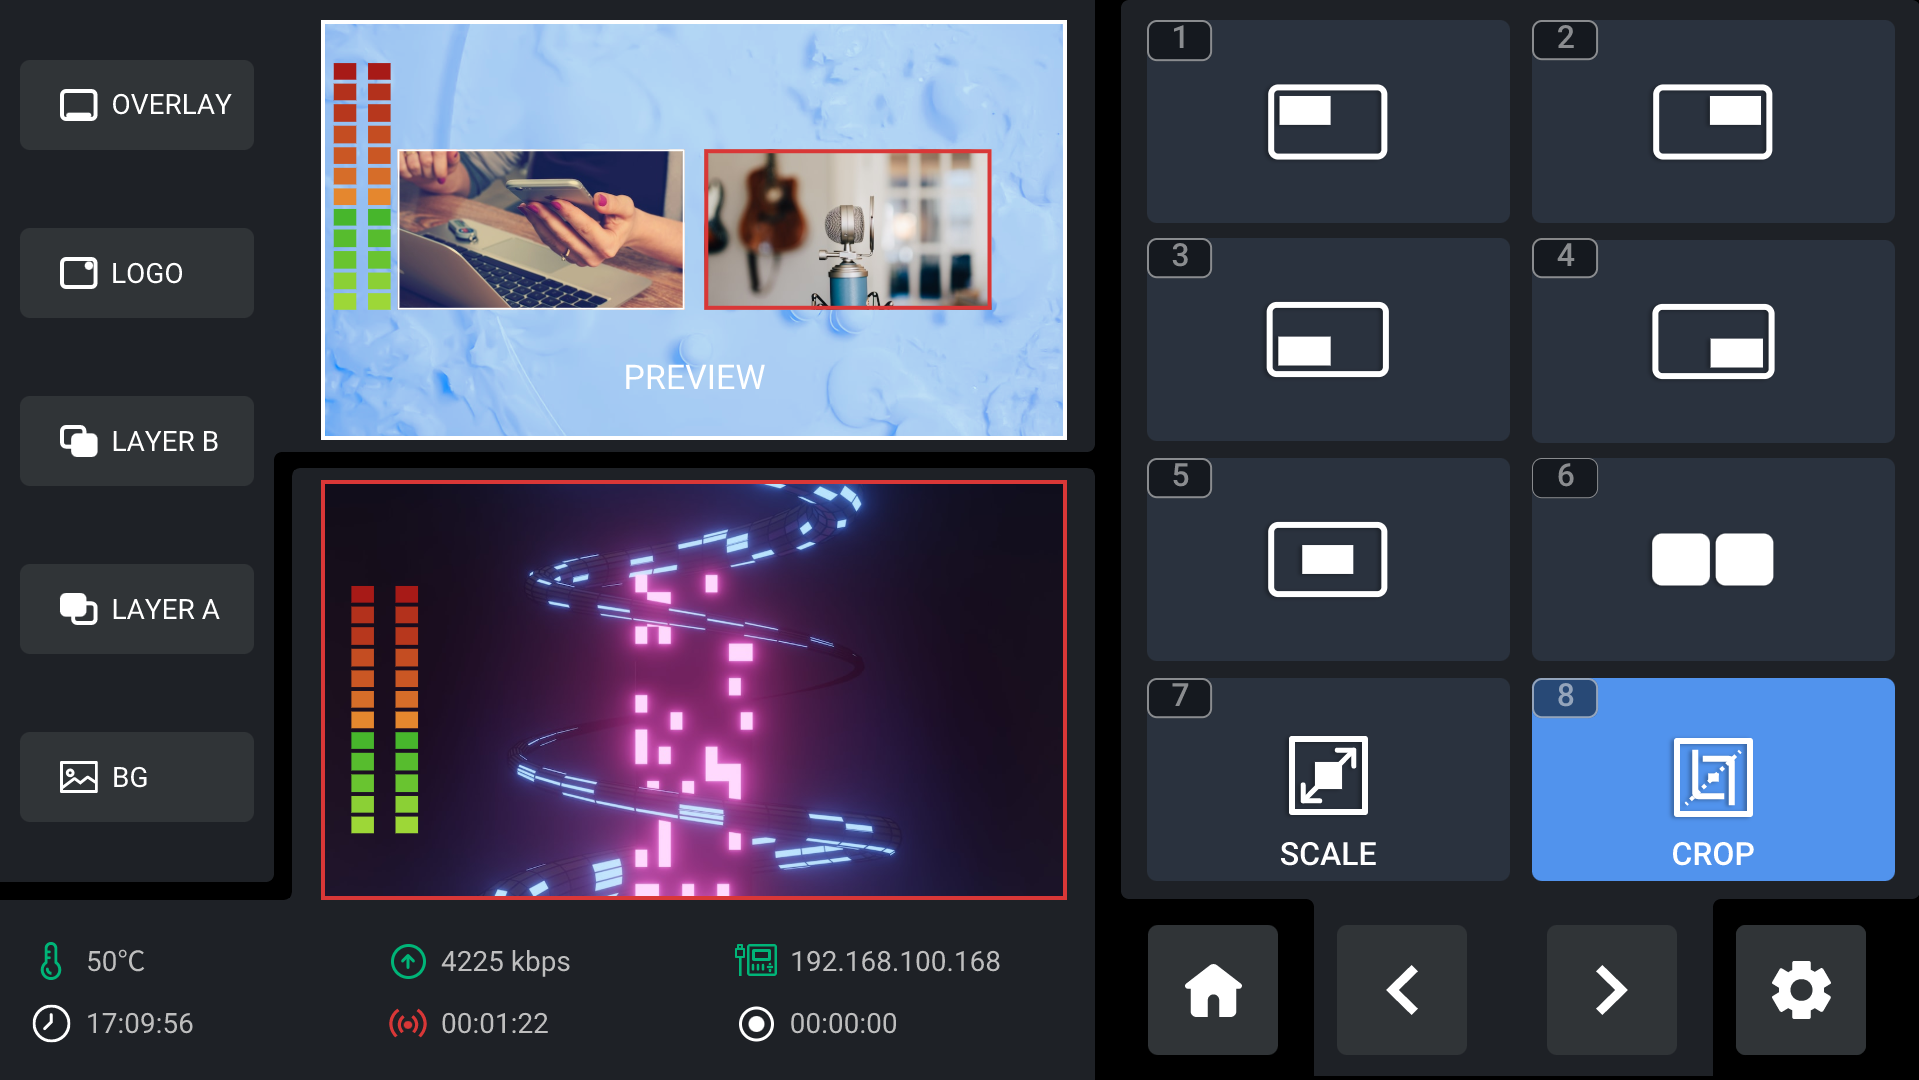
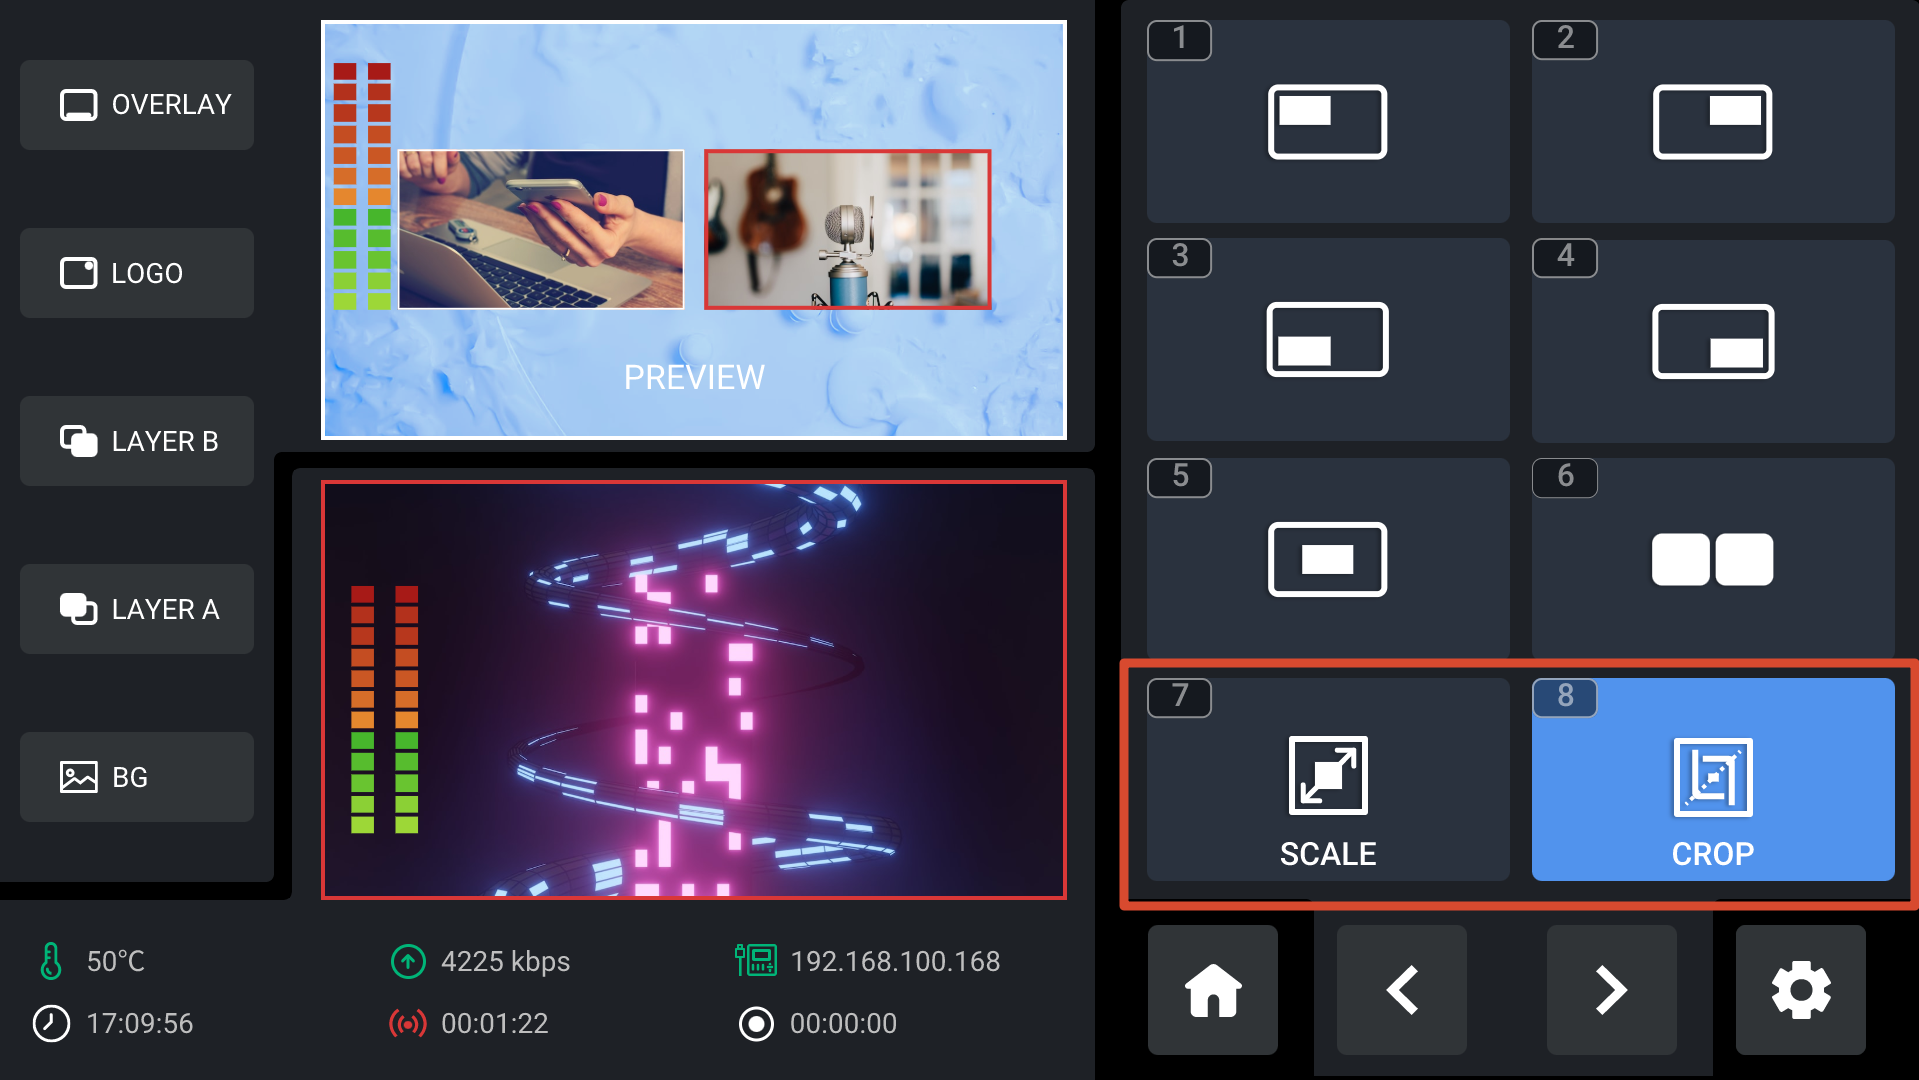
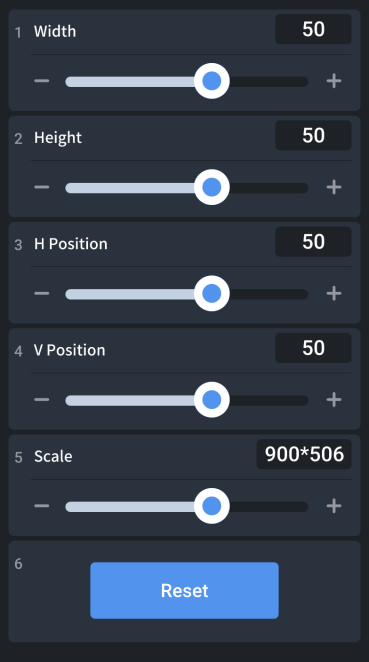
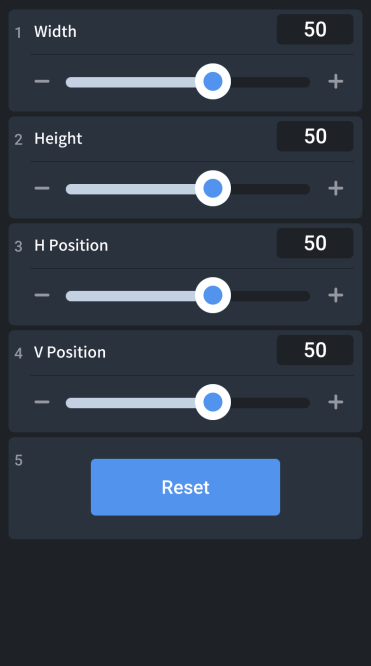
Configure Scale and Crop Parameters
mini-edge SDI supports precise scaling and cropping adjustments.
- Open the SCALE or CROP page.
- Use ENTER to select the parameter to be adjusted.
- Rotate ENTER to modify the parameter value.
3.2.2 Adding Layer B
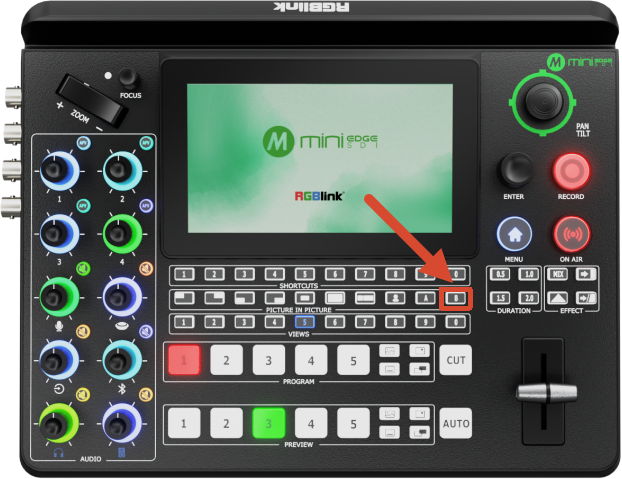
Select Layer B
Press B on the front panel to select Layer B and enter edit mode.
Selecting Layer B automatically enables its visibility.
Select a Video Source
A source can be:
- Previewed in the PVW window
- Assigned directly to the PGM output window
Where:
- The PROGRAM row buttons (1–5) select sources for program output. A solid red indicator shows the source currently assigned to PGM.
- The PREVIEW row buttons (1–5) select sources for preview. A solid green indicator shows the source currently assigned to PVW.
Adjust Layer Parameters
The following Layer B operations are identical to those of Layer A:
- Layout configuration
- Position adjustment
- Scaling
- Cropping
Refer to Adding Layer A for detailed instructions.
📢  Notes

When BG, LOGO, or OVERLAY is selected (blue indicator):

- Sources in the PREVIEW row cannot be selected.
- Layer parameters cannot be edited.

To configure preview sources or layer parameters, select A or B individually and ensure the layer is in edit mode (blue indicator).