Online Manual
mini-edge SDI User Manual

3.4 Media Management
Media Management
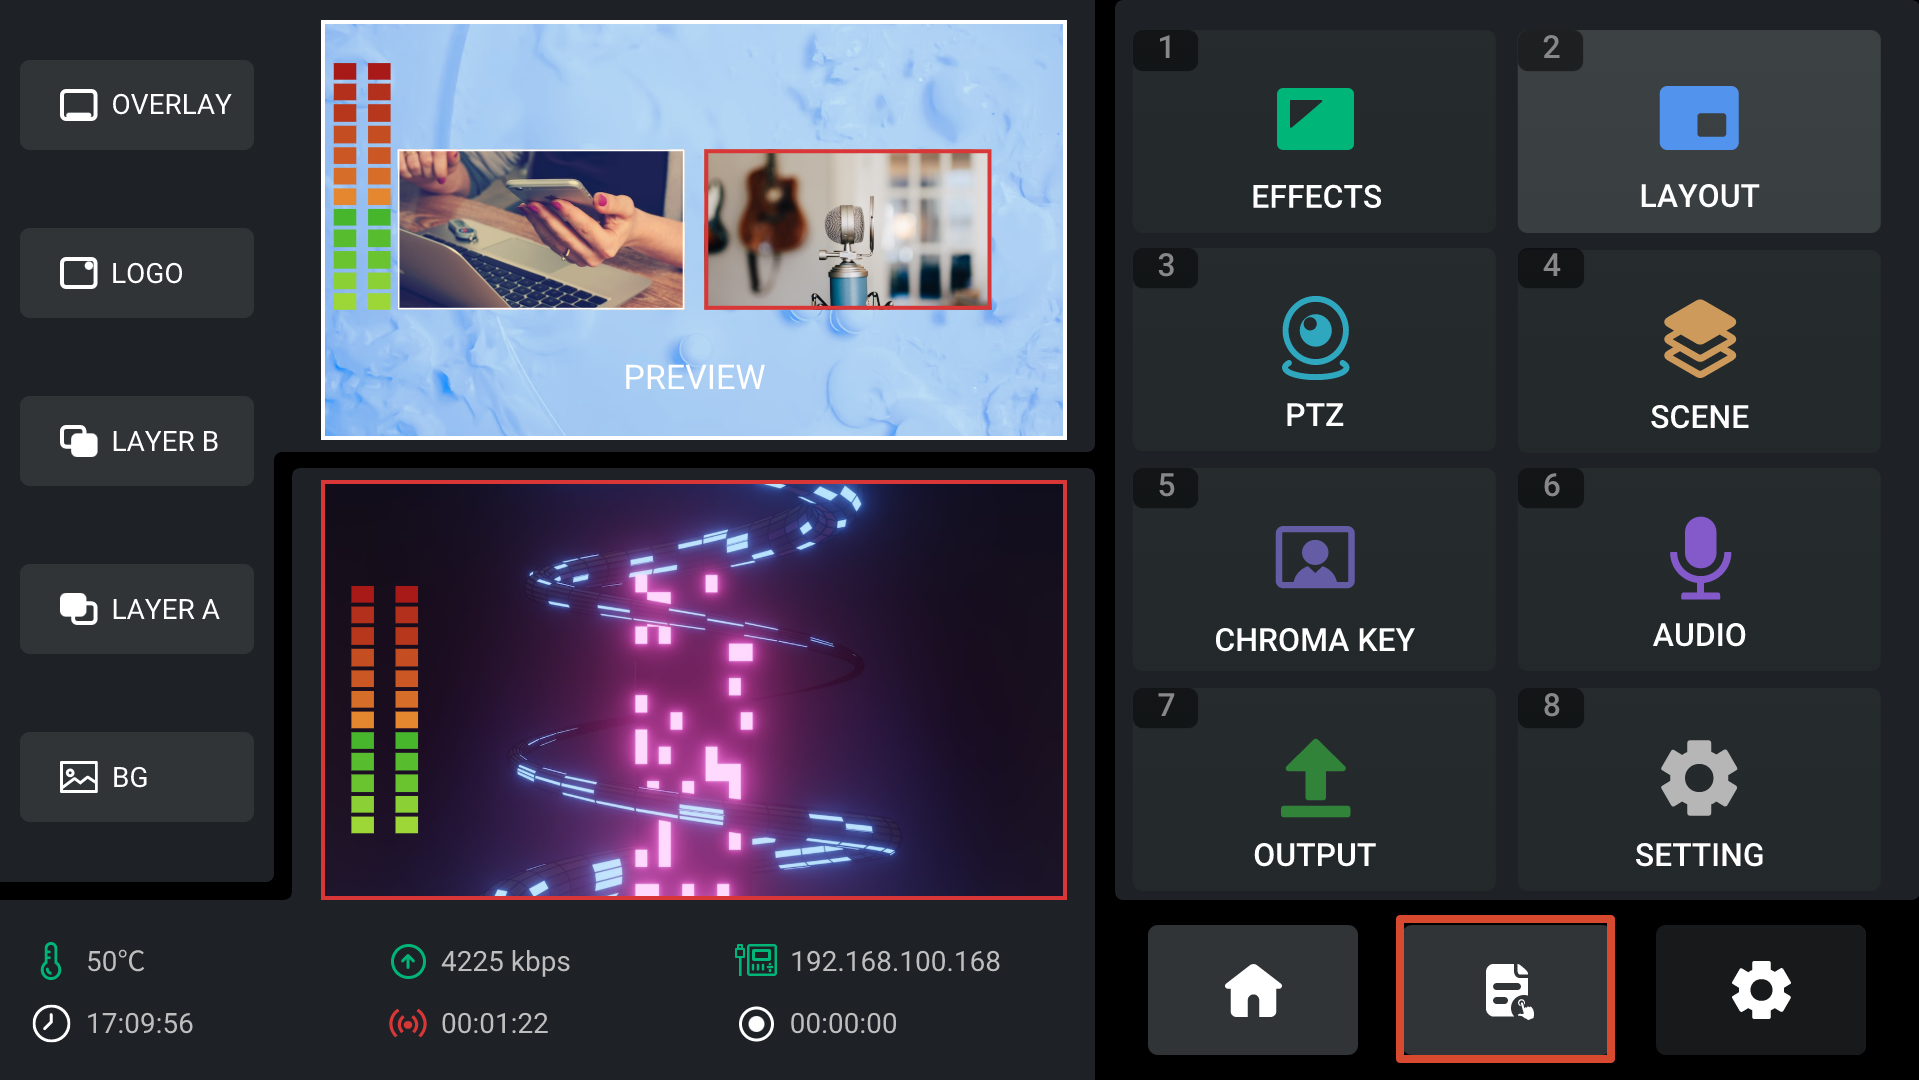
From the menu screen, rotate ENTER to highlight the  icon, then press ENTER to open the Media Management page.
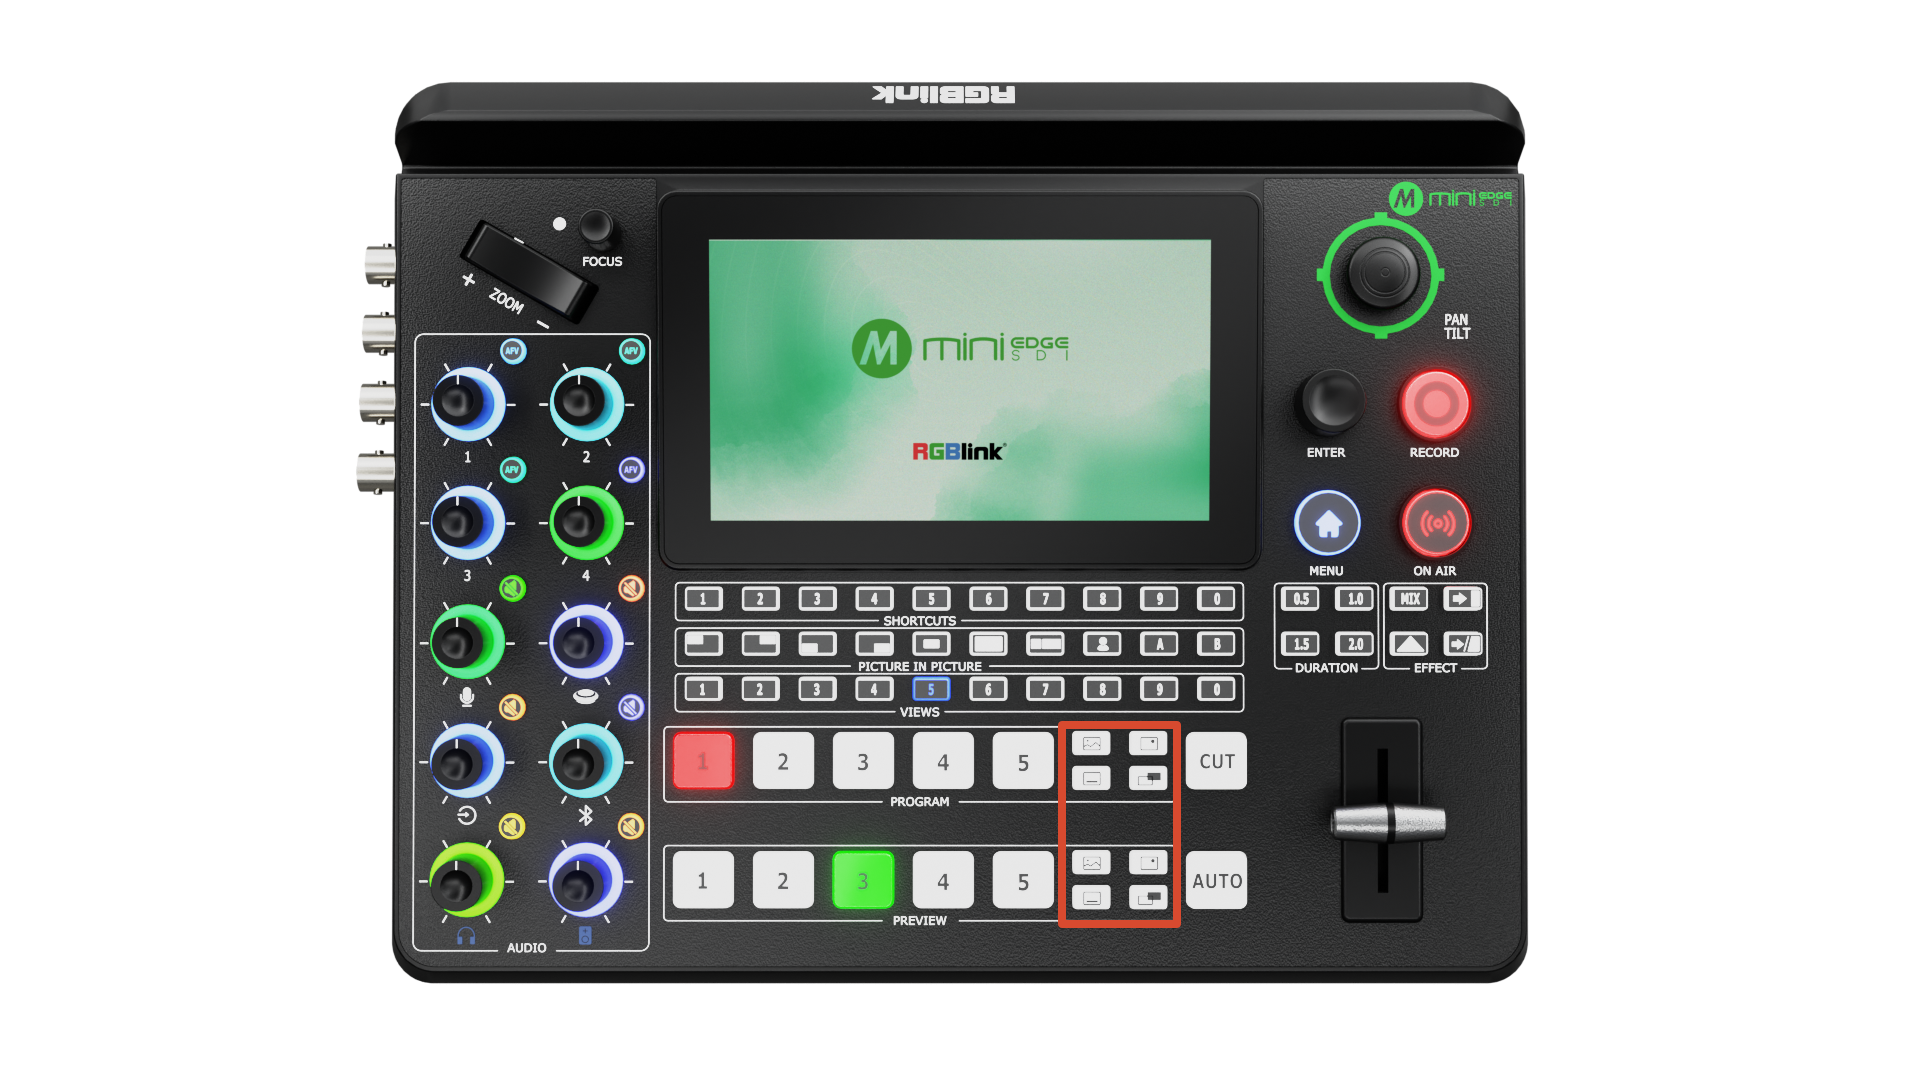
You can also press and hold Background, LOGO, or OVERLAY icon in the PGM or PVW section of the front panel to open the corresponding media management page directly.
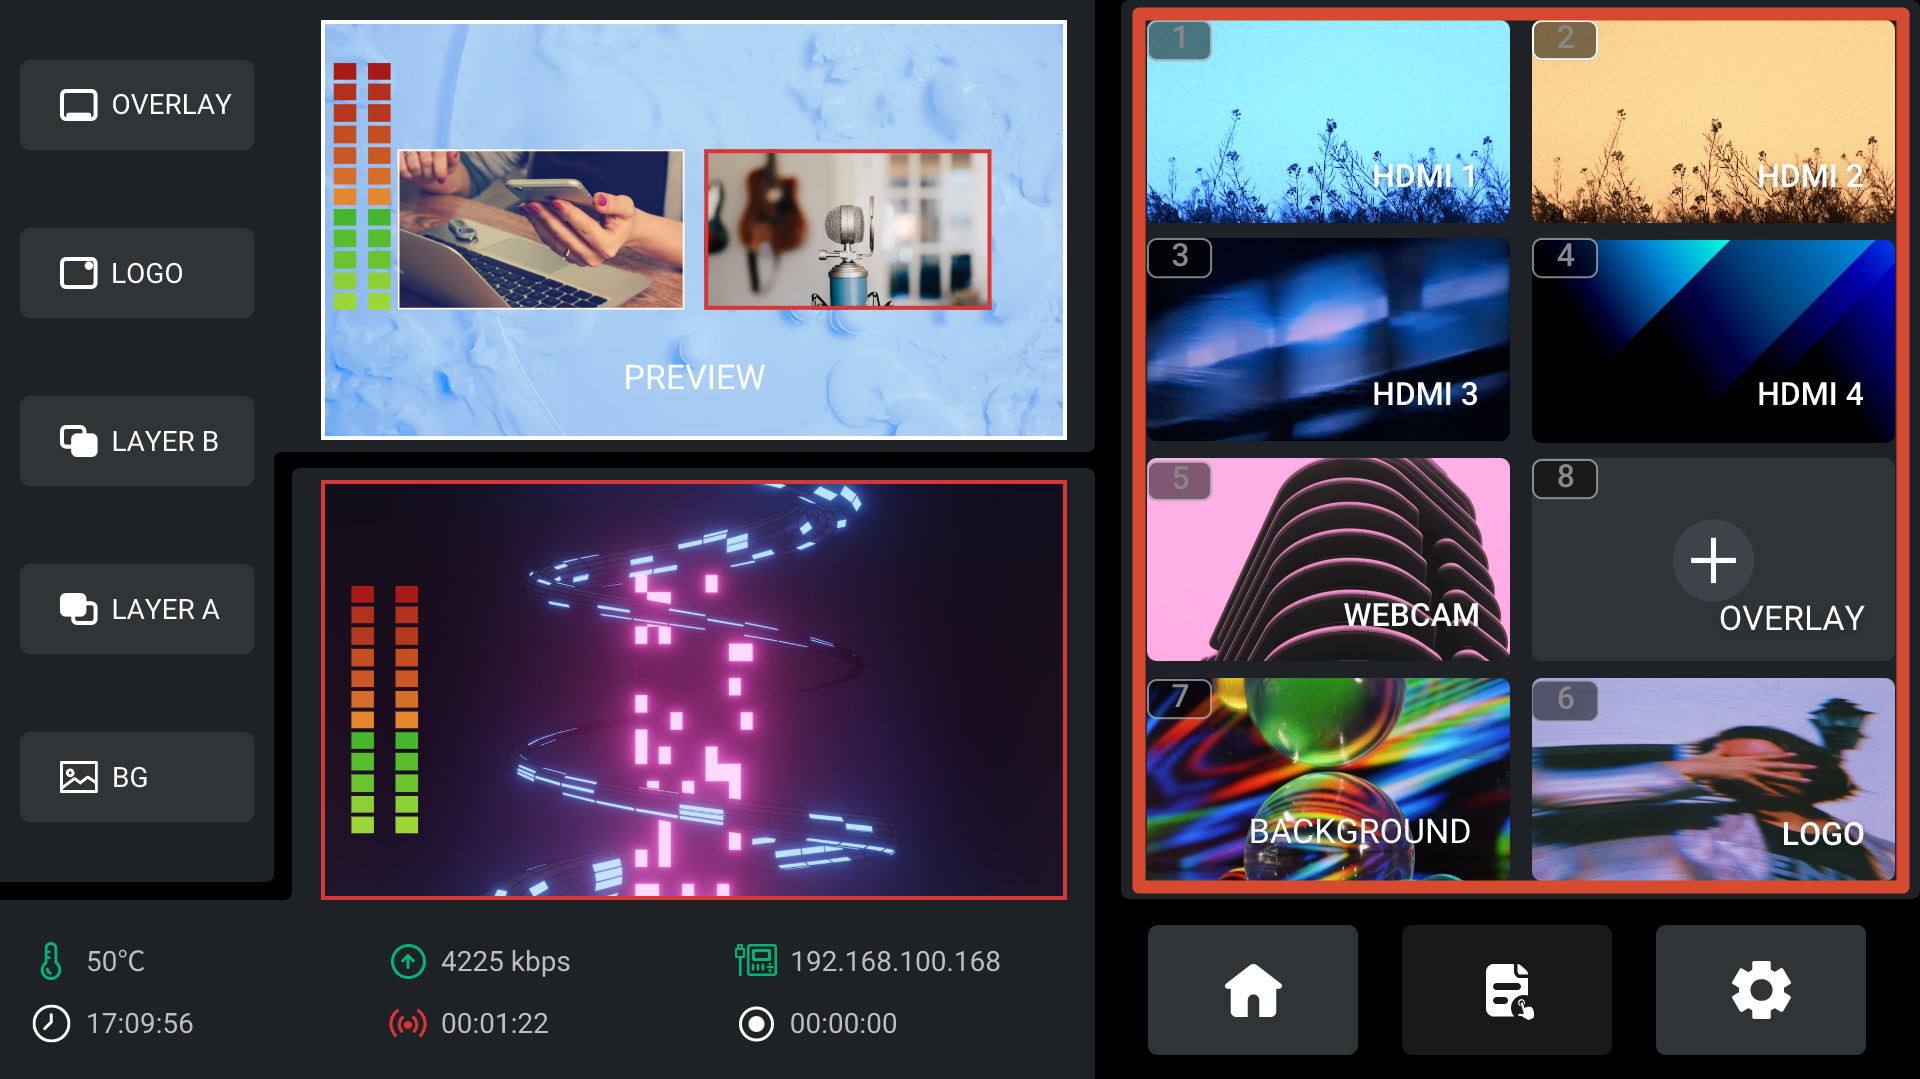
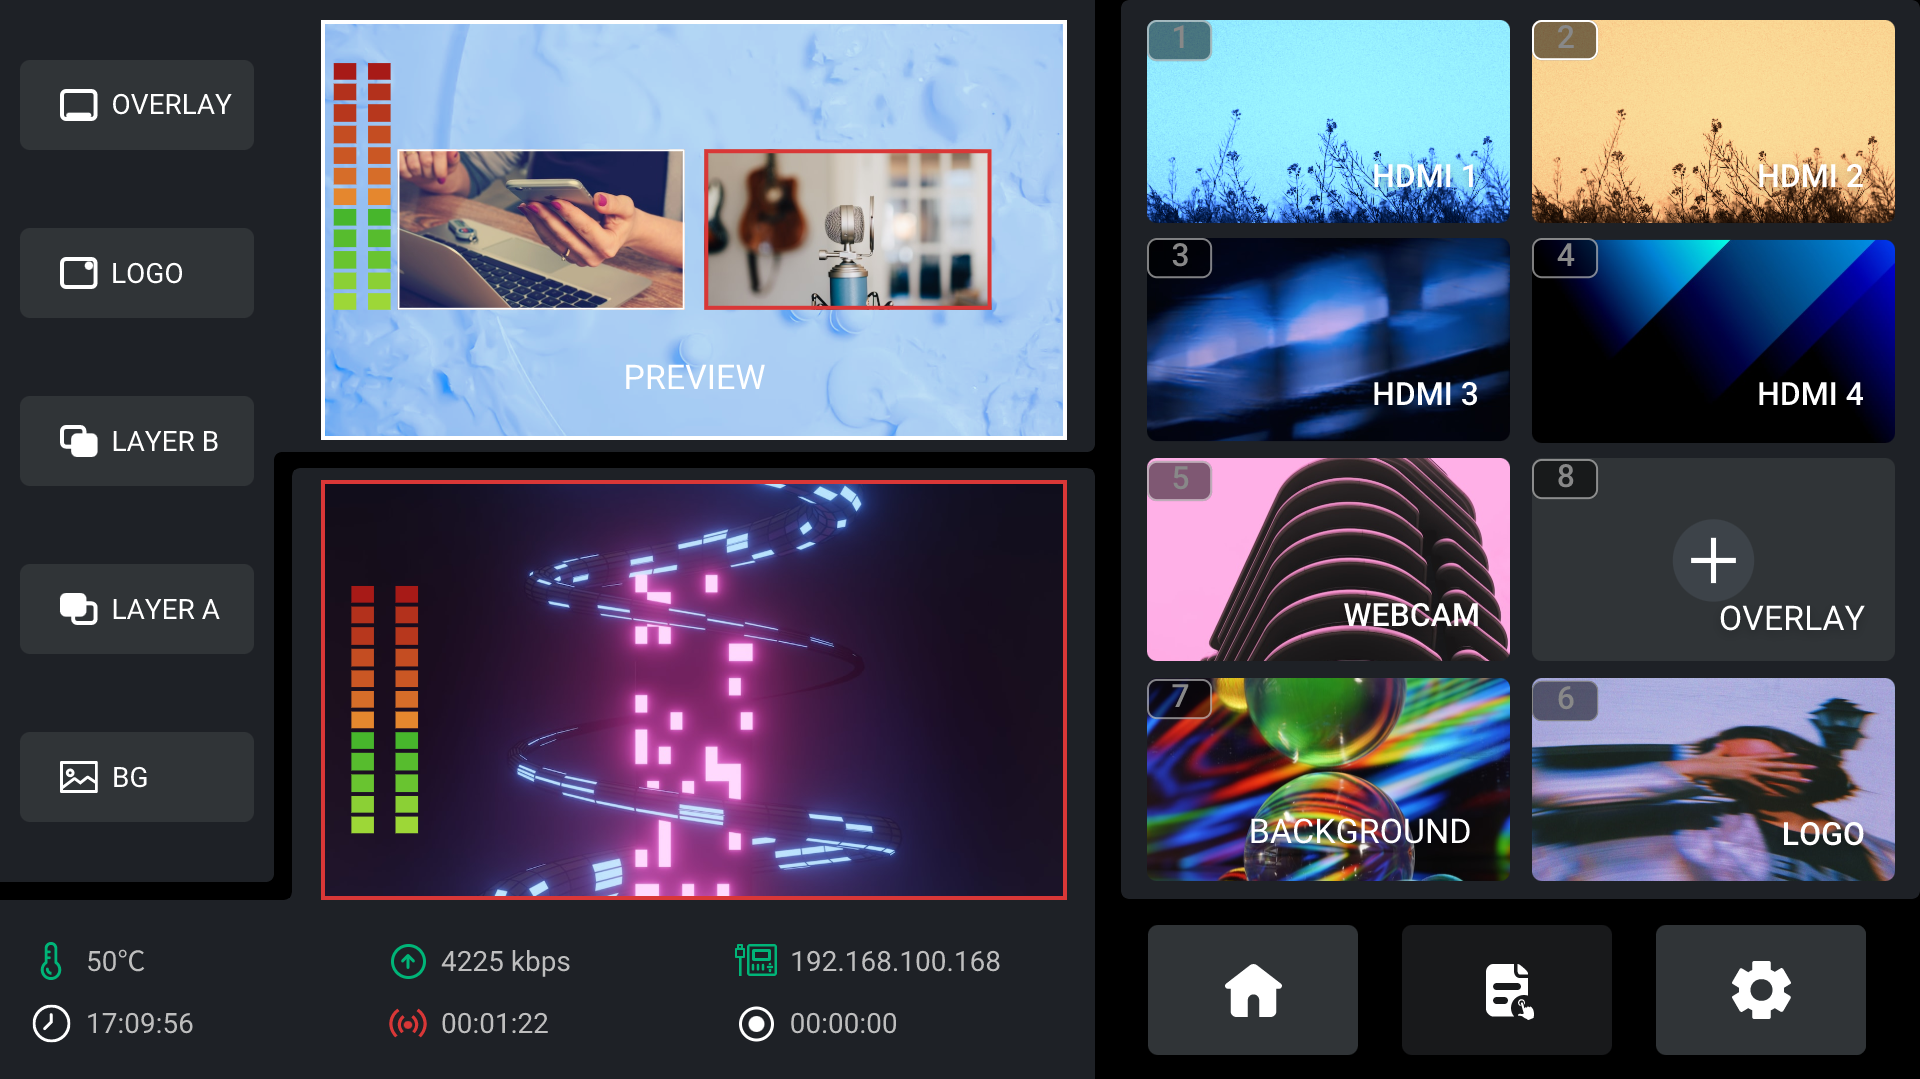
- Window 1-5: Source monitoring windows. Used to monitor HDMI/SDI 1–4 inputs and the UVC source. After selecting an input source with ENTER, the selected source is displayed in the PVW window.
- Window 6-8: Media import and selection windows. Background, logo, and overlay assets can be imported from a USB storage device. Select a media window and press ENTER to open the corresponding media management page.
Storage Structure
Media assets can be imported from a USB storage device.
Before importing media, create the required folder structure on the USB drive. Folders can be generated automatically or created manually.
Automatic Folder Creation
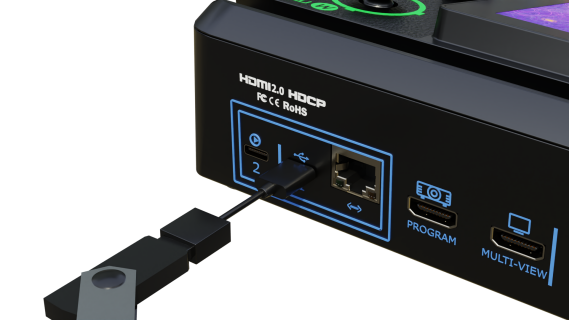
- Connect a USB drive to USB 1.
- Restart the device.
- If no compatible folder structure exists, the system automatically creates a folder named mini-edge.
- The following subfolders are generated:
mini-edge
├─ audio
├─ image
│ ├─ background
│ ├─ logo
│ └─ overlay
├─ record
├─ stream
└─ video
Manual Folder Creation
If folders are created manually, use the following directory structure:
mini-edge
├─ audio
├─ image
│ ├─ background
│ ├─ logo
│ └─ overlay
├─ record
├─ stream
└─ video
Importing Media
- Copy media files to the corresponding folder.
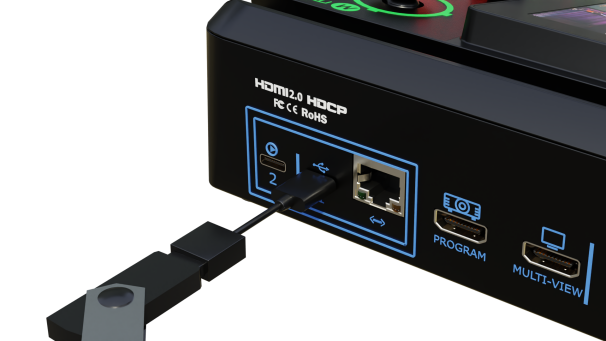
- Connect the USB drive to USB 1.
- Open the Media Management page.
- The system automatically scans the USB drive.
- If no USB drive is detected, a prompt will be displayed.
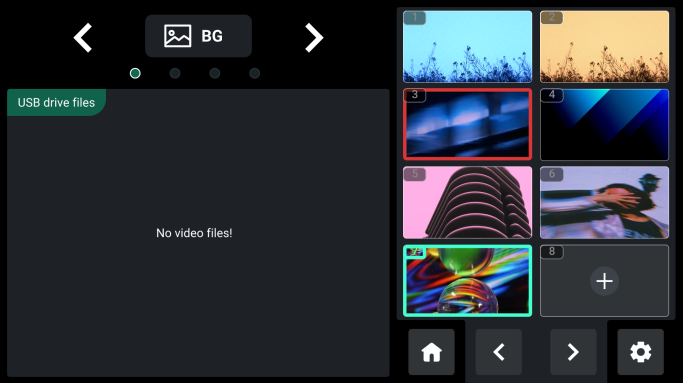
- If no compatible media files are found, No video files! is displayed.
Supported Media Formats
| Category | Format |
|---|---|
| Background Images | ● Filenames must not contain spaces or special characters. ● Supports JPG, PNG (32-bit), and BMP (24-bit). ● Resolution must not exceed 1920 × 1080. ● Matching the current output resolution is recommended. ● Scaling and cropping are not supported. |
| Logo Images | ● Filenames must not contain spaces or special characters. ● PNG format only. ● 32-bit image required. ● Resolution must not exceed 1920 × 1080. |
| Overlay Images | ● Filenames must not contain spaces or special characters. ● PNG format only. ● 32-bit image required. ● Resolution must not exceed 1920 × 1080. |
| Audio Effects | ● MP3 format only. |
Adding a Background
Import Background Media
- Copy background files to the background folder.
- Connect the USB drive to USB 1.
- Open the Background Management page.
Either:
- Select BG (Background) from the Media Management page.
- Press and hold BACKGROUND
 in the PVW section.
- The Background Management page appears.
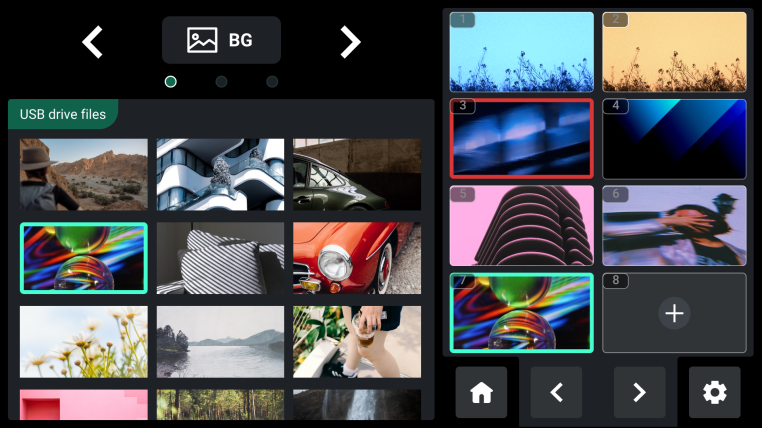
- Green border: Current cursor position.
- Red border: Asset currently assigned to PVW.
Add a Background
- Select an empty slot marked with +.
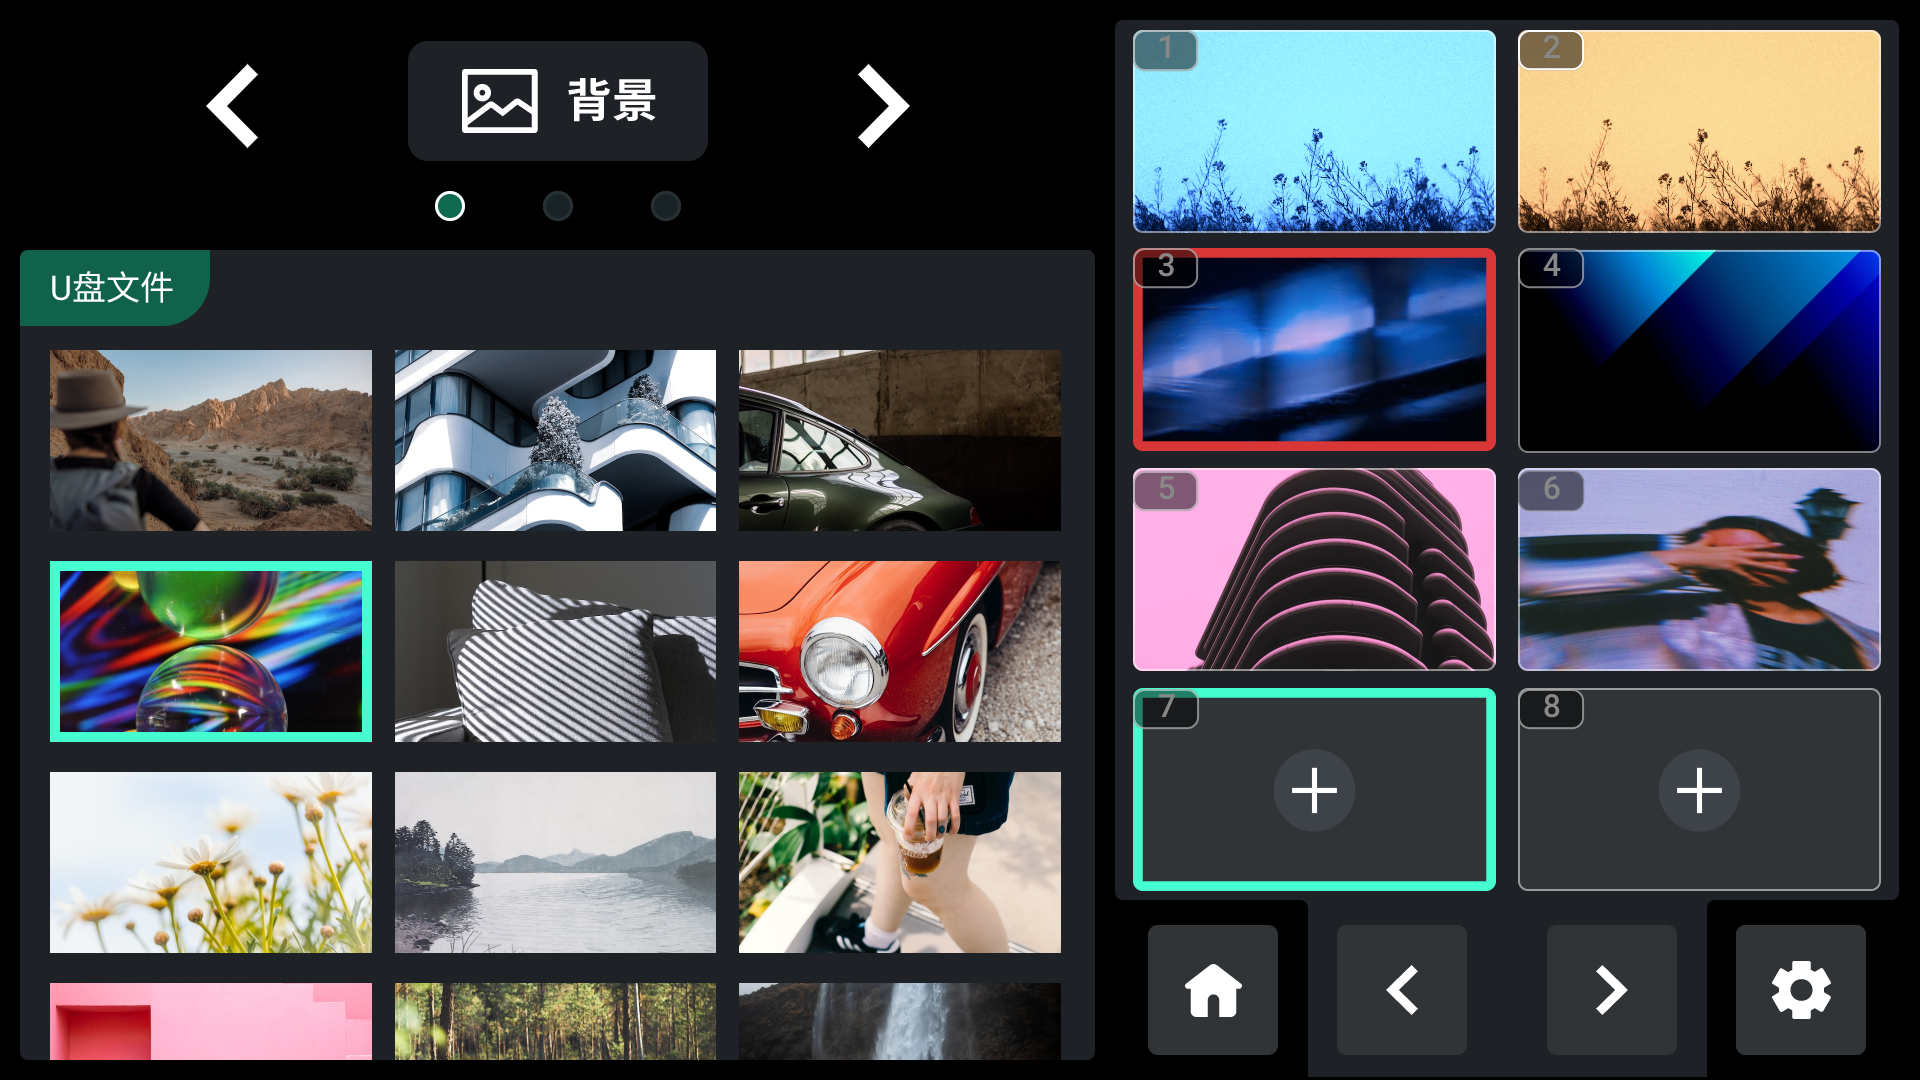
- Press ENTER.
- The cursor moves to the media selection area.
- Select the desired background image.
- Press ENTER to import.
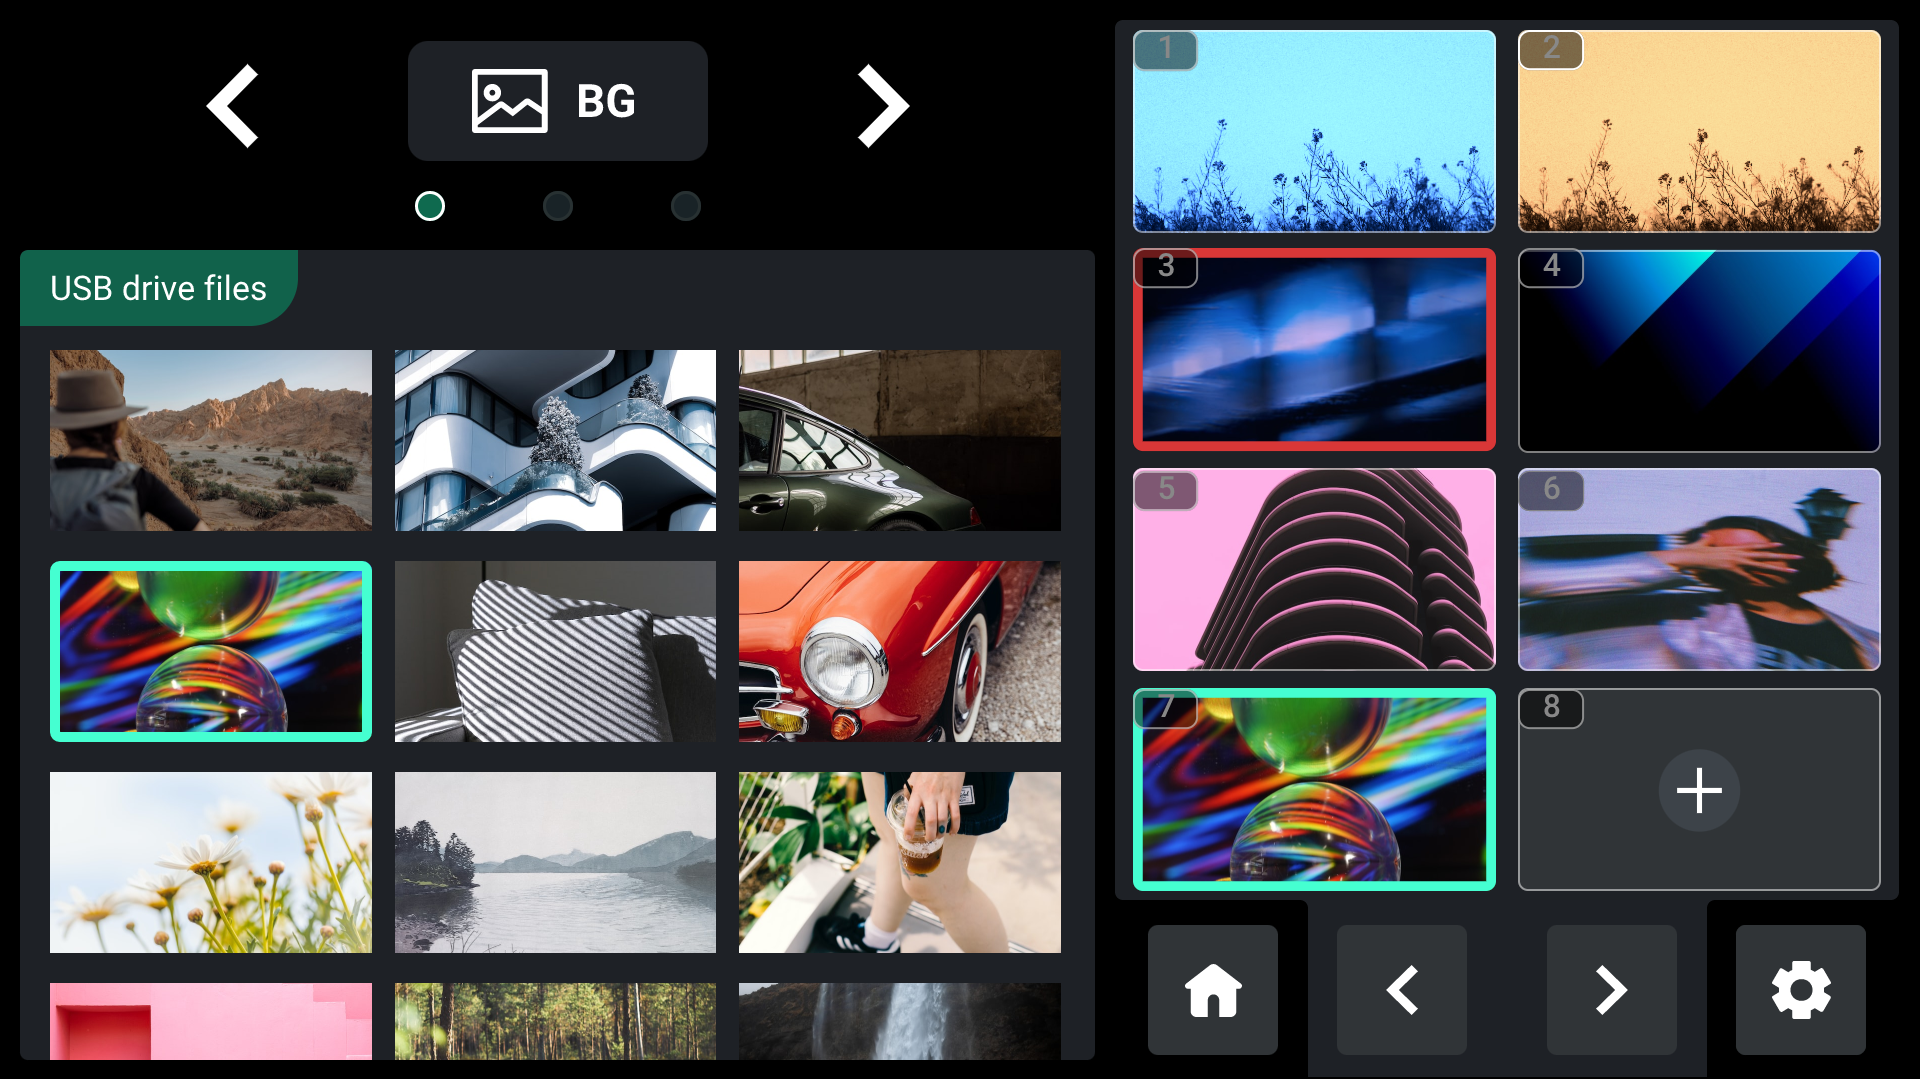
- The selected background is displayed immediately in PVW.
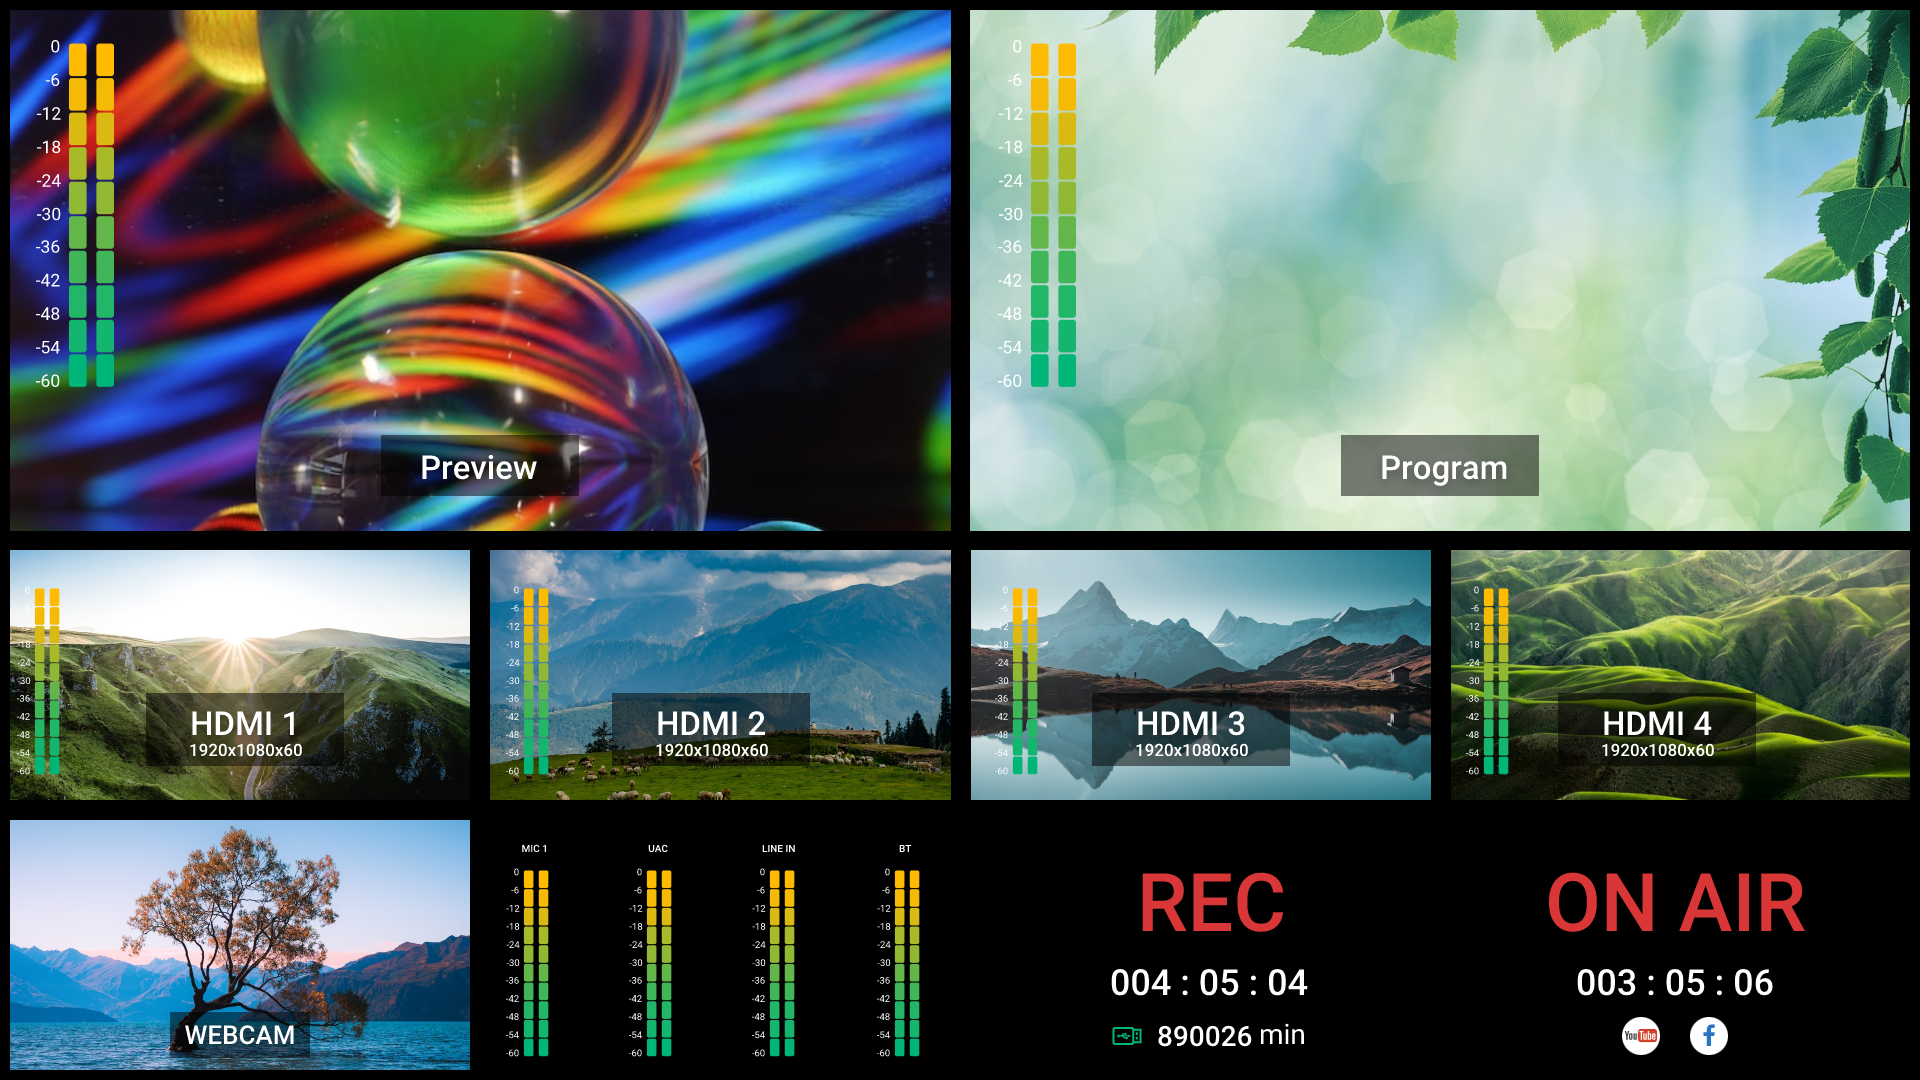
Send to Program Output
If BACKGROUND in the PROGRAM section is illuminated white:
- Press BACKGROUND once.
- The background is added to the program output.
- The indicator changes to solid red.
To remove the background:
- Press BACKGROUND again.
- The indicator returns to white.
Replace a Background
- Select the background slot.
- Press and hold ENTER.
- Select Replace.
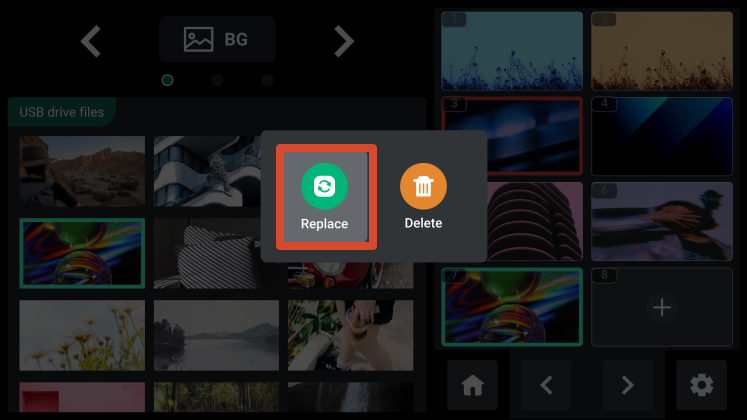
- Choose a new background image.
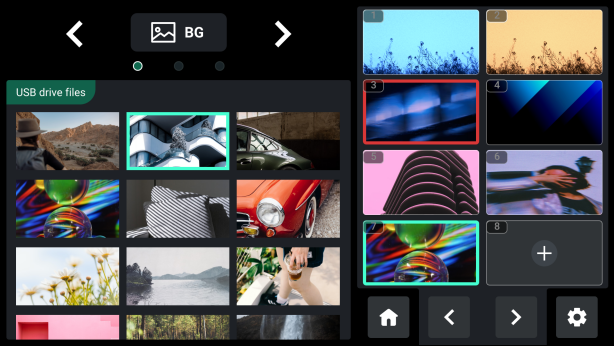
- Press ENTER to confirm.
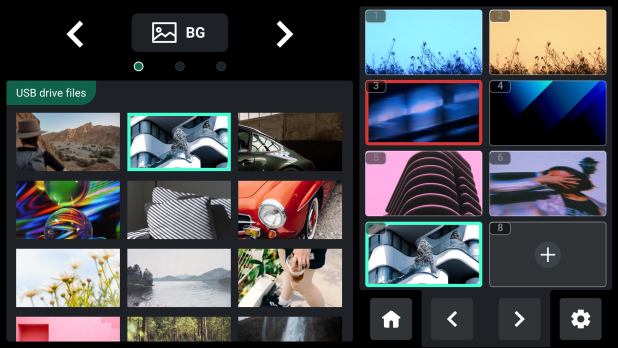
Delete a Background
- Select the background slot.
- Press and hold ENTER.
- Select Delete.
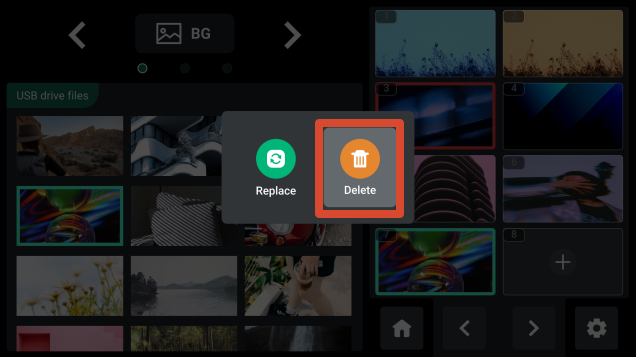
- Select Confirm in the confirmation dialog.
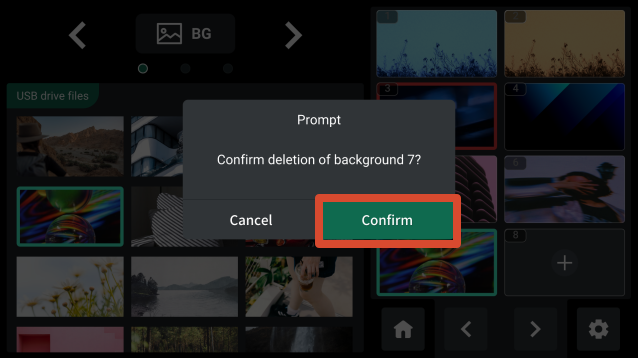
Adding a LOGO
Importing, replacing, and deleting logo assets follow the same procedure as section Adding a Background.
After entering the Layout Settings page:
- Select different layout presets.
- Use the 5-direction joystick to adjust the logo position.
Refer to 3.2 Adding Layers for more details.
Adding an Overlay
Importing, replacing, and deleting overlay assets follow the same procedure as section Adding a Background.
After entering the Layout Settings page:
- Select different layout presets.
- Use the 5-direction joystick to adjust the logo position.
Refer to 3.2 Adding Layers for more details.