Online Manual
mini-extreme ISO User Manual

2.2.8 PTZ Control
mini-extreme ISO supports simultaneous control of up to 8 PTZ cameras via IP VISCA.
PoE cameras are recommended. Use an Ethernet cable for connection. Use a network switch for multiple cameras.
Set Up the Network
mini-extreme ISO and the PTZ cameras must be on the same subnet.
For a network with subnet mask 255.255.255.0, the first three IP address segments must match. The last segment must be 2–254 and unique for each device.
Example: 192.168.1.2, 192.168.1.3, 192.168.1.4
- Go to SETTINGS > IP Setting.
- Enable DHCP to obtain an IP address automatically.
- Disable DHCP and use the ENTER knob to set a static IP address.
📢  Notes

Connect multiple PTZ cameras through a network switch. Assign a unique IP address to each device to avoid IP conflicts.
Configure PTZ Cameras
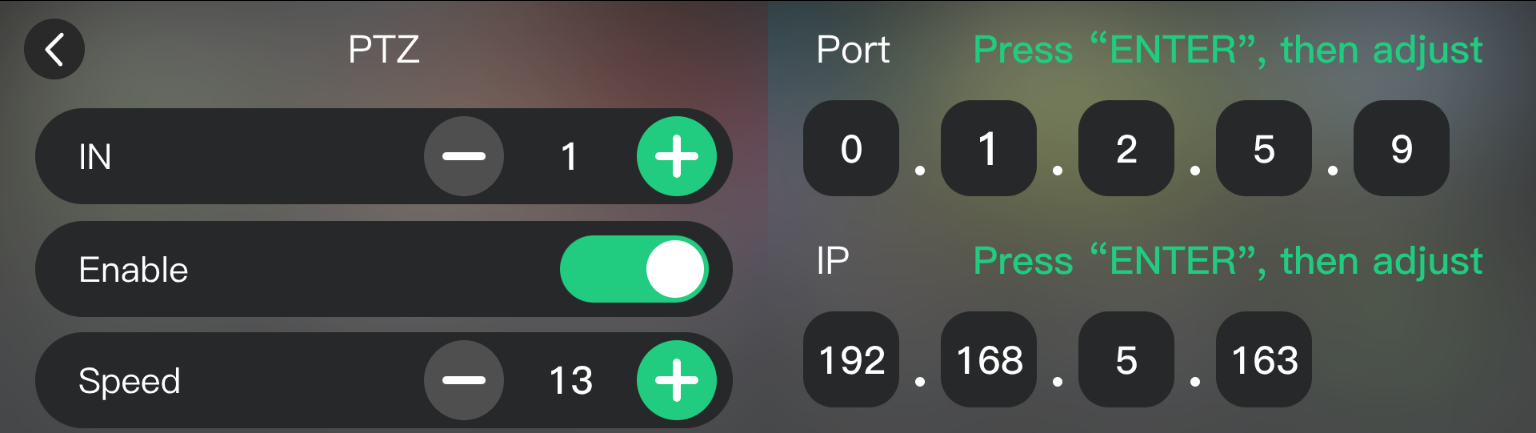
Set the IP address and port for each camera on page 2 of the PTZ menu.
- Connect the PTZ camera to mini-extreme ISO or a network switch.
- Go to page 2 of the PTZ menu.
- Press + or - to select a PTZ camera.
- Set the camera IP address and port as prompted.
- Tap Enable to receive the camera feed.
📢  Notes

RGBlink vue series broadcast cameras are recommended. Their default port is `1259`.

For other camera brands, check the camera manual for the correct port.
Control PTZ Cameras
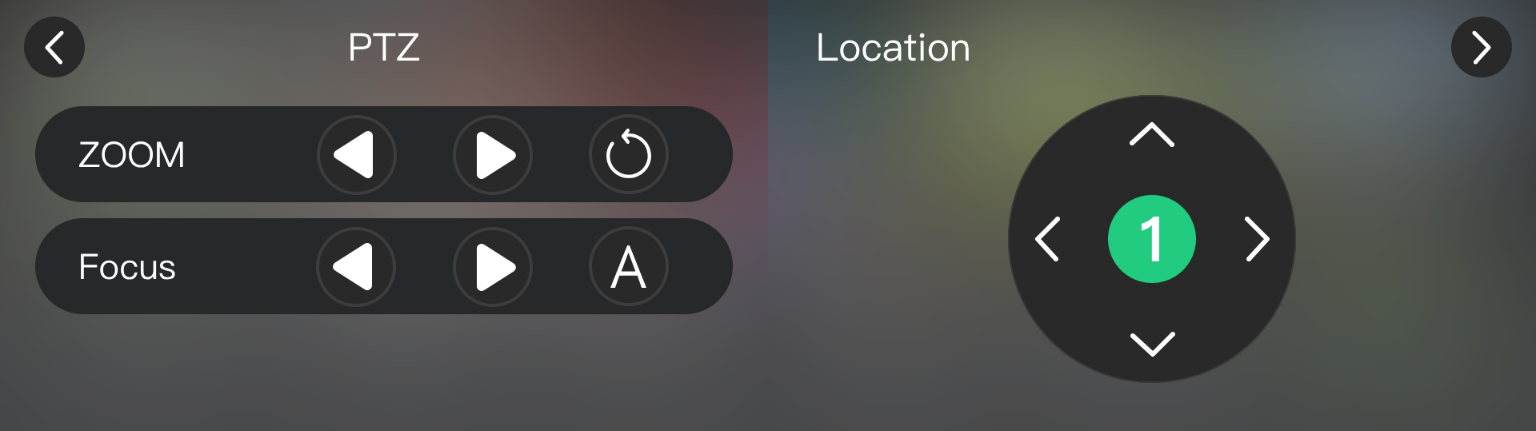
mini-extreme ISO supports camera zoom, focus, pan/tilt, and speed control.
- Assign the target PTZ camera to Preview.
- Use the ZOOM control to adjust zoom.
- Use the FOCUS knob to adjust focus.
- Go to PTZ to adjust zoom, focus, pan/tilt, and speed.
Save PTZ Presets
Save the current PTZ settings as part of a view.
- Assign the target PTZ camera to Preview.
- Adjust the pan/tilt position, zoom, and other parameters.
- Save the current settings as a view.
- Recall the view to restore the saved PTZ settings.