Online Manual
mini-extreme ISO User Manual

3.12 Controlling PTZ Camera
mini-extreme supports PTZ camera control via IP VISCA and NDI protocols.
Control PTZ camera pan, tilt, zoom, and focus from mini-extreme. Save frequently used positions for quick recall.
- Supports up to 8 PTZ cameras simultaneously.
- Supports saving PTZ presets.
- Supports saving PTZ parameters with the VIEWS function.
3.12.1 Connecting PTZ Cameras
Before controlling PTZ cameras, complete network connection and communication settings.
- mini-extreme and PTZ cameras must be on the same network segment.
- Use a network switch for connection.
Connecting One PTZ Camera
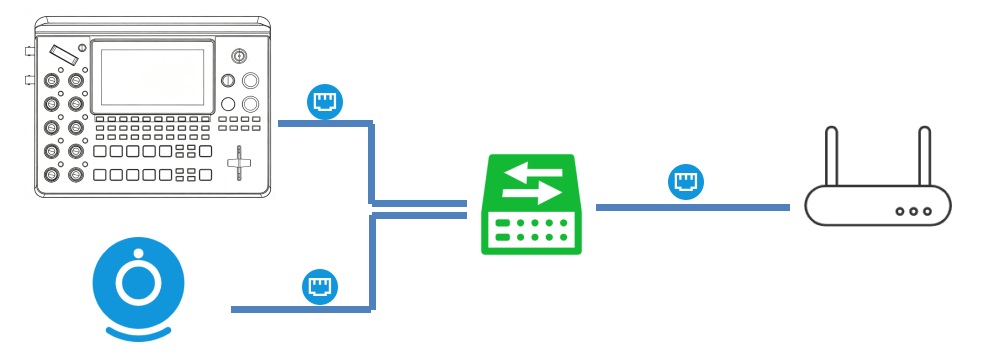
Recommended connection:
- Connect the switch to the router.
- Connect mini-extreme to the switch using an Ethernet cable.
- Connect the PTZ camera to the switch using an Ethernet cable.
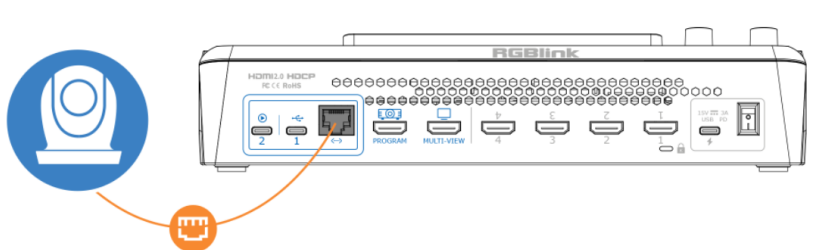
You can also connect mini-extreme directly to the PTZ camera using an Ethernet cable.
📢  Notes

When using a direct Ethernet connection, mini-extreme cannot access external networks. Use this method only when no switch is available.
Connecting Multiple PTZ Camera
mini-extreme supports controlling up to 8 PTZ cameras through a network switch.
- Use the ping command to check network connectivity and confirm whether the IP address is available.
- Press Windows + R.
- Enter cmd and click OK.
- In Command Prompt, enter a command such as
ping 192.168.5.66
If the message Destination Host Unreachable is displayed, the address is not currently in use.
Assign the available IP address to the PTZ camera and run the ping command again.
If a reply is received, communication between mini-edge SDI and the PTZ camera has been established successfully.
- Configure Camera IP Addresses
Ensure that:
- Each camera uses a unique IP address.
- All devices are on the same subnet as mini-extreme.
- Connect the Network Switch
- Connect the switch to the router.
- Connect mini-extreme to the switch using an Ethernet cable.
- Connect up to 8** **PTZ cameras to the switch using Ethernet cables.
RGBlink CAT6 Ethernet cables are recommended. Product code: 940-0001-00-11-0
- mini-extreme can now control multiple PTZ cameras simultaneously (up to 8).
📢 Notes

1. Ensure that the computer, mini-extreme, and all PTZ cameras are on the same subnet.
2.  Verify each camera IP address individually using the **ping** command.
3.  mini-extreme supports:
-  IP VISCA
-  NDI Control
The following protocols are not currently supported:
-  CGI
-  HTTP
-  Pelco-D
-  Pelco-P
Configuring IP Address and Port
📢  Notes

mini-extreme communicates with cameras through ports.

RGBlink Vue series broadcast cameras use port 1259 by default. For other camera brands, check the camera manual and enter the correct port number.
- Navigate to MENU > PTZ.
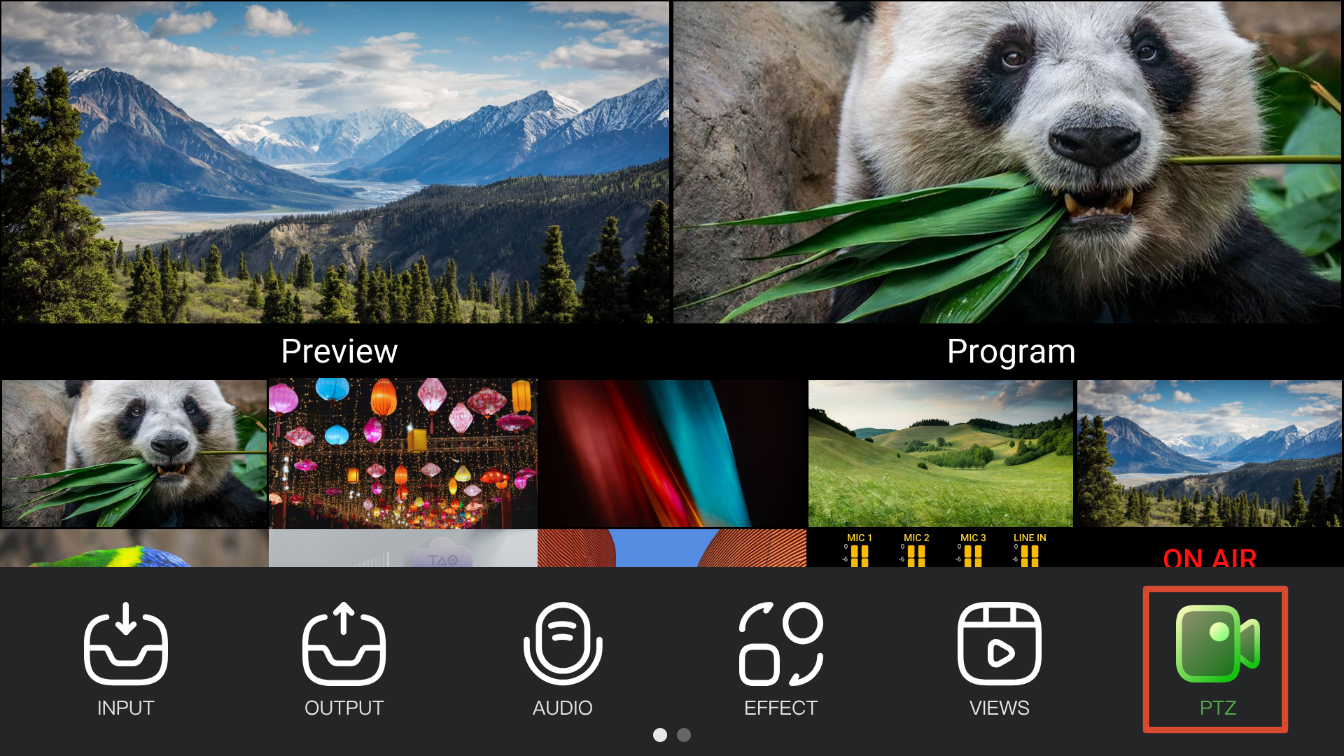
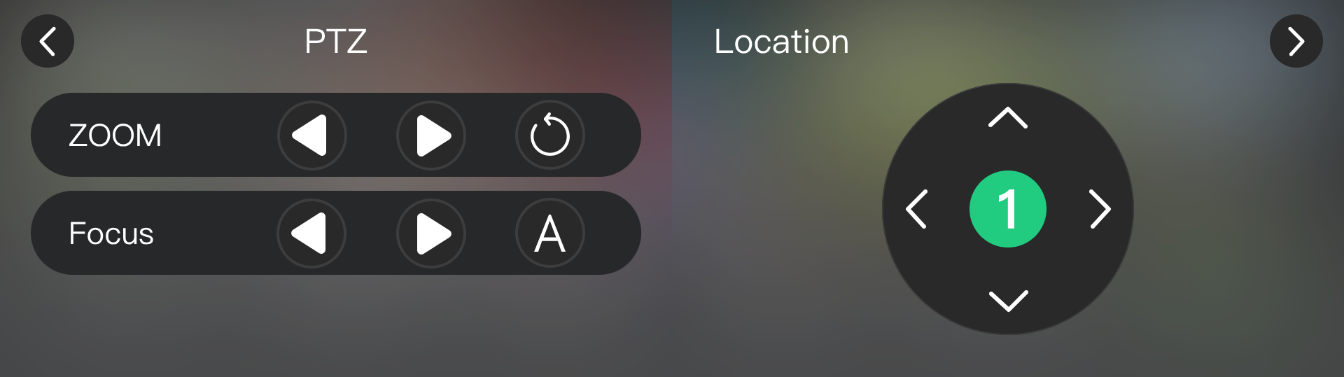
- Select the arrow icon > in the upper-right corner to switch to the second page.
| PTZ Page 1 Example | PTZ Page 2 Example | |
|---|---|---|
 | 👉 | 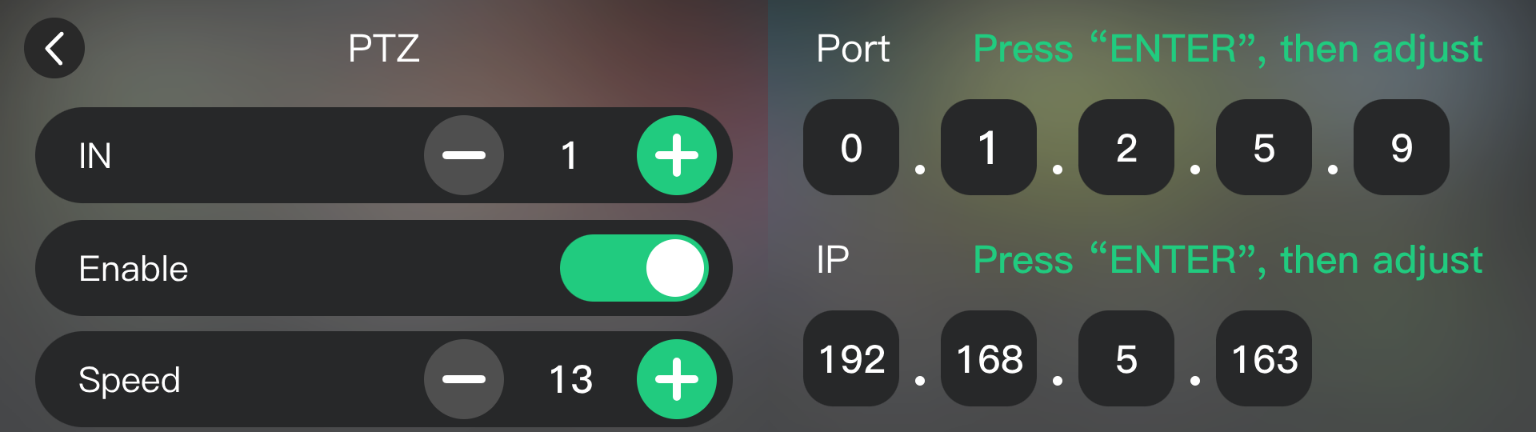 |
- Click + or − in the IN section to switch the Preview screen to the corresponding PTZ input source.
- Use the front-panel ENTER button to set the camera IP address and port. Ensure the camera and mini-extreme are on the same network segment.
📢  Notes

- A green border indicates selection mode. You can switch between digits but cannot edit values.
- A blue border indicates edit mode. You can modify the selected digit.
a. Press ENTER to enter selection mode.
b. Rotate the knob left or right to select the digit to edit.
c. Press ENTER again to enter edit mode.
d. Rotate the knob left or right to adjust the value.
e. Repeat steps b–d to complete IP address or port editing.
f. Press ENTER again to exit edit mode and save settings.
3.12.2 Controlling PTZ Cameras
PTZ control adjusts camera position, zoom, and focus.
Using the Front Panel
Adjusting Zoom:
- Rotate the ZOOM controller to adjust focal length.
Adjusting Focus:
- Press the FOCUS knob to enable autofocus.
- Rotate the FOCUS knob to adjust focus manually.
Adjusting Pan/Tilt Position:
- Move the 5-Direction Joystick to control camera movement.
- Press the 5-Direction Joystick to return to the initial position.
Using the Touchscreen
- Navigate to MENU > PTZ.
- The following controls are available:
| Function | Description |
|---|---|
| Zoom | Adjusts lens zoom and restores the previous setting with one click. |
| Focus | Adjusts focus position and enables or disables autofocus. |
| Position | Tap the arrows to adjust pan and tilt direction. |
| Speed | Select the number button in the center of the Location area, then tap the screen or press ENTER to adjust pan/tilt speed. Supported pan/tilt speeds: 17/15/13/11/9/7/5/3/1 |
3.12.3 Saving and Loading a PTZ Preset
PTZ presets save the current camera position, zoom, and focus settings.
When loading a preset, the PTZ camera autimatically moves to the saved position.
Saving a PTZ Preset
- Adjust the camera to the desired position.
- Set the required zoom and focus parameters.
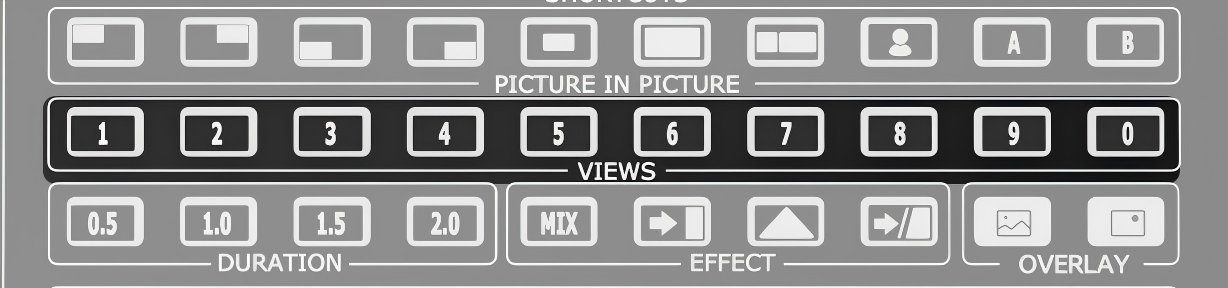
- Press and hold the corresponding scene button in the VIEWS section.
- Save the current PTZ preset as a View.
Or:
- Adjust camera parameters.
- Open the VIEWS page.
- Save the current PTZ preset as a View.
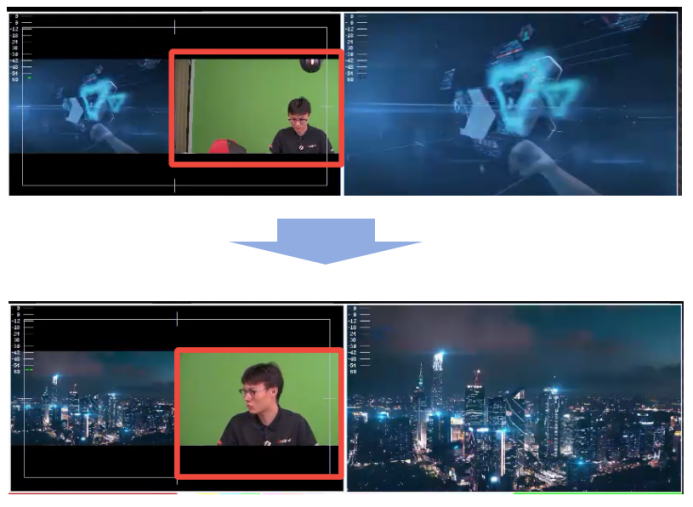
Loading a PTZ Preset
Press the corresponding saved VIEWS button to load the preset.
 | 👉 |  |
|---|