Online Manual
mini-extreme ISO User Manual

3.14 Settings
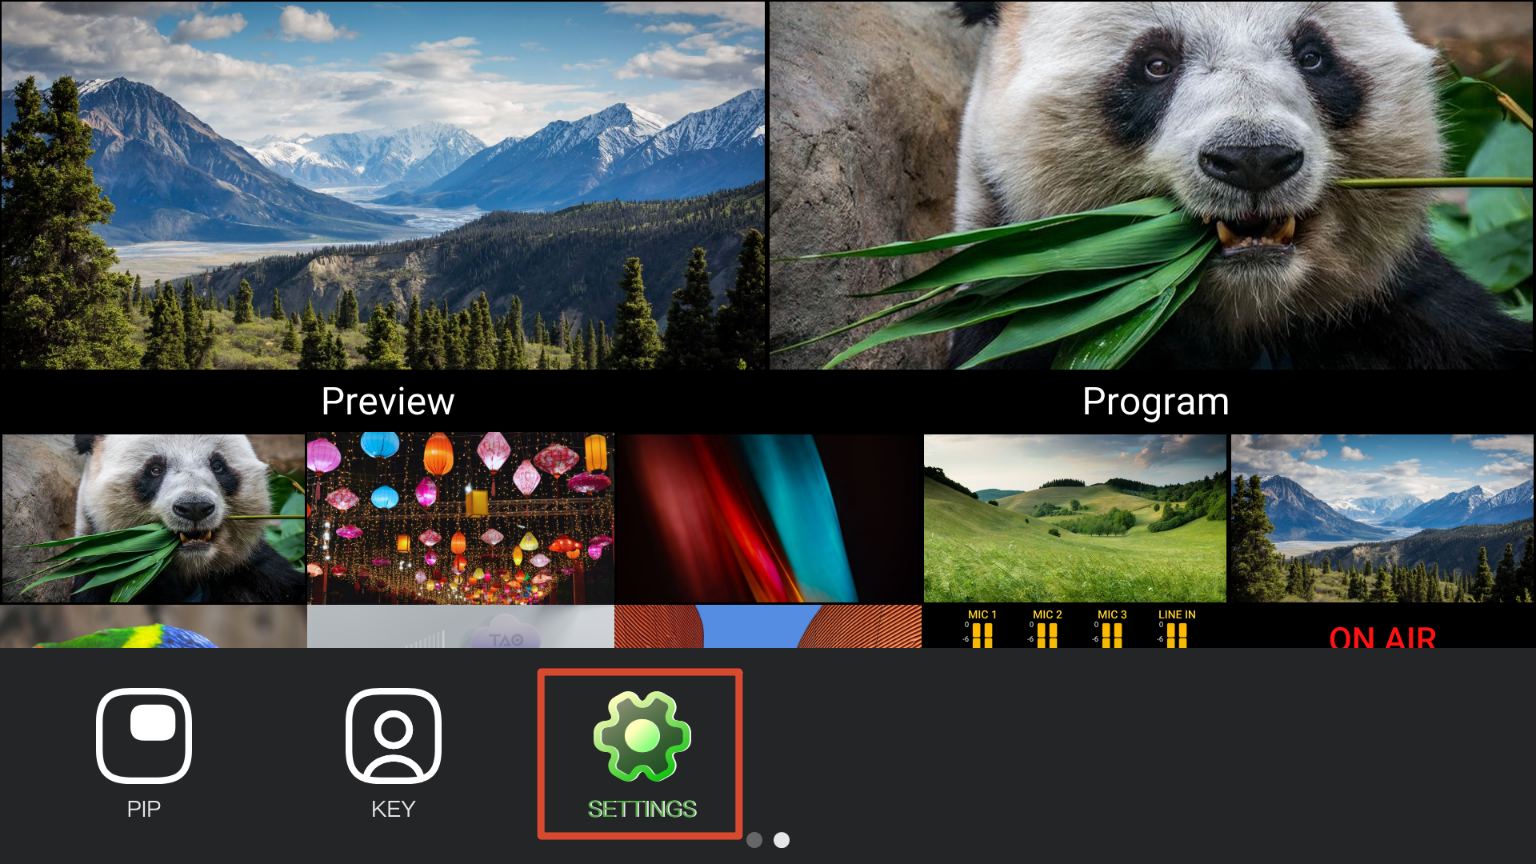
Navigate to MENU > SETTINGS.
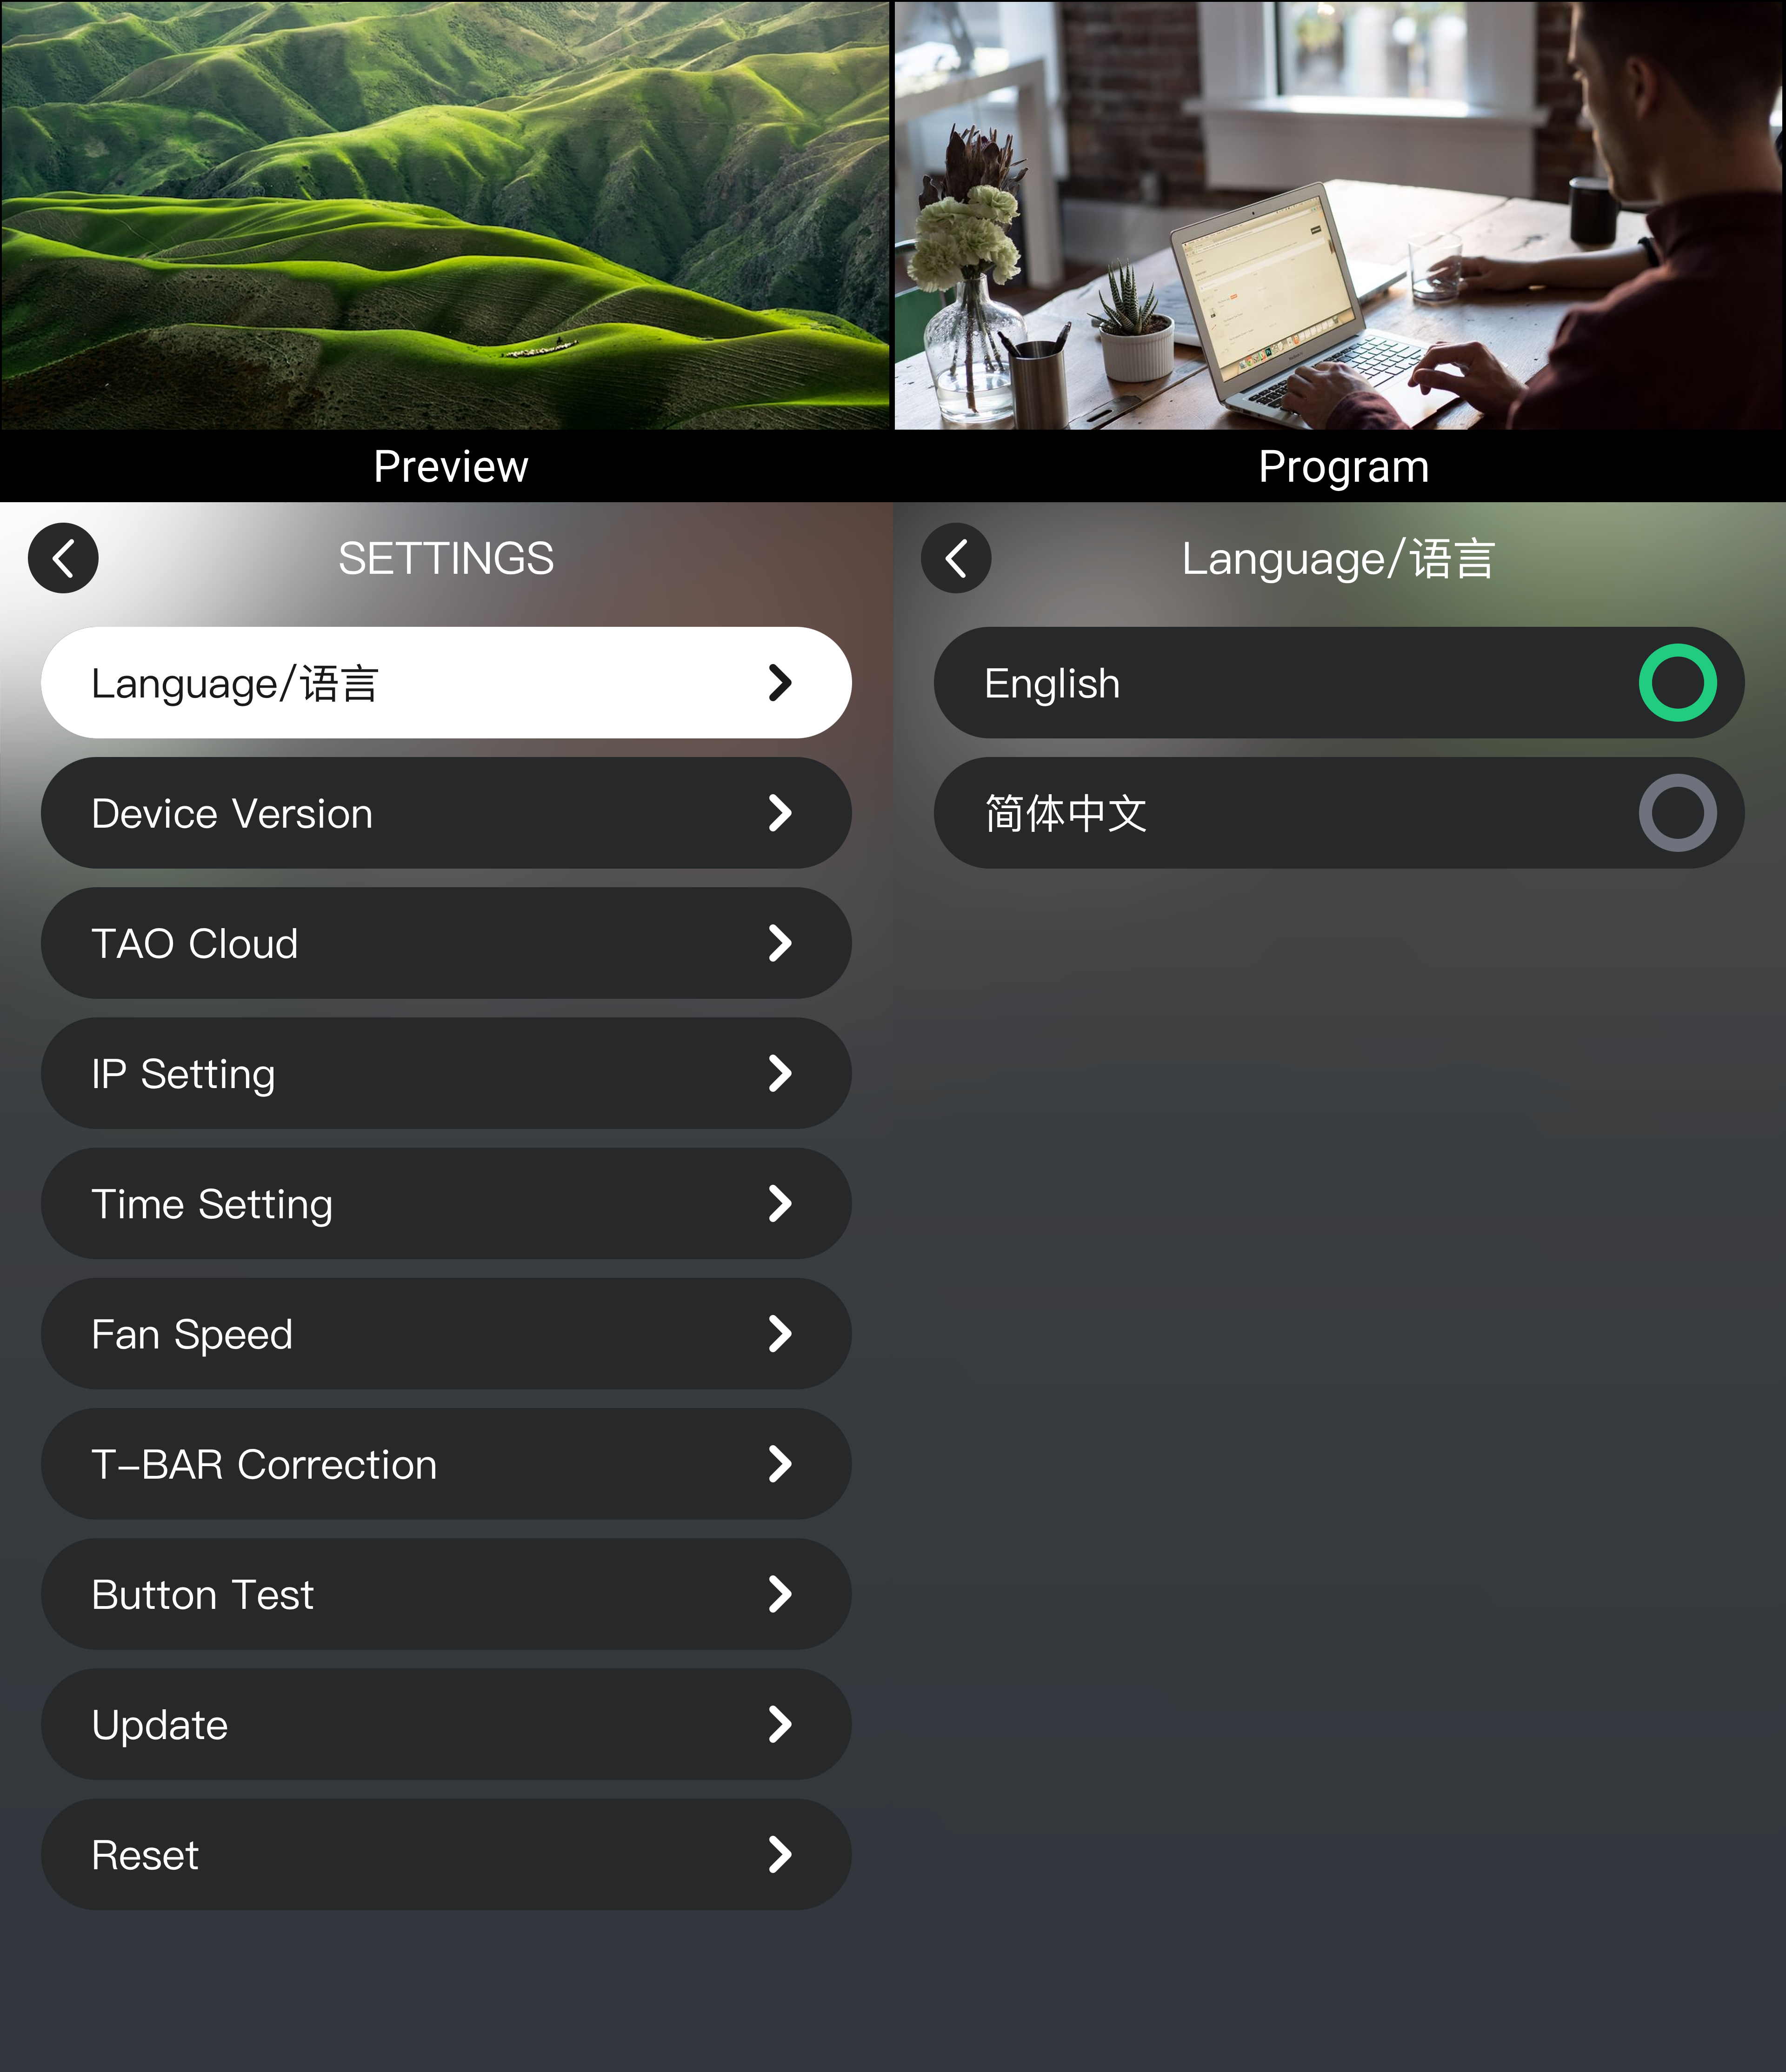
The Settings menu includes language selection, device information, TAO Cloud binding, IP settings, date and time settings, fan control, T-Bar calibration, key test, firmware upgrade, and factory reset.
 | 👉 |  |
|---|
3.14.1 Language/语言
Select the system language:
- English
- 简体中文
3.14.2 Device Version
View device information, including:
- Serial Number (SN)
- MAC Address
- VIDEO Version
- MCU Version
- APP Version
3.14.3 TAO Cloud
Ensure the device is connected to the network.
- If the device is not bound to TAO Cloud, the verification code is displayed.
- If the device is already bound, the screen displays the linked status and associated TAO Cloud account.
3.14.4 IP Setting
mini-extreme supports wired network connections.
Default IP address: 192.168.5.100
Using DHCP
- Connect mini-extreme to a router or network switch using an Ethernet cable.
- Enable DHCP. The device automatically obtains an IP address.
Using a Static IP Address
- Disable DHCP.
- Select the IP address field.
- Press ENTER, then rotate the knob left or right to modify the IP address.
- Save the settings.
📢  Notes

When using a static IP address, avoid IP conflicts with other devices on the network.
3.14.5 Time Setting
Automatic Time Synchronization
- Ensure the device is connected to the network.
- Enable Auto Set. The device synchronizes the time automatically.
Manual Time Configuration
- Disable Auto Set.
- Set the time zone, date, and time.
- Save the settings.
📢  Notes

Configure the system time manually when the device is not connected to a network.
3.14.6 Fan Speed
mini-extreme provides automatic and manual fan control modes.
Automatic Mode
Enable Auto.
The system adjusts fan speed automatically based on operating conditions.
Manual Mode
- Disable Auto.
- Click + or − to adjust fan speed.
- Adjustment range: 0–100
- Increment: 10
📢  Notes

Use Automatic Mode for optimal cooling performance and noise control.
3.14.7 T-Bar Correction
T-Bar Correction restores transition position accuracy. Run correction if transition positions are inaccurate or the T-Bar travel does not match the displayed transition progress.
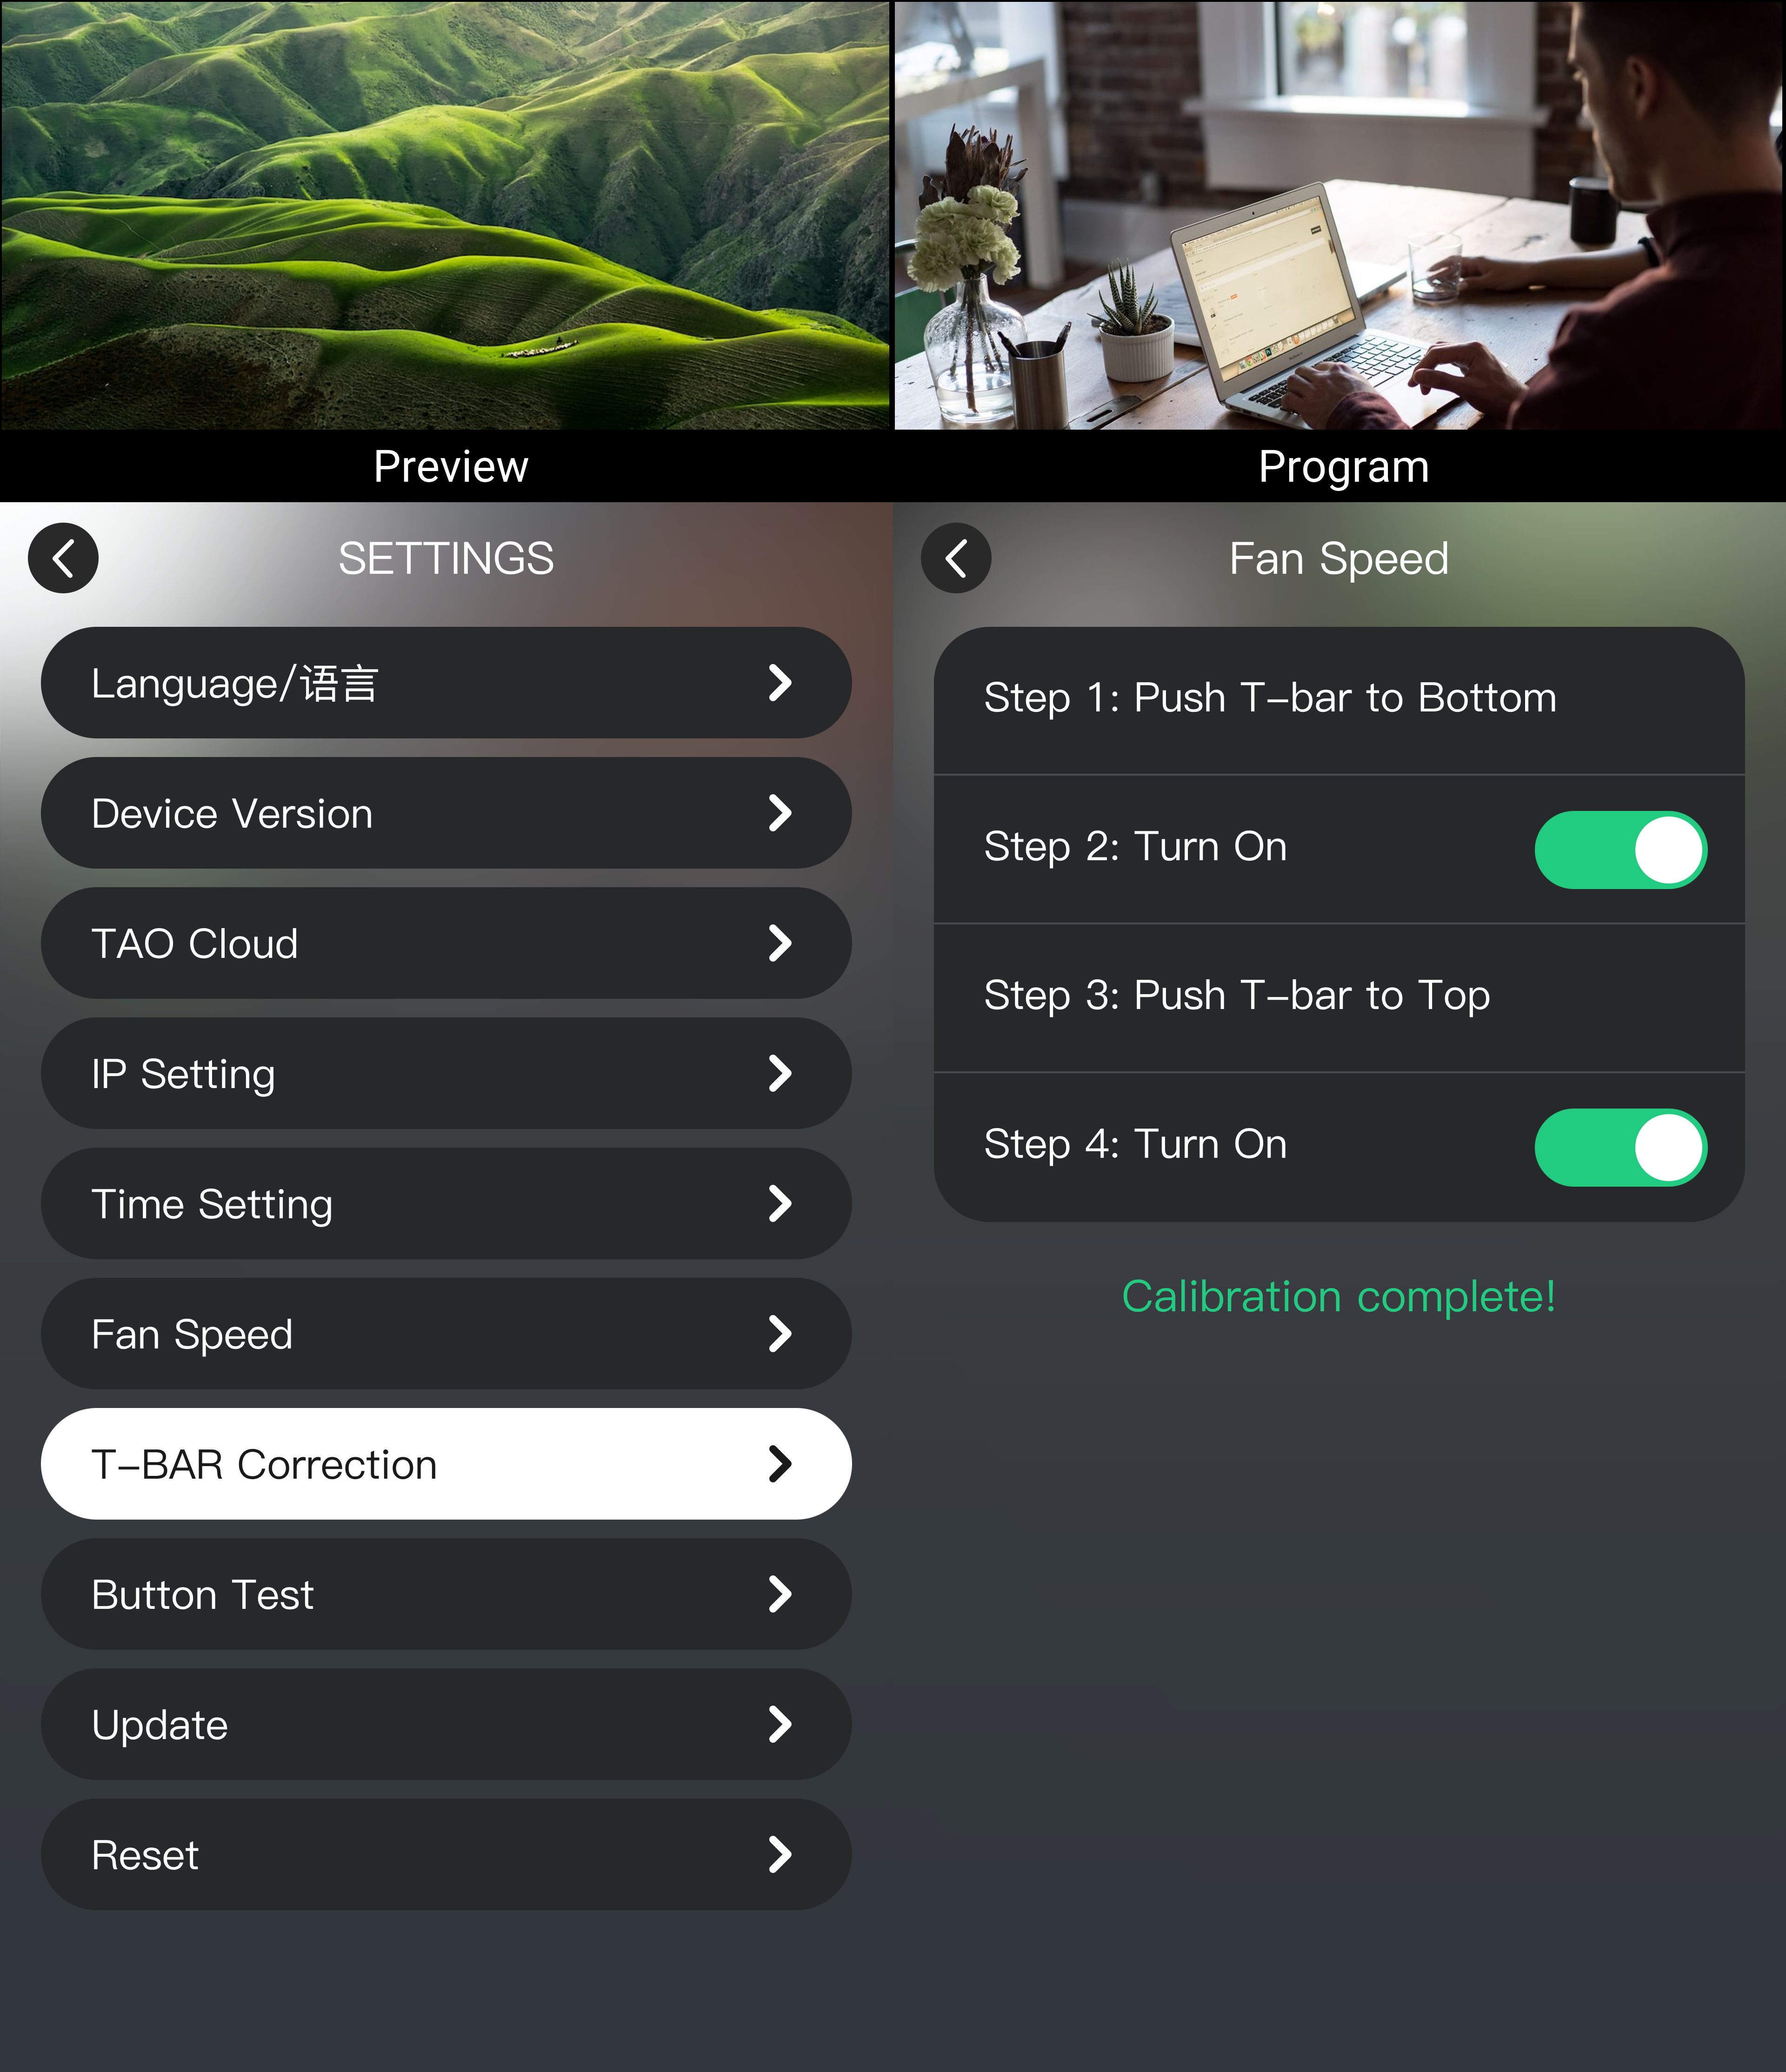
- Push T-Bar to bottom.
- Enable the switch for Step 2.
- Push T-Bar to top.
- Enable the switch for Step 4.
- Complete the correction.
3.14.8 Button Test
ButtonTest verifies front-panel button operation.
- Press any button.
- Check whether the button displayed on screen matches the button pressed.
If the displayed result is correct, the button operates normally.
3.14.9 Update
Check whether a firmware upgrade is available.
For upgrade instructions, see chapter 4. Upgrade for details.
3.14.10 Reset
🚨  Warning

Reset permanently deletes all user settings, views, and custom parameters. Deleted data cannot be recovered.
Reset restores all settings to factory defaults.
- Go to SETTINGS > Reset.
- Click Yes in the confirmation dialog.
- Wait for the reset process to complete.
📢  Notes

Restart the device after completing a factory reset.